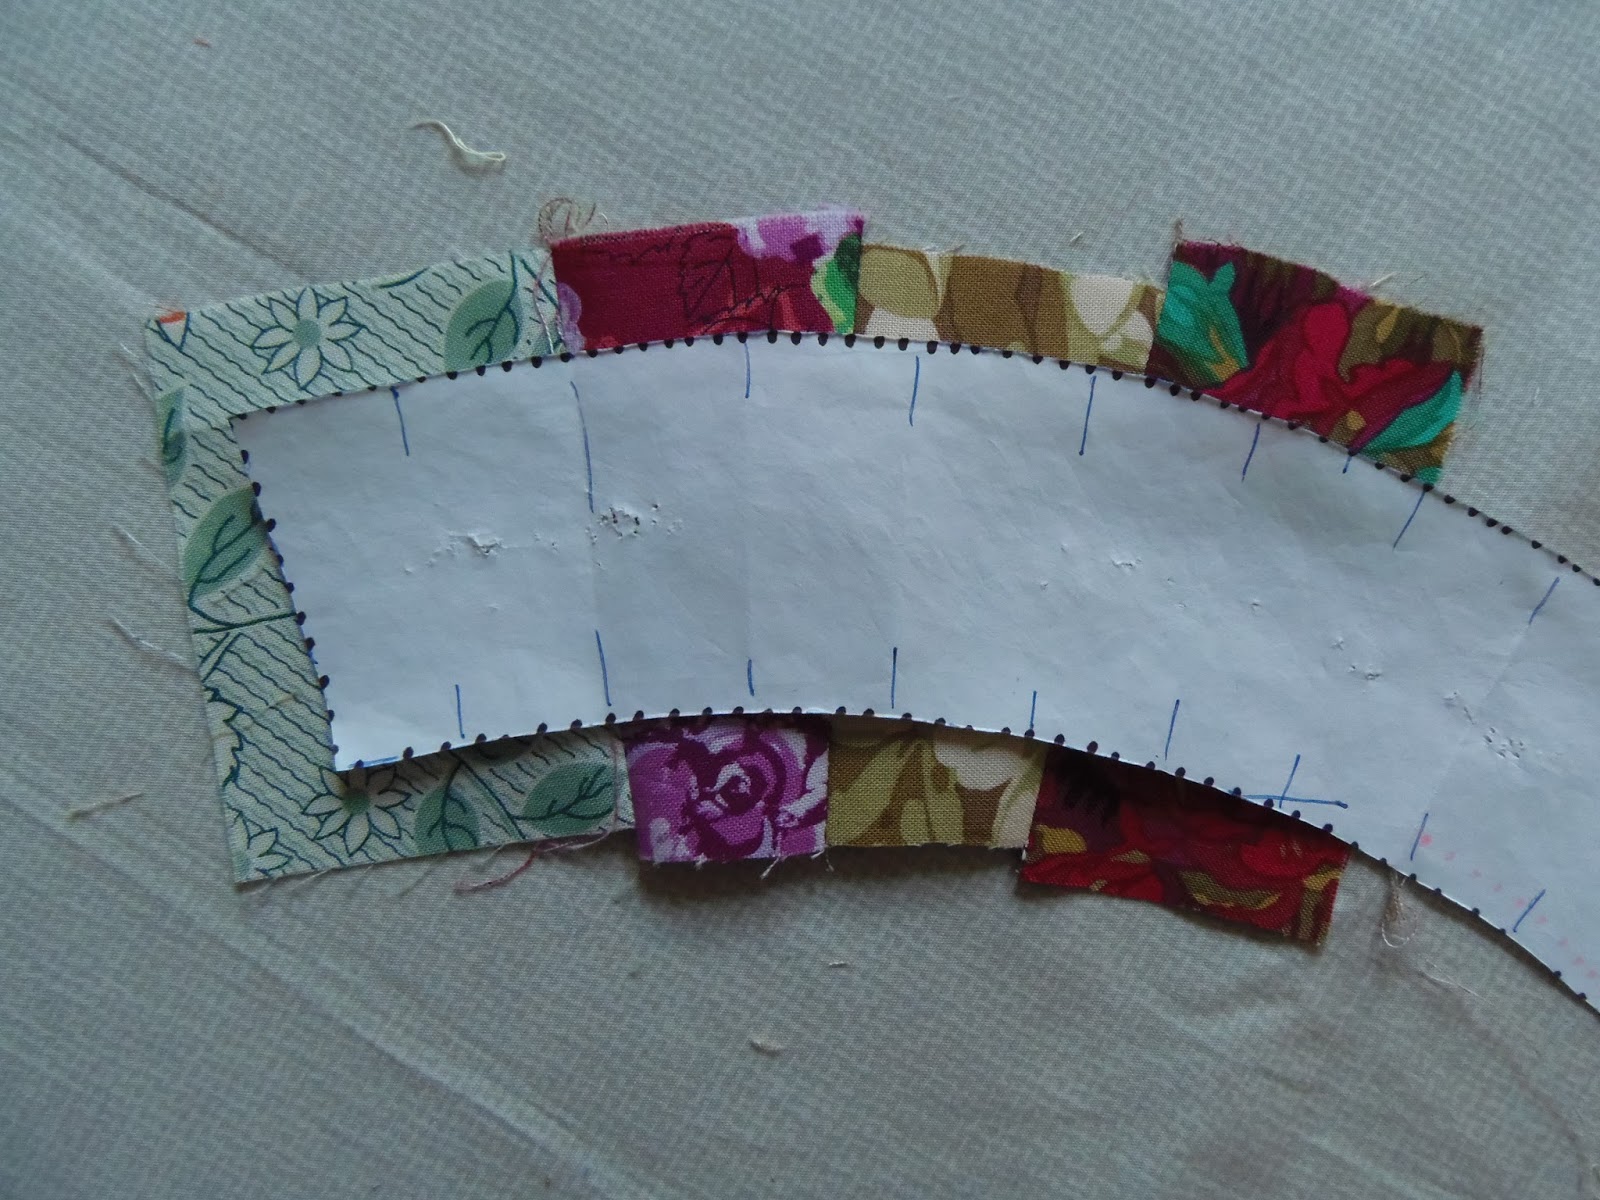
I selected two pieces of fabric for the first two wedges and stitched them together. I shortened my stitch length because the arcs will be trimmed afterwards and I didn't want seams coming undone. I finger pressed the seam allowances open.
The next step was to place my paper template on the two fabrics I joined and I lined up the registration marks on the seam. There was approximately 1/2" of fabric beyond the paper template.
I selected the next fabric and placed it on top of the paper template being sure to line up the edge with registration marks. I pressed down with my index finger at the top edge and my thumb on the bottom edge and with my other hand I carefully slid out the paper template. I pinned and sewed 1/4" away from the edge of the piece of fabric on top.
The excess fabric on the bottom was trimmed and the seam finger pressed open.Once again I place the paper template on the unit and then placed the next piece of fabric on top once again using the registration marks as a guide for fabric placement. I pinned, sewed and trimmed. Once the arc is pieced I give it a press with a little spray starch. As I told you yesterday I then trace around the paper template on the arc and trim away the excess fabric.
I like to make little tools to help with the job and one of the tools I made for this project was a cardboard template of a wedge with a 1/2" seam allowance. It worked well for cutting from strips of fabric or for cutting the first two wedges. For the most part however, I just cut pieces of fabric that were 3" (the height of the wedge) by whatever the width of the scrap was! In some instances I sewed two smaller scraps together (vertically or horizontally) to make a new piece of fabric that was large enough for a wedge!
So now I'll finish turning under and basting the seam allowance on the arcs so that they are ready to be appliqued to the background fabric with a zigzag stitch. I decided to use the light grey print for the background. I want to do lots of pretty quilting on this one and I think it will show up very nicely if a single fabric is used.
Tomorrow I'll show you how I'm going to place the arcs on the background fabric so that everything will match up when it comes time to sew the blocks together!
So what's blooming or about to bloom today?
Joe Pye Weed
Kniphofia
Salvia
Agastache
That's it for today! Until I post again, happy sewing!


what great ideas you have! I too, prefer the angled wedges. I have added this to my "do list" as you make it look very straightforward. A few years back I EPP'd some rings for a table runner and it was very time consuming and fiddly. I think it was appliquéing the rings down (slitting the backing and coaxing the shapes out) that drove me nearly mad! I guess my friends must have realised what a chore it was, because every time we see a wedding rings quilt they say "Oh look Kath, there's your nemsis!".
ReplyDeleteHi Kath - there's usually an easy solution to most sewing problems and it just takes a little thinking to figure it out! In this case I got nice wedges and I didn't have to slit the back to get rid of the paper. Something I really didn't want to do!
ReplyDeleteThank you for showing your good ideas. Pia
ReplyDeleteThank you for showing your good ideas. Pia
ReplyDelete