I'm back from my blogcation. I had a lovely two weeks off but didn't get nearly as much done as I had hoped. One of the things that I did get done was to write up a pattern for my hexagon mini quilt called Quilting Bees. The pattern is now available for sale in my Craftsy store Faeries and Fibres.
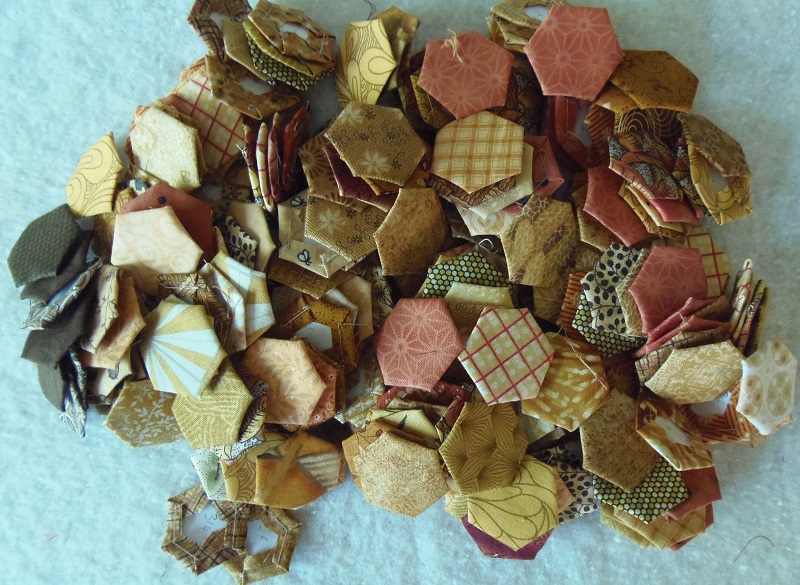
I did get some work done on my new quilt The Meadery. I had already cut strips of honey coloured fabric and from them I rapidly cut a big pile of hexagons.
I kept them in a bowl and in the evening I basted them.
In no time flat I had a really big pile of hexagons basted and ready to be stitched together.
And stitch them together I did! Here is the first of two strips that will frame my medallion.
The next strip will be longer and I'll stitch the two together to make a big "L". I'm not entirely happy with the grey background of the medallion fabric against the honeycomb and am mulling over some ideas for change.
It has been very hot and humid here the past several days. Jinx has been climbing a ladder to get on top of the arbor where he sprawls under the wisteria! Here's a picture of him on his back with his tail hanging between the slats of the roof. What a life!
Time for me to tidy my sewing room. It was on my "to do" list and it is still on my "to do" list. Maybe I should have a cuppa first...yes, I think that I should have a nice hot cuppa before I do anything else!
Until I post again, happy sewing!
Karen H
Showing posts with label quilting bees. Show all posts
Monday, August 17, 2015
Thursday, January 30, 2014
Secret Tote Bag Swap and a honey of a quilt
It is sign-up time for round 3 of Lia's Handmades Secret Tote Bag Swap. If you've never participated you are missing out on a lot of fun!
For this round the theme is geometry. Sign-up is open until January 31st. The way it works is that you fill out an online form which includes your likes and dislikes, you create and post a mosaic of the things you like including bag styles and then you submit your form. You'll be assigned a partner for whom you will make a tote bag based upon her likes and dislikes and someone else will have your name. You can put little treats in with your bag. I've participated in the previous swaps and have lovely bags that I use all the time. And there were plenty of little treats such as fabric, rulers, chocolate and handmade little gifts. For a complete list of the rules and the sign up form go here.
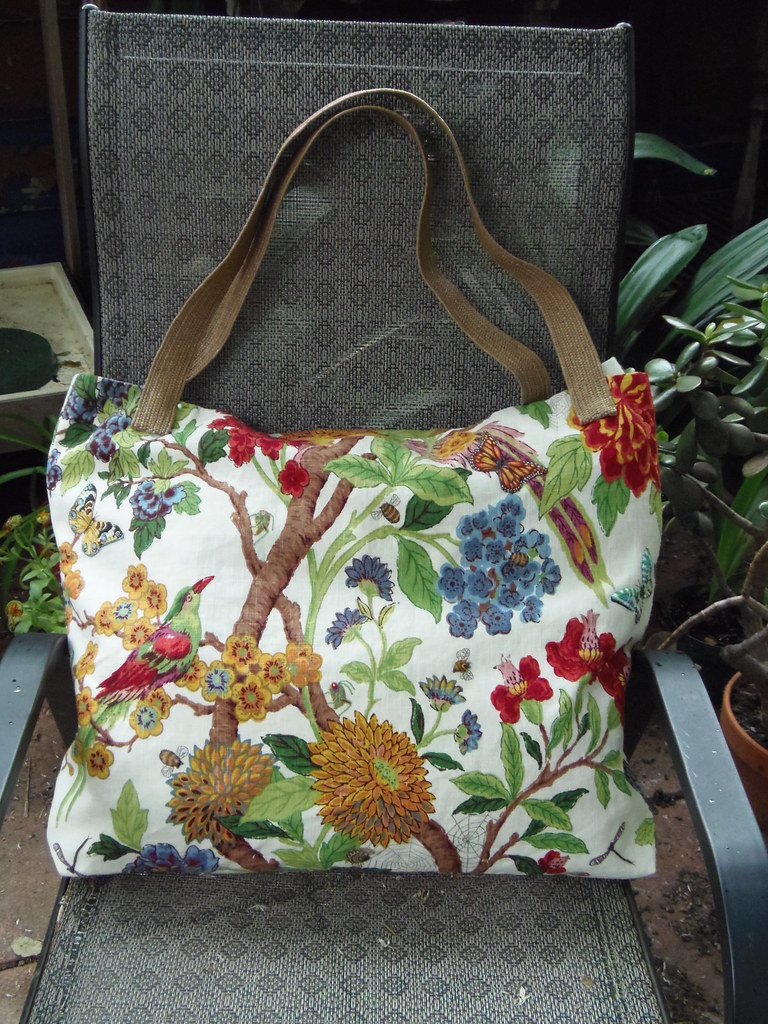
This is the first swap bag I made. It was a lovely linen like print and I embellished it with dragonflies, butterflies, bees and spiders!
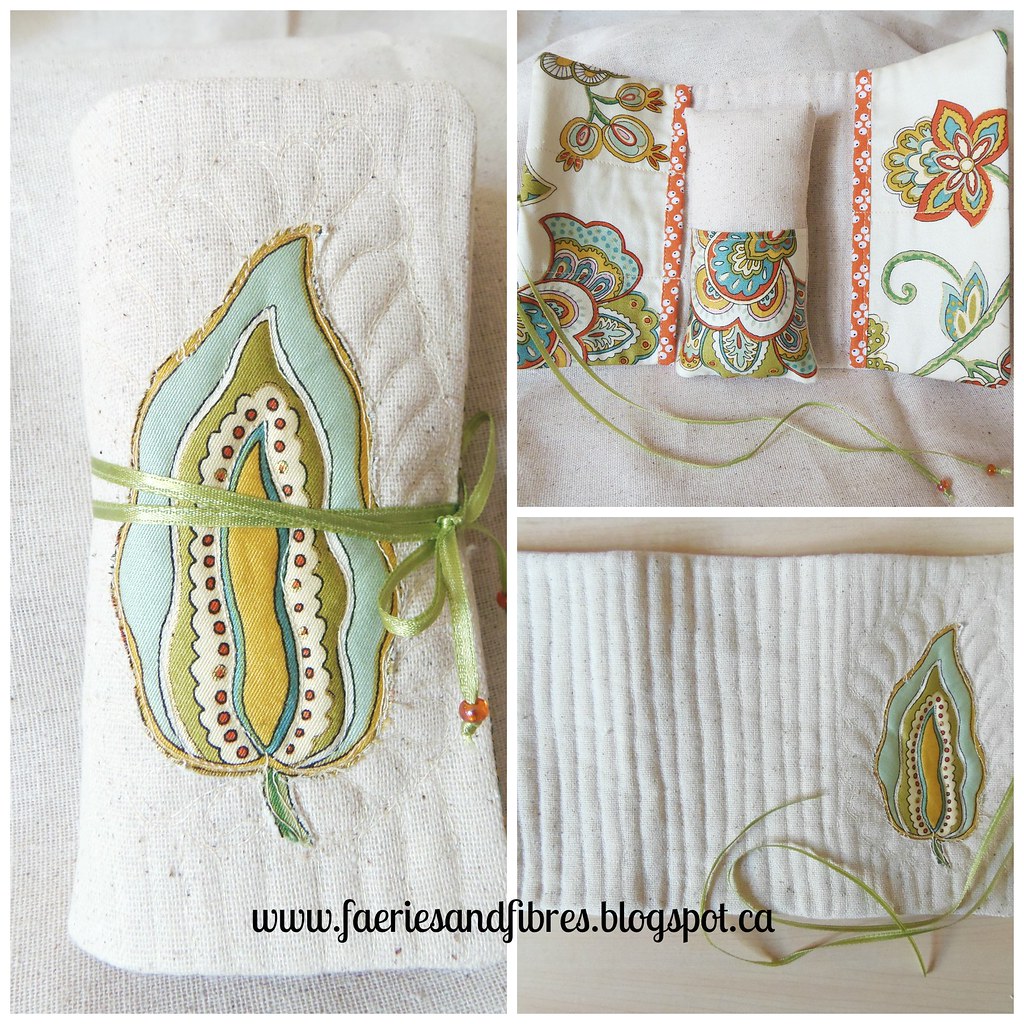
This is a little roll up sewing kit with a matching pincushion that I made to go along with the tote bag I made in Round 2. The paisley print I used was the leftover lining from the tote bag!
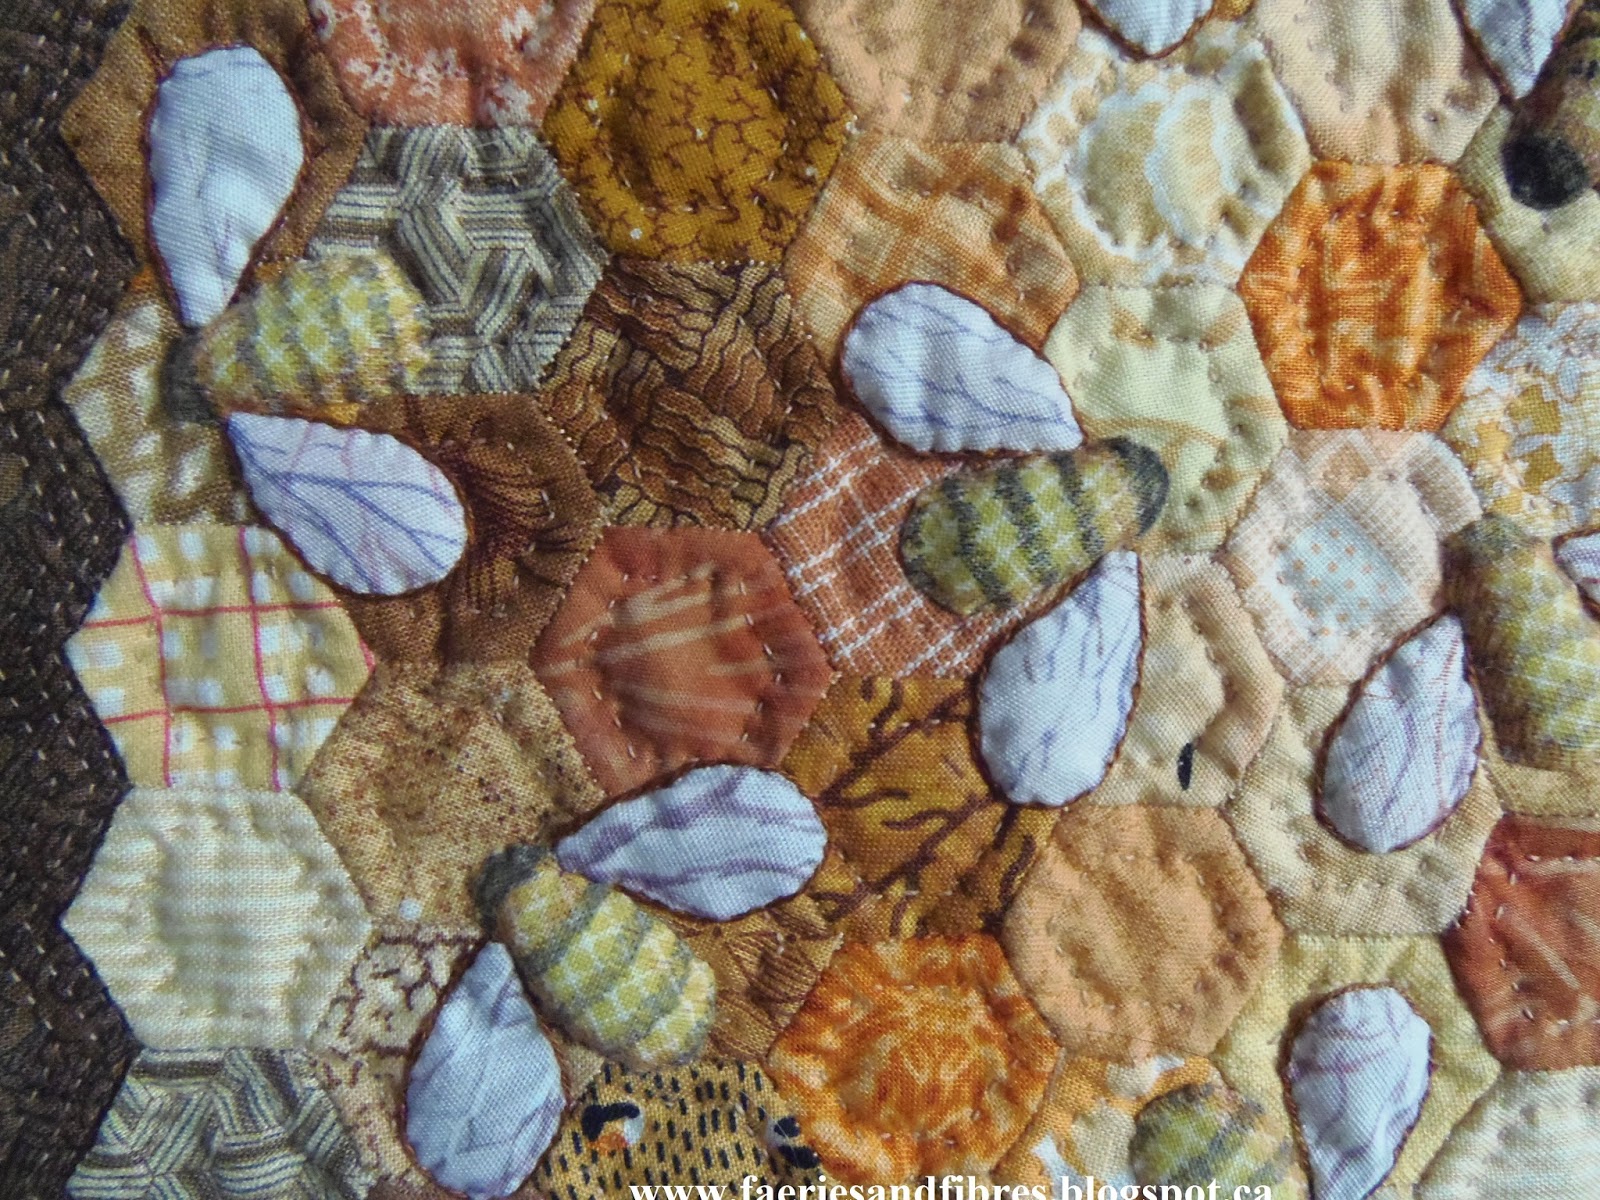
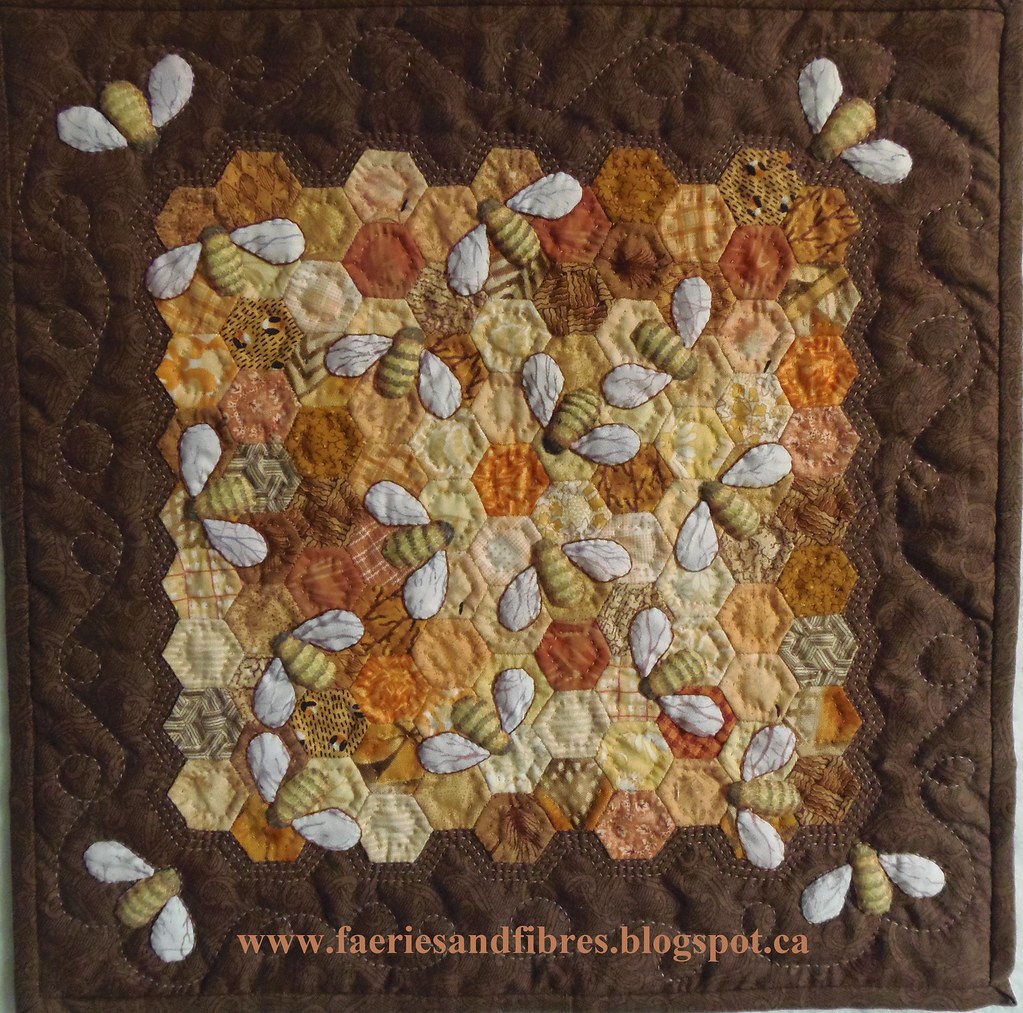
Lately I've received a number of inquiries about this little quilt and how I made it. I made it for my Mom and I called it Quilting Bees!
I used 1/2" hexagons which you can find here. I basted my hexagon papers to various honey colour scraps of fabric and stitched them together. Once it was pieced I gave it a spritz of starch and a good press with a hot, dry iron. The basting threads and papers were removed. I cut a piece of brown fabric and appliqued the honeycomb to the background. I trimmed away the excess brown fabric underneath the honeycomb.
Bees were appliqued to the honeycomb. To start I mad a template for a wing. I cut one wing out and then reversed the template for the wing on the other side. I stitched the wings down. I drew the bodies on a yellow on yellow print fabric and used my Sakura pigma pens to mark the bodies with a dark head and stripes. I made sure that the pattern on the bodies went right into the seam allowances. Once they had been inked I cut them out and appliqued them to the quilt top. I poked a little stuffing into their bodies just before I finished appliqueing them down so that they were dimensional. The method I used was very similar to that I described in my tutorial on making bees - it was a honey of a demo!
The fabric I used for the bees wings was very light so I used an outline stitch and some brown DMC floss to outline each wing so that it wouldn't blend into the honeycomb background.
The last step was to make a quilt sandwich, quilt and bind the quilt. It was surprisingly easy and loads of fun!
Friday morning Part 3 of my Soupcon Quilt Along will be published. So let's have a look at the blocks that were published on the Soupcon FLICKR Group since our last trunk show. Next time the pictures are posted they are going to look different!
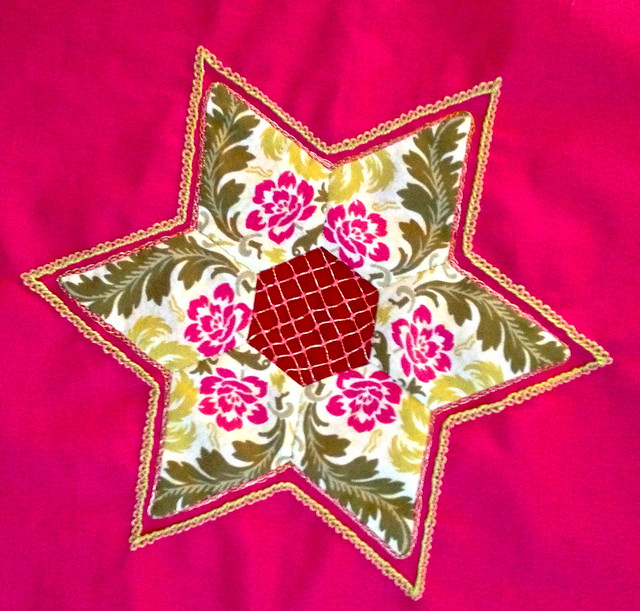
Jean continues to produce wonderful blocks such as this one. She used DMC metallic thread for the laid work in the center and green perle #5 cotton for the outer Pekinese stitch. She wrote that the "backstitch which is the basis for te Pekinese stitch and the couching stitches on the laid work are perle #5 cotton in pink. I found it helpful to use a blunt tapestry needle for the Pekinese stitch". Thanks for that great tip Jean!
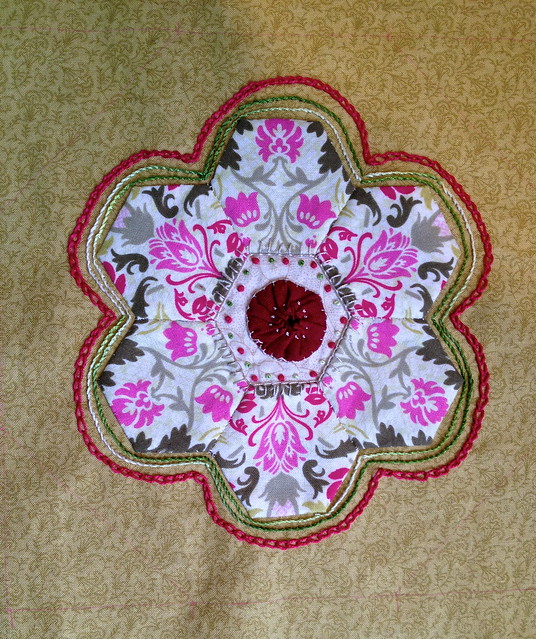
And this is Jean's eighth and final block. About this one Jean wrote that she worked the "yoyo in the centre with #12 perle cotton blanket stitch. French knots aroung it are #8 perle cotton rose pink and two strands DMC variegated green. Outer scallops are chain stitch #8 perle cotton rose pin, two inner rows of stem stitch in two strands DMC variegated green". I think the chain stitch almost looks as though cord has been couched around the outside of the block. Very effective!
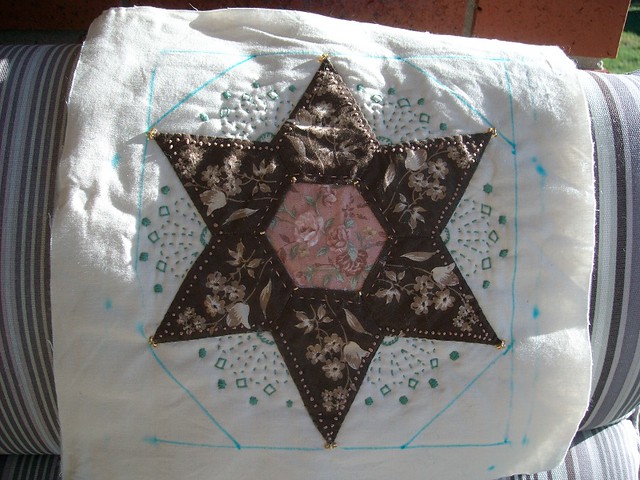
Cee-Emm posted this pretty block. She wrote "I quilted the design onto this block, hoping the next stages don't cause me to gnash my teeth because I did". It might be a bit of a challenge but it will be an opportunity to get creative! It is a very pretty block so I hope we can find a work around!
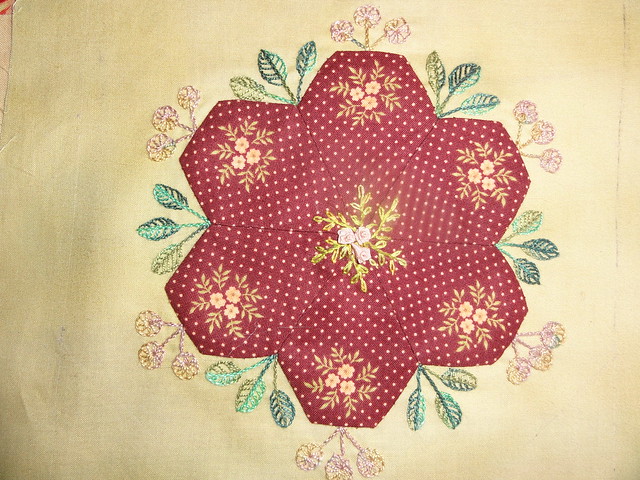
Brigitte68 posted her block. Check out the beautifully embroidered roses in the center. One of the comments was "that center is out of this world wonderful and the embroidery is so well executed... beautiful and clever". Isn't it just!
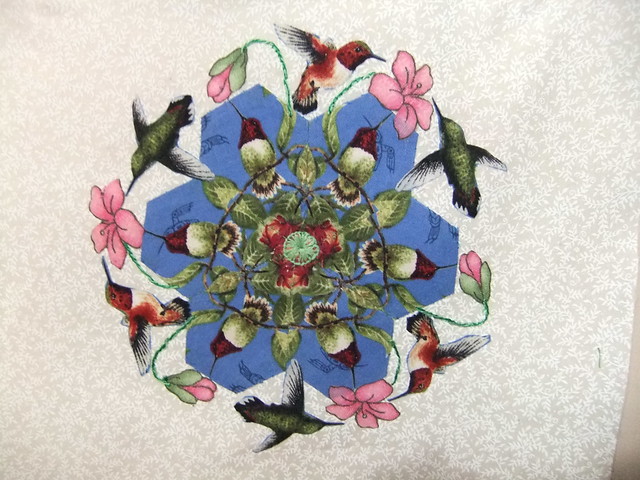
Grace has embellished one of her blocks and it is wonderful! It will be a birthday gift for her sister. Lucky sister! Grace fused the hummingbirds and flowers. She asked if they need to be stitched down and I suggested that if it is to be a wall hanging it won't be washed or used so it should be fine but that she could always secure the edges with monofilament when she quilts the piece.
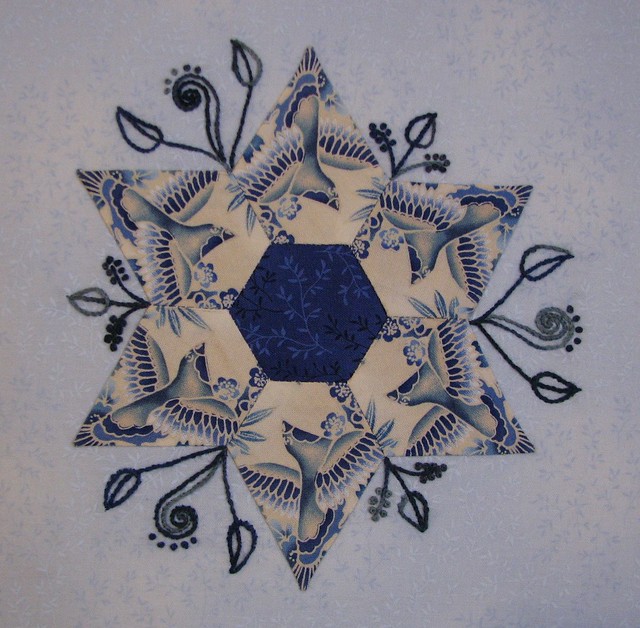
A Passion for Applique's block reminds me of the china pattern "willow". I really like the curlicues with French knots and also the little sprigs of French knots. Very whimsical!
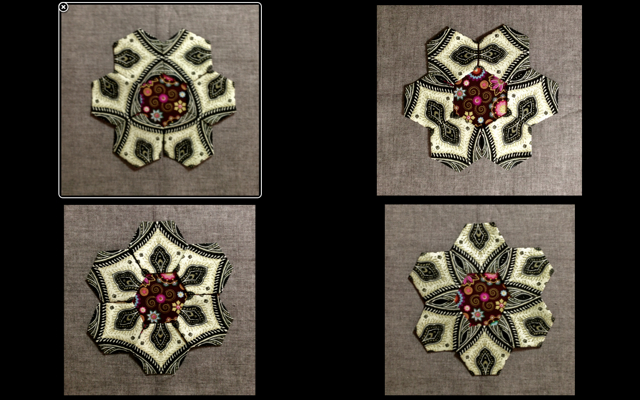
Nellie continues to make blocks from her fabric. Here she has arranged the six patches in four different layouts and is asking which one? I have no idea how she will pick one because they are all wonderful!
This one is Nellie-knot-a-palooza! It is heavily embellished with colonial knots and buttonhole stitch. Totally gorgeous!
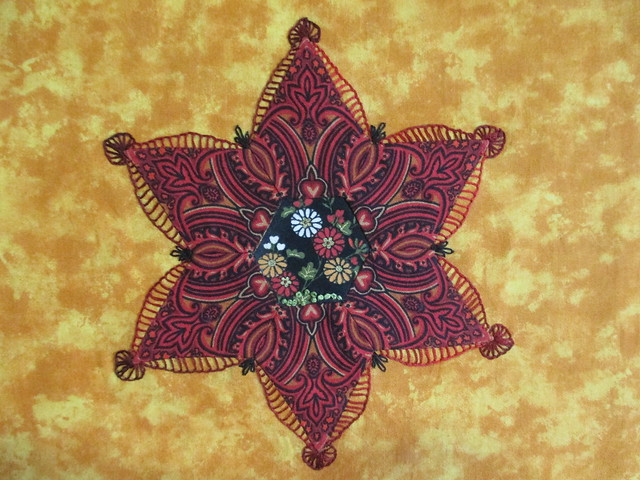
Nellie outlined this block to create a lacy pattern around the outside edges. I love how the hard lines of the block are modified and softened by the embroidery. Be sure to visit Nellie's blog post on January 29, 2014 to see where she is going with all of her lovely blocks!
And the last block comes from Clare! I love the buttonhole border and the little trilobal details at the inner corners. The buttonhole stitch is so lacy and it is wonderful the way the background fabric shows through the stitches. Another pretty block taken to the next level! Beauty!
So that's what's been posted on the Soupcon FLICKR Group. If you would like to have a closer look at all of the details in these wonderful blocks head on over for a look! I expect to see some even more spectacular results after Part 3 is posted!
Until I post again, happy sewing!
For this round the theme is geometry. Sign-up is open until January 31st. The way it works is that you fill out an online form which includes your likes and dislikes, you create and post a mosaic of the things you like including bag styles and then you submit your form. You'll be assigned a partner for whom you will make a tote bag based upon her likes and dislikes and someone else will have your name. You can put little treats in with your bag. I've participated in the previous swaps and have lovely bags that I use all the time. And there were plenty of little treats such as fabric, rulers, chocolate and handmade little gifts. For a complete list of the rules and the sign up form go here.
This is the first swap bag I made. It was a lovely linen like print and I embellished it with dragonflies, butterflies, bees and spiders!
Quilting Bees, 12 1/2" square
I used 1/2" hexagons which you can find here. I basted my hexagon papers to various honey colour scraps of fabric and stitched them together. Once it was pieced I gave it a spritz of starch and a good press with a hot, dry iron. The basting threads and papers were removed. I cut a piece of brown fabric and appliqued the honeycomb to the background. I trimmed away the excess brown fabric underneath the honeycomb.
Bees were appliqued to the honeycomb. To start I mad a template for a wing. I cut one wing out and then reversed the template for the wing on the other side. I stitched the wings down. I drew the bodies on a yellow on yellow print fabric and used my Sakura pigma pens to mark the bodies with a dark head and stripes. I made sure that the pattern on the bodies went right into the seam allowances. Once they had been inked I cut them out and appliqued them to the quilt top. I poked a little stuffing into their bodies just before I finished appliqueing them down so that they were dimensional. The method I used was very similar to that I described in my tutorial on making bees - it was a honey of a demo!
The fabric I used for the bees wings was very light so I used an outline stitch and some brown DMC floss to outline each wing so that it wouldn't blend into the honeycomb background.
The last step was to make a quilt sandwich, quilt and bind the quilt. It was surprisingly easy and loads of fun!
Friday morning Part 3 of my Soupcon Quilt Along will be published. So let's have a look at the blocks that were published on the Soupcon FLICKR Group since our last trunk show. Next time the pictures are posted they are going to look different!
Jean continues to produce wonderful blocks such as this one. She used DMC metallic thread for the laid work in the center and green perle #5 cotton for the outer Pekinese stitch. She wrote that the "backstitch which is the basis for te Pekinese stitch and the couching stitches on the laid work are perle #5 cotton in pink. I found it helpful to use a blunt tapestry needle for the Pekinese stitch". Thanks for that great tip Jean!
And this is Jean's eighth and final block. About this one Jean wrote that she worked the "yoyo in the centre with #12 perle cotton blanket stitch. French knots aroung it are #8 perle cotton rose pink and two strands DMC variegated green. Outer scallops are chain stitch #8 perle cotton rose pin, two inner rows of stem stitch in two strands DMC variegated green". I think the chain stitch almost looks as though cord has been couched around the outside of the block. Very effective!
Cee-Emm posted this pretty block. She wrote "I quilted the design onto this block, hoping the next stages don't cause me to gnash my teeth because I did". It might be a bit of a challenge but it will be an opportunity to get creative! It is a very pretty block so I hope we can find a work around!
Brigitte68 posted her block. Check out the beautifully embroidered roses in the center. One of the comments was "that center is out of this world wonderful and the embroidery is so well executed... beautiful and clever". Isn't it just!
Grace has embellished one of her blocks and it is wonderful! It will be a birthday gift for her sister. Lucky sister! Grace fused the hummingbirds and flowers. She asked if they need to be stitched down and I suggested that if it is to be a wall hanging it won't be washed or used so it should be fine but that she could always secure the edges with monofilament when she quilts the piece.
A Passion for Applique's block reminds me of the china pattern "willow". I really like the curlicues with French knots and also the little sprigs of French knots. Very whimsical!
Nellie continues to make blocks from her fabric. Here she has arranged the six patches in four different layouts and is asking which one? I have no idea how she will pick one because they are all wonderful!
This one is Nellie-knot-a-palooza! It is heavily embellished with colonial knots and buttonhole stitch. Totally gorgeous!
Nellie outlined this block to create a lacy pattern around the outside edges. I love how the hard lines of the block are modified and softened by the embroidery. Be sure to visit Nellie's blog post on January 29, 2014 to see where she is going with all of her lovely blocks!
And the last block comes from Clare! I love the buttonhole border and the little trilobal details at the inner corners. The buttonhole stitch is so lacy and it is wonderful the way the background fabric shows through the stitches. Another pretty block taken to the next level! Beauty!
So that's what's been posted on the Soupcon FLICKR Group. If you would like to have a closer look at all of the details in these wonderful blocks head on over for a look! I expect to see some even more spectacular results after Part 3 is posted!
Until I post again, happy sewing!
Wednesday, June 12, 2013
Hexagon Ideas!
A number of you have commented that you like hexagons but
don’t know what to do with them! You can of course sew them together into a
quilt made entirely of hexagons but there are other options.
So use your imagination and see what you can come up with!
I leave you with some pictures of the peonies in the garden. I've been watching them for the past couple of weeks, just waiting for the buds to burst open and it finally happened yesterday afternoon! Aren't they glorious?
And then I noticed someone hiding in the petals! Can you see him?
I waited only a few seconds before he crawled out and I was able to take this picture! For those of you who don't like spiders I apologize but they are an important part of the ecosystem and they really are quite amazing! They are an optometrist's dream because they have eight eyes! I am really pleased with this picture of a jumping spider!
Until I post again, happy sewing!
My friend Barbara had a pile of hexagons in the flower motif
(six hexagons surrounding a centre hexagon). She had planned on joining them
with a white path but was losing interest. She also had a good pile of the flower
motifs without the white path and a handful of diamond hexagons that were given
to her by my Mom. The diamond hexagons were a slightly smaller size so joining
them to the flowers hexagons was not an option. And she was adamant that she
was simply NOT going to make any more hexagons. Barbara was suffering from hexagon
fatigue and needed a solution. We did a little brainstorming and this was our
solution.
What the Hexagon, by Barbara C 2011
Barbara appliqued the large flowers with a white path to a
10.5" square of neutral background fabric so that she had a square block with which to work.
The diamonds were appliqued over the intersections where the blocks joined and the
remaining flower hexagons which had no path (white border) were appliqued to
the border. All of the applique work was done on her domestic sewing machine with
monofilament on top and light weight thread in the bobbin. A fast and easy
solution to a problem! And a lovely hexagon quilt. Don't you just love the name she came up with?
I had a stack of small yellow and orange hexagons that were
to be flower centres but I decided to do something different so what to do with
all these hexagons? At one time hexagon quits were called honeycomb quilts and
thinking of that gave me the answer! A honeycomb! I sewed the hexagons together
and then appliqued the piece to a brown background. Bees were appliqued on the
quilt top and voila I give you “Quilting Bees”! It measures about 12" square.
Quilting Bees by Karen H
If I were to do this quilt again I think I would make the honeycomb shape irregular.
These bees have appliqued wings but if you read my tutorial
(it is posted under Tutorials and Tips tab) on making bees there are other faster ways to make them. I think a handful of
hexagons and a couple of appliqued bees would make a lovely card! Or a small grouping could be appliqued to the back of a quilt for a little special surprise!
This is another quilt I am working on. The centre is made of
hexagons and diamonds which are hand appliqued to the background. I marked out
a grid with thread and used my Roxanne Glue Baste-It to hold the alternating
hexagons and diamonds in place before hand appliqueing them in place. I opted
for hand applique so that the project would be portable.
And yet another quilt in the works (albeit it hasn't been touched for a very long time - I must add it to my to finish list!) In this quilt the flower motifs are appliqued to a border.
My Mom made a basket out of hexagons and filled it with hexagon flower motifs. The entire unit was then appliqued to a background and butterflies were applied using broderie perse.
If you have loose hexagons why not applique them as a swag in a border?
So use your imagination and see what you can come up with!
I leave you with some pictures of the peonies in the garden. I've been watching them for the past couple of weeks, just waiting for the buds to burst open and it finally happened yesterday afternoon! Aren't they glorious?
I waited only a few seconds before he crawled out and I was able to take this picture! For those of you who don't like spiders I apologize but they are an important part of the ecosystem and they really are quite amazing! They are an optometrist's dream because they have eight eyes! I am really pleased with this picture of a jumping spider!
Until I post again, happy sewing!
Subscribe to:
Posts (Atom)