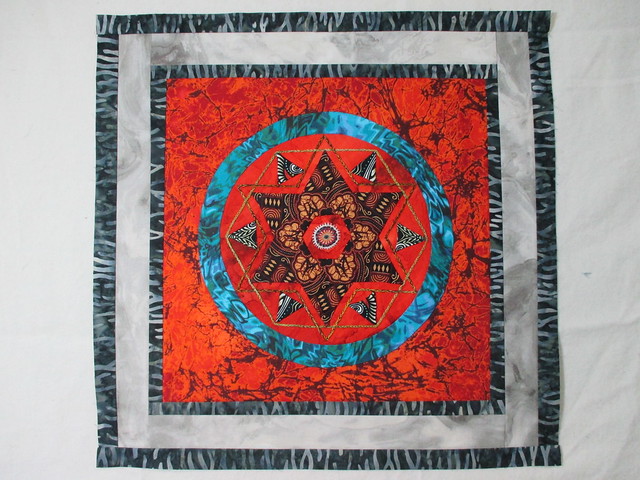
In my view the path serves two purposes - it separates the hexagons so that they can shine and secondly it keeps the quilt square. If the hexagons are the same size (i.e. they have the same number of rounds) and butted one up to the next a gentle slope develops. This was the case with my quilt Ausiegons which is my version of an antique quilt in an Australian quilt registry. There is no path in this quilt.

If you look closely at the left hand side you can see this slope. I dealt with it by adding filler bits which straightened it enough that I could applique the entire quilt to border strips so that the quilt would be square. If you are a beginner this might be a little challenging so the use of a path is highly recommended.

If you decide to add a path to a hexagon quilt it will act exactly the same way as a sashing on a quilt made of square blocks. This means you have only one path between two hexagons. You do not sew the path around each hexagon because you will end up with a slope when the blocks are stitched together.
If you add a path you will need lots of hexagons made from the same fabric. I don't mind cutting fabric for the hexagons that will form the block because it is part of the creative process but I don't like to spend a lot of time cutting a single fabric for the hexagon path. I want that part done quickly so I can get to the really fun part, the basting and sewing. In this post I'm going to show you how I cut and prepare my path hexies quickly and painlessly!
To get started I cut strips of fabric and I want to cut strips in the most economical manner so that there is little waste and if there are any leftover strips they will be of a usable size. I am working with 1" hexagons so I determined that I would need 2 1/2" strips. I cut my strips from my fabric using the method I described on February 2, 2014.
I line up the selvage edges of two strips so that I'll be cutting through four layers. I trim off the selvages and then cut 2 1/4" sections.

I take a stack of four patches and set a paper hexagon on top.

I use my scissors to trim off the corners being sure to leave at least 1/4" seam allowance. It doesn't need to be an exact 1/4" all around (more is better) because when basted to the paper the finished hexagon will be the exact size needed.

Paper can be slippery so after the first cut I often make a fabric template which will stick to my fabric. I use it as a pattern to trim the corners.


In no time flat I had a pile of fabric hexagons.

I use a tiny dab of fabric-safe glue to hold the papers to the hexagons and again I want it done fast! To start I lay out a bunch of hexagons with the wrong side facing up.

A little dab of glue on the paper is all it takes to hold the paper to the fabric. And when I'm done it will release easily! In the past I've been asked about the little marks you see on the hexagons; I use a master template and I mark the size on the master sheet so the marks you see are the size of the hexagons which is 1". I always make sure that I place the glue on the blank side of the hexagon.

To speed up the gluing process I apply a dab of glue to a paper hexagon, pick it up and then I apply the glue to a second hexagon but I leave it stuck to the glue stick. I place the first hexagon on the fabric and then grab the second and place it on the hexagon. The glue sets fairly quickly since I'm only using a little bit so I work quickly.

In less than thirty minutes I had a pile of almost 200 hexagons ready for basting!

And now for something entirely different. I'm still a lucky girl. Look what I got in the mail: the threads that I won from Lorraine at Colour Complements! These threads are simply gorgeous! The colours are rich and vibrant and they have a glorious sheen. You can get your own from her etsy shop. All four threads are hand dyed and the package included knitted tubular ribbon, #8 DMC perle cotton, twisted rayon and #5 DMC perle cotton.

Now that I have a pile of hexagons ready to baste I had better get cracking! So until I post again, happy sewing!
Karen H