Showing posts with label Good Golly Miss Mollie. Show all posts

Sunday, September 7, 2014

Good Golly Miss Mollie and a reader's Value Proposition quilt so far

It is quilted... Good Golly Miss Mollie is quilted and bound. All it needs is a hanging sleeve and it is ready to hang at the quilt show in two weeks! The quilt is densely quilted for two reasons. First I like the look and feel of dense quilting and the second reason is that I just can't stop myself once I get started. I used a fine weight polyester thread so the quilt is very soft and foldable even though it is heavily quilted.


I need to get a picture of it hung outside so you can see the whole thing. For now I'll just share some pictures of the blocks.


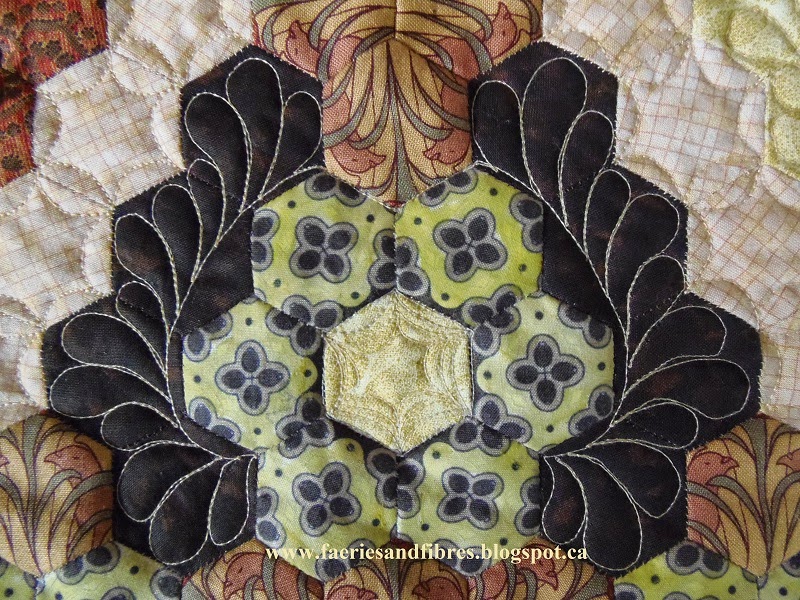
On September 4 I showed you a little leaf motif that I like to quilt. Here I've used in in round of hexagons made with the taupe & orange fabric.


To quilt the leaf motif  I quilted the outer most shape of the leaf first using the hexagon as my guide for the shape. When it was quilted I bounced back the way I just came from and echoed the leaf shape. Then I bounced back and quilted the outer teardrop and finally I bounced back to quilt the inner teardrop. When I bounce I try to stop a stitch or two (or three) from the corner/edge to avoid a heavy thread build-up. I stitch along the edge of the hexagon until I get to the point where I want to stitch the next leaf. Fast and easy!


If you will be in the Toronto area in two weeks you can see my quilt at this show.


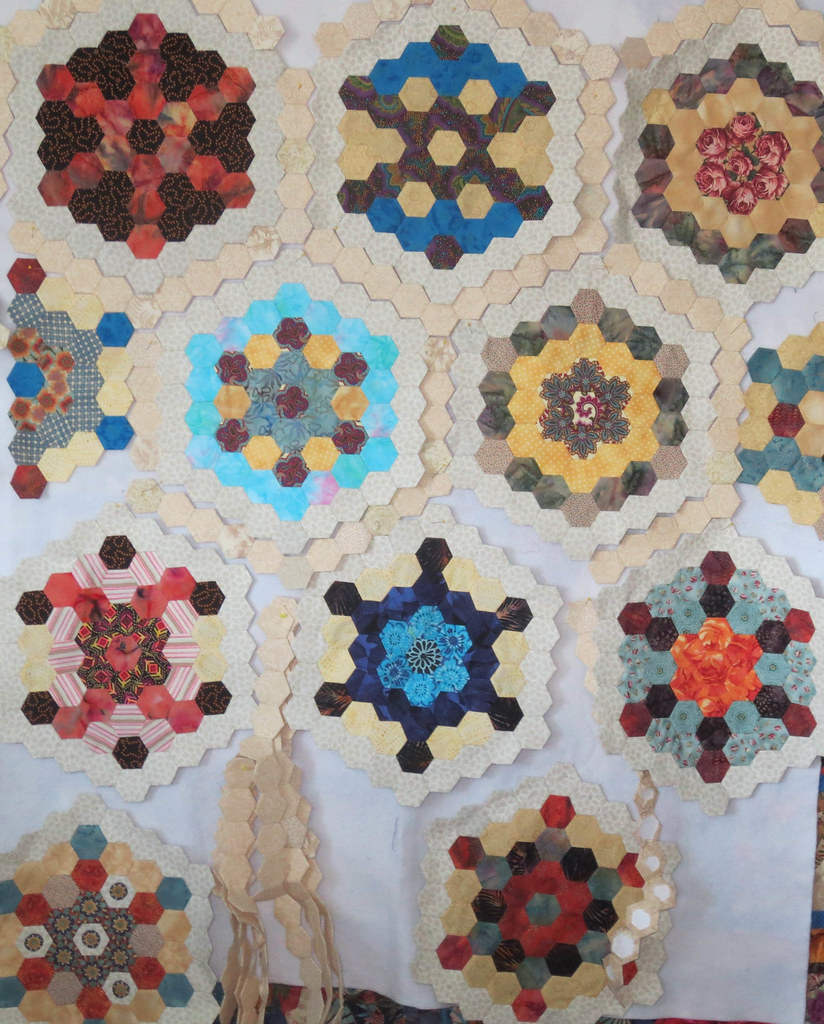
Now for a little bit of eye candy! There are a number of you who are participating in my free Value Proposition Hexagon Quilt Along. The quilt is made up of 18 full blocks and 4 partial blocks. I set up a FLICKR page so that sewists could post pictures of their blocks. Bunny put her blocks up on the design wall and posted a picture. Are you drooling over her quilt? I sure am! Bunny tells me she doesn't make scrap quilts but she is using her bits and pieces to make this one and she is very happy with what she is seeing!


If you are tempted to join in the hexagon fun you will find links to all of the patterns under the tab Quilt Alongs by Karen H just under the banner at the top of this page!

Until I post again, happy sewing!
Karen H

Monday, September 1, 2014

More about basting hexagons and more about quilting Good Golly Miss Mollie

Chantal left a comment in which she asked if the basting method I wrote about yesterday would work with 2" hexagons. I think that it would provided that the seam allowances were turned and finger pressed before basting but I'm just guessing as I've never worked with 2" hexagons. What would work is Missie Carpenter's method which uses freezer paper and starch. You can read about it here. I've tried it and it works beautifully so be sure to check it out!


James P left a comment and asked "when you're turning over your fabric edge to baste, how can you tell you are against the paper piece? Using normal paper I would think it is too thin to feel an edge". I'm answering the question here because James is a no-reply blogger. I reply to every comment so if you don't hear from me that would be the reason. Now as for the paper I use regular 20lb bond printer paper and I can feel the edge. If I am unsure I will pinch the fabric between my fingers to press in the fold and then lift the seam allowance to ensure that the fold is against the paper. Sometimes however the weight or texture of the fabric is more challenging so what I'll do is finger press all of the seam allowances before I baste. This is what it looks like once it has been finger pressed.  The basting goes easily and smoothly when the fabric is prepared in this way.


When I finger press I work in a counter clockwise position. For demonstration purposes I`ve pressed the seam allowances with my Dritz Petite Press so that there will be a nice sharp fold for the pictures but it isn't necessary to do this - a good pinch with your fingers is sufficient. To start I fold down the top seam allowance and finger press.


Working counterclockwise I'll turn over the seam allowance to the left and I'll finger press.


It will look like the hexagon in FIG 1. I turn the seam allowance at the bottom left (FIG 2) and finger press. I repeat these steps as shown in FIG 3 and FIG 4. At this point there is only one seam allowance to turn.


I fold the last seam allowance tucking it under the top edge and finger press.


Eventually you will get to know the feel of the fabric against the paper and you'll likely just skip the finger pressing!

I continue to machine quilt Good Golly Miss Mollie (my version of the Godstone Grannies coverlet) on my domestic sewing machine. There have been several comments about the small feathers in the 3/4" hexagons. I find the smaller shapes less challenging than the larger feathers. Try drawing a perfect circle that is 8" in diameter. Tough, isn't it? Now try drawing a circle that is the size of a small coin. Much easier! A wobble in a big circle is much more noticeable than a wobble in a small circle whether it is drawn or quilted. When quilting small I don't have to reposition my hands when I'm in the middle of quilting a shape makes for smoother quilting lines. Enough about this - how about some of the quilting in the hexagons?

I filled the following block with feathers, figure 8s, melon wedges and teardrops. To quilt the feathers in the pale yellow and those above and below the centre cross I drew lines for the spine.


In the following picture you can see a teardrop, melon wedges, figure 8 quilting and the feathers. The lines I drew for the spine have not yet been removed.


I prefer not to do any marking so I gave some thought to quilting designs that would not require marking. If the spine of the feather was going to be straight I would need a line but if I went for a curvy spine I could use the shape of my hexagons as a guide. So I quilted a curvy spine in the white round of hexagons and added the feathers. I start at the top of the spine and quilt down to the base. When I get to the base I quilted the plumes all the way back to the top. When I get there I come back down parallel to the spine to create a vein. I think it adds depth and dimension. I then started again at the top and quilted the feathers on the opposite side.


Here is a close-up of how I filled the centre four hexagons! I really like the texture that is created with this simple motif!


I used this same approach to quilt the odd shape in the taupe hexagons in this block.


Here's another example of an odd shape filled with feathers. I didn't quilt the other side of the spine and I think that it is needed so I will go back and add it to the quilting.


Phew! Lots of words and lots of pictures. Time for me to do some sewing so until I post again, happy sewing!
Karen H

Saturday, August 30, 2014

Quilting the centre hexagon diamond in Good Golly Miss Mollie

I've started to quilt the hexagon diamond block that is in the middle of the quilt. This is the block before it was stitched into my quilt Good Golly Miss Mollie which is my version of the Godstone Grannies coverlet. Each hexagon is 3/4" and I'm doing the quilting on my domestic sewing machine, a Juki TL2010Q.


I've quilted the pale yellow round with feathers and I'll show that to you but first I want to talk about the dark rust outer round of hexagons. I used my darning foot and free motion quilted straight lines. I didn't need to use the walking foot because the distance to quilt on each hexagon was short. The trick was to find spots to stop so that I could reposition my hands and that point was the inner point where two hexagons join.


I left this for several days before deciding what next. Because this is the centre of the quilt I want the quilting to be interesting. I finally decided on a simple feather motif. I started at the lower left and worked my way to the top. I them moved to the lower right and worked my way to the top. You can also see some quilting in the pale yellow hexagons. Notice that I again used the fiddlehead motif at the top.


Here you can see the difference this bit of quilting made to the rust round of hexagons. The left side is filled in with the feathers and the right side is not.


I quilted some feather motifs in the pale yellow. I haven't decided how I will quilt the taupe hexagons or the four in the centre. For now I'll just move on and quilt another area. Eventually the quilting solution will come to me!


Here is the block with the feathers quilted all the way around on the rust hexagons.


I hope I've given you some ideas for quilting hexagons! Until I post again, happy sewing!
Karen H

Thursday, August 28, 2014

Machine quilting the border and some hexagons

I've now quilted the border of Good Golly Miss Mollie (my interpretation of the Godstone Grannies coverlet) I decided to quilt straight lines and I used the width of my darning foot on my domestic sewing machine to space the lines. I really like this look and it is so fast and easy! Before I add the binding I want to quilt the half diamonds around the quilt. The reason is that the border is very narrow (about 2" at its widest) and I like to have some fabric to hang onto as I move the quilt under the needle.


I'm allowing the shapes within the hexagon diamonds dictate the quilting. This means each block will be different however I will repeat some of the motifs to give the quilt a more cohesive look. In the picture above you can see I've added very simply quilting to the hexagon rosette at the top ans well as the partial rosettes along the bottom edge. I decided to fill in the lemon yellow background hexagons with a feather. I started by quilting the spine and it followed the curve of the half rosette. I then quilted the other side and this is the result. I think it enhances the block without taking away from the hexagon design. The straight lines on the narrow border really flatten the border so that the quilting on the hexagons can shine! If you look in the upper right corner you can see a little bit of quilting on another one of the diamonds.


Here is another half diamond on the side. I haven't decided how to quilt the rust colour hexagons on the bottom edge or the fussy cut white and grey print round but I had an idea for the solid brown.


This is what I did. They remind me of fiddleheads. The quilt is stabilized and nothing will shift so I can put off quilting the rest of this half diamond until I know what I want to do.


This is a close-up of the fiddleheads. I started on the left and quilted the first fiddlehead and then stitched along the edge of the taupe hexagon until I got to the point of the next so I could quilt the next fiddlehead. I continued in this way until each of them had its own fiddlehead!


Here's another example of how I'm allowing the hexagons to dictate the quilting. I had an idea as to how I would quilt the centre of each of the four hexagon rosettes and the dark brown frames.


Feathers are great for filling hexagons and three plumes per hexagon seems to do the trick! I haven't decided how I'll fill in the rosette or the rusty hexagons but it will come to me!


So there you have it! The quilting is underway and it is making me think about each block and what I should do! Stay tuned for more pictures!

Tomorrow I'll post  another installment in my Value Proposition Hexagon QAL, Side Setting Block 2 and the following Friday will be Block 11. I hope you'll be back for a visit! Until then, happy sewing!
Karen H

Tuesday, August 26, 2014

Quilting melon wedges in my Good Golly Miss Mollie hexagon quilt

Time to answer reader questions! Thanks to everyone who takes the time to leave a comment and ask questions; I'm always happy to share what I do and how I do it! Skootchover wrote "Can you illustrate your quilting in the path in a future post? I see the pattern that was created but don't really understand what you did in each hexagon". Angie asked  if there is backtracking (sewing on previously quilted lines). There is no backtracking involved!

I am quilting Good Golly Miss Mollie (my version of the Godstone Grannies coverlet) on my domestic sewing machine. The first thing I normally do when I begin to quilt is ditch quilt but that might not be the best approach for a hand stitched hexagon quilt. I decided to stitch melon wedges (little crescents) in the path because I can work continuously from the top of the quilt to the bottom with no stops. When all these little melon wedges are stitched the result is a little star in each path hexagon. You can see the melon wedge stars on the path. The best part of all is that it serves the same function as ditch quilting which is that it stabilizes the quilt so nothing will shift. Once I've ditch quilted I can go back and quilt inside the blocks which are diamonds shapes made up of hexagons.


To quilt the melon wedges on Good Golly Miss Mollie I used a polyester 50wt thread on top in a colour that matches the path fabric. This helps the quilting disappear and all that is left is the texture and image of the little star. In the bobbin I used Superior's The Bottom Line in a neutral colour. My needle is a Superior Titanium Topstich 90/14. The machine that I'm using is a Juki TL2010Q mechanical (not computerized) sewing machine. I begin at the top of the path and quilt a little melon wedge or crescent in the first hexagon. You can see my start point in the red circle. Once I've quilted the wedge I quilt the next one to the right.


The next wedge is stitched in the same hexagon where it touches the next path hexagon.


I move to the next hexagon and quilt a wedge on the other side of the wedge I just quilted and this creates sort of an elliptical shape. Then I'm on to the top side of the same hexagon. I continue quilting in this way until I reach the point where I need to change direction. I stopped at the red circle because I want to continue quilting in a downward direction. The path will be quilted in a zigzag direction.


I continue quilting the melon wedges until I get to the bottom of the path.


Now I want to quilt up the other side of the path that I just quilted.


I continue until I get all the way back to my starting point.


I go back to the top of my quilt and begin to quilt melon wedges (marked in green) in the next part of the path.

I continue all the way to the bottom of the quilt


and then I come back up and quilt melon wedges on the other side of the hexagons.


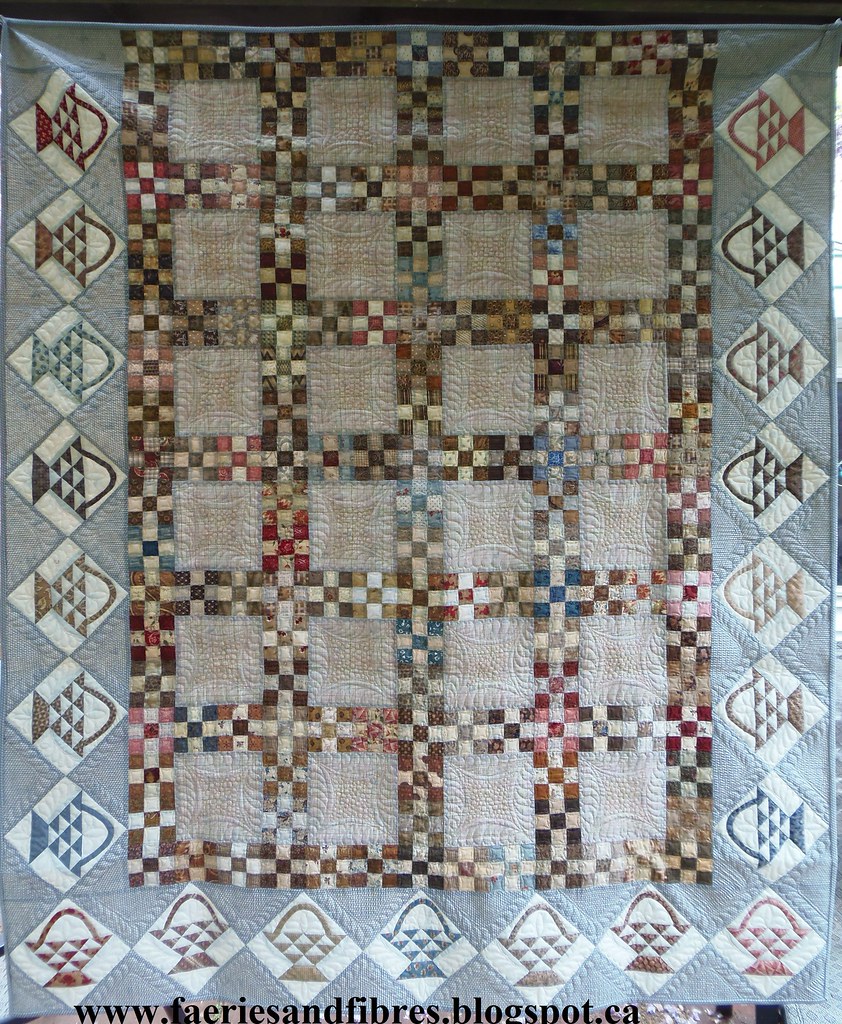
So there you have it - melon wedges. These little shapes are a great way to stabilize a hexagon quilt path and it is a shape that is easy to manage on a domestic sewing machine. The hexagons in Good Golly Miss Mollie are 3/4" so the wedge is relatively small and easy to quilt. The wedges don't have to be perfect or identical. Similar is good enough because when the quilting is done what you will see is the overall texture. This melon wedge shape also works well in other blocks. When I made my Baskets and Nine Patches quilt I stitched them in the little 3" nine patches. I like a flat quilt and the melon wedges produce that look and feel.


This is the finished quilt Baskets and Nine Patches. You will find a free pattern for this quilt under the tab Patterns by Karen H.


Until I post again, happy quilting on your domestic sewing machine!
Karen H

Monday, August 25, 2014

Quilting Godstone Grannies AKA Good Golly Miss Mollie

The quilting of Good Golly Miss Mollie is well underway. This quilt is my interpretation of the Godstone Grannies quilt which is at the Quilt Museum in York, England. You can see the original and read about it here. The name of my version of the quilt comes from Mollie Simmonds who was the leader of the group that made the original quilt in the early 1960s.

I've made oodles of hexagon quilts and usually have a pretty good idea as to how to quilt them on my domestic sewing machine (a Juki TL2010Q) but this one was a bit of a challenge because there is a variety of blocks and they can be quite different from one another. There are 31 whole diamonds in the quilt one of which is unique (the block in the centre) and the rest are pairs of blocks. There are also 4 pairs of half diamonds on the sides and 5 pairs of partial diamonds at the top and bottom. The colour is not right in this picture - it looks quite grey but in fact it is more buttery and peachy.


Normally I ditch quilt first, then quilt the border, bind the quilt and then go back and quilt the blocks. So what are the challenges? This quilt is entirely hand pieced using the English paper piecing method so ditch quilting isn't my preferred option. The second challenge is that the border is very narrow which means I'll have to quilt the partial blocks all around the quilt before I can bind it.

My solution was to quilt melon wedges in each of the path hexagons. I like this method because it creates a nice little start and there are relatively few starts an stops. This is a little bit of what it looks like. It isn't perfect - far from it but I'm not at all bothered because I know that once the whole thing is quilted the little imperfections will disappear! It also works the same as ditch quilting which stabilizes the quilt so that I can quilt the border and bind the quilt before quilting the diamond blocks.


What to do with the rest of the blocks? I don't like marking so I want to do as little of it as possible. I decided to work with the shapes created within the diamonds and use them as my inspiration for the quilting! Here is the same side block quilted! I quilted the orange rosette and its centre and then the four partial orange rosettes along the bottom edge. Then it was onto the feather swags on the side followed by the small swag below the orange rosette! I'm a happy quilt maker. I'll quilt the second partial block that is the same as this one in the same manner! That's two done and lots more to go!


Now that I have an idea about how to quilt the blocks I will ditch quilt the outside edge of the quilt where the hexagons were appliqued to the border strips and I'll quilt the border. I like close straight lines so I think that's what I'll do! When I've got it done I'll share pictures of the border quilting!

Until I post again happy sewing!
Karen H