Showing posts with label Yellow Bird. Show all posts

Friday, June 5, 2015

Introducing Yellow Bird's Sister

Do you remember the quilt Yellow Bird that was made by my friend Babs? It got its name from the fabric that was used. It was a black, white and yellow border print by Vera Bradley and it was called "Yellow Bird". I showed her my method for fussy cutting from a strip of fabric and she used it to make all of the hexagon rosettes.

Yellow Bird by Babs 2014

There were leftover 1" hexagons from Yellow Bird and she wanted to use so she decided to make another quilt quilt that would be a sister quilt to Yellow Bird!


She also had one star that I taught her to make. The Yellow Bird leftovers and this star were the starting point for the new quilt, Yellow Bird's Sister.


Slowly it started coming together.


Here yhou can see she has made a large hexagon and added a black border.


A border of triangles followed. There were still a few more black hexagons to be added to the corners.


After she got this it to this point she had used most of her grey, black and yellow hexagons and decided that she didn't want to go any further. She wanted to take it to a rectangle shape and be finished with it. The decision was to add so strips to four sides and then add triangle units. She had a lovely grey fabric with a hexagon print so that is what was used. It looks really nice but is a little short on the WOW factor.


She removed the corners and replaced them with a darker print and the whole quilt just pops!

Yellow Bird's Sister by Babs 2015

This is going to be yet another fabulous quilt by Babs! I think she will hand quilt this one and then bind it with black. I hope you enjoyed seeing this quilt top!

Until I post again, happy sewing!
Karen H

Thursday, July 17, 2014

Yellow Bird is quilted and progress on the new hexagon project

Yellow Bird is done and I hope my friend Babs likes what I did to her quilt! The last decision I had to make was what to quilt in the black inner border and I decided to go with a figure 8. It is a simple and quick motif to quilt and it can be very effective.


I used the figure 8 in my quilt Piccadilly to the Nines (which I plan on finishing this week)!

Close-up of Piccadilly to the Nines figure 9 quilting

Probably the trickiest part is figuring out how to deal with the mitered corners but if you know the trick it isn't difficult. It quilts very easily because for many of us a figure 8 is a familiar shape to doodle. You can read about how I quilt my figure 8's here.

Bab's used a black backing and I think it is fabulous. I used Superior The Bottom Line (silver colour) in the bobbin and I think the thread and quilting look great on the back. I just love the way the figure 8 quilting looks on the back.


I'll try to get outside to take a picture of the entire quilt but for now you will have to be happy with the corner. I am beyond thrilled with the feather border on the outside. I've never done anything like it and have simply amazed myself! Really! You don't know what you can do until you try! The plumes are not equal or identical but you don't see that...all you see is the lovely texture that they create!


Last week I shared a picture of a quilt that I fell in love with and it is next on my very long "to make" list! I saw this quilt on Lorraine's blog. It is such a cheerful quilt! If you love hexagon quilts be sure to click on that link because there are several lovely hexagon quilts in the post.


I went through my stash and pulled fabrics. I pulled these two for the turquoise snowflakes.


These fabrics are being turned into these rosettes! I've got a nice pile started!


I also pulled these two fabrics for the center medallion.


I added a subtle off-white, tone on tone print and now have the beginning of the medallion stitched together!


The next step is a border of the off-white fabric followed by a pink border. I've selected the fabric I will used so I'll prep some hexagons for basting when I'm out and about!

Until I post again, happy sewing!
Karen H

Tuesday, July 15, 2014

Rip it out and Round 5 of the Secret Tote Bag Swap

I've finished quilting the centre of Bab's Yellow Bird quilt. Kathy had left a comment that the quilt looked like it is yellow and blue but in fact it is yellow with black and white. In some pictures it reads pale yellow but it is in fact a lovely, bright, zingy lemon-yellow. It is very dramatic and really pretty! I quilted a wreath in the centre and filled it with doodling. It flattens the area and adds great texture. I filled in the rest of the quilt (up to the black border) with feathers. All I would do is sketch a spine and quilt a feather to fill the space. Then I would draw another spine and quilt the feather. I really like the effect it created and it was so fast and easy.


I'm not sure what I'll do in the black border but it is ditch quilted so it can wait. Instead I moved on to the large yellow outer border. I wanted to quilt feathers. I quilted the feather that you see on the left and wasn't jazzed about it. To my eye is too large and boring so I tried something different and you can see it on the right. Much better! So I spent the evening ripping out the quilting on the right.


This is what the border will look like with the new quilting plan. I started by sketching a question mark in the middle of the border and quilted it. From there I divided either side of the question mark into three sections and in each I sketched a spine for a "C" shaped feather. I like the effect of this new design much better.


As heartbreaking as it can be, sometimes it is better to just rip it out!

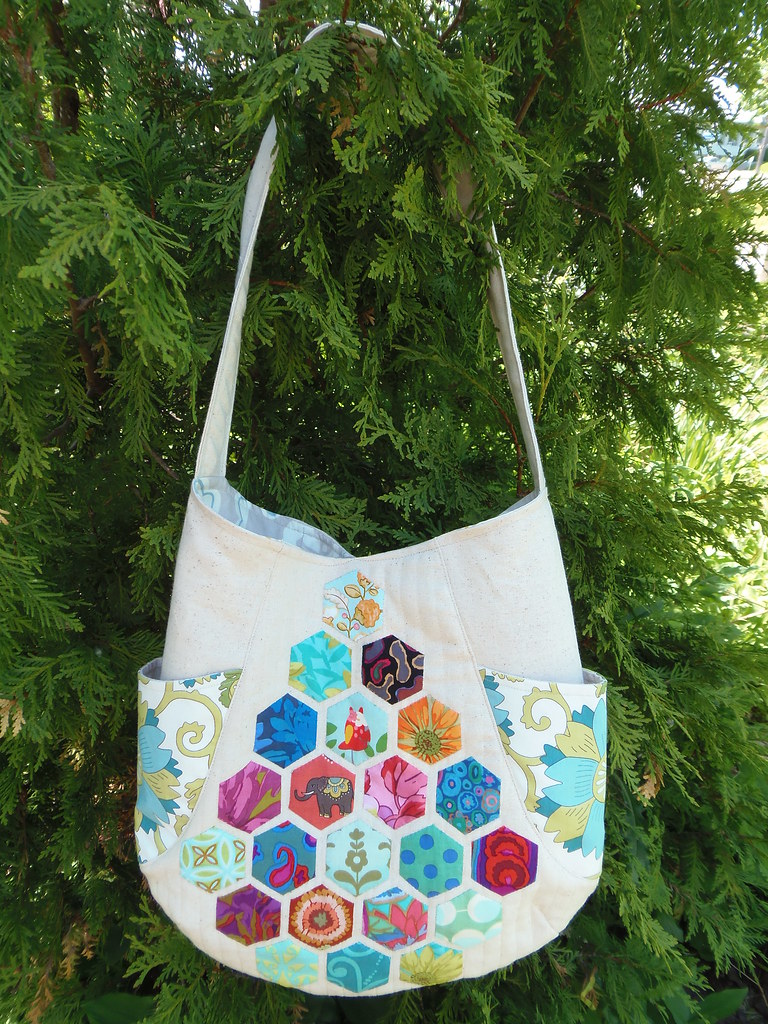
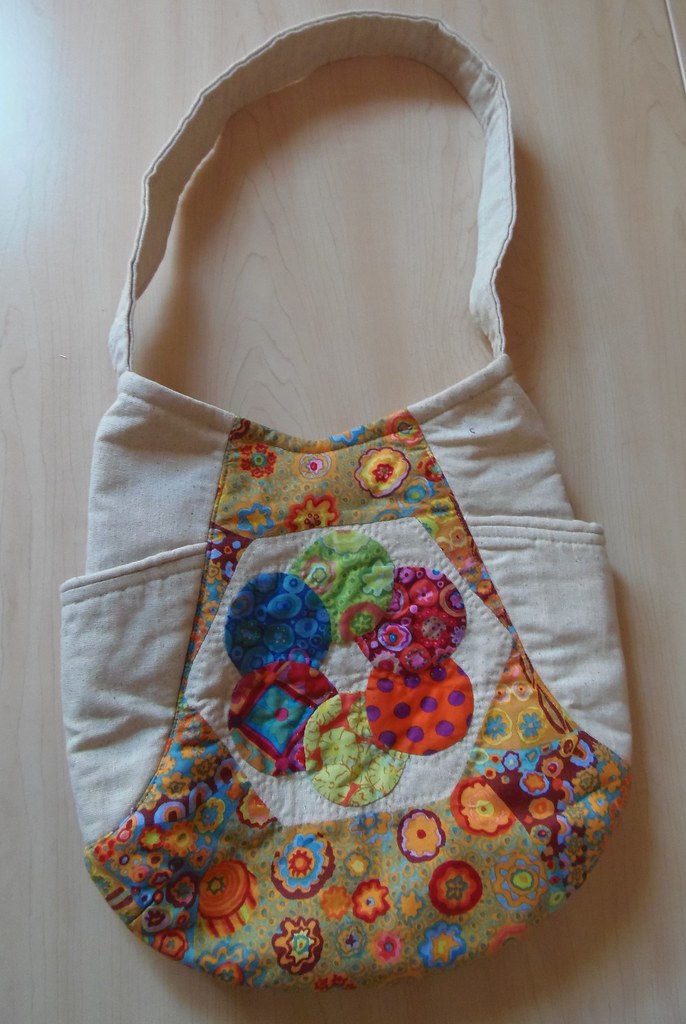
Many of you will know that I've participated in Lia's Secret Tote Bag Swaps in the past. She has launched Round 5 and the theme is the Noodlehead 241 Tote. Everyone will work with the same pattern so it will be really interesting to see variations! If you decide to sign up you will complete a form with your likes and dislikes. Once the sign-up is closed you will receive an email with your partner details. You won't know who gets your name and your partner won't know you have her name. You have roughly a month to make your bag. Usually we tuck little goodies inside the bag!

 I've made several bags from the 241 pattern. It is fast, easy and very well illustrated. Here are some pictures of what I've made. This one was appliqued with butterflies and a grasshopper. I added beaded zipper pulls to jazz it up!


I made this one as a gift. The recipient wanted a bag that she could use to carry her knitting. I used upholstery fabric for the front and back panel. She loved the large graphic print!


The theme for this swap was geometric shapes so I appliqued some bright colours to Osnaburg that I quilted with straight lines.

I made this for my partner in a previous swap. I forget the theme but I loved the bag and my partner said she did too!

And this the tote bag that I received in the last swap! My partner tucked all sorts of wonderful goodies inside! I told her I like the 241 pattern so she got it and tried it out herself! It is a great bag and oh so summery!


To sign up for the swap you must be a FLICKR user. You will find the instructions for signing up here. If you are interested you have until July 19th.

Until I post again, happy sewing!
Karen H

Thursday, July 10, 2014

Yellow Bird

Several days ago I showed you a picture of my friend Babs' quilt that she calls Yellow Bird.


I still have it and can't stop looking at it. It is such a striking quilt. Now don't get me wrong, I've got more than enough to do (too much in fact) but this quilt is just screaming "QUILT ME". It isn't my quilt but what the heck - I'm quilting it! Sure hope Babs likes what I'm going to do to it!

I ditch quilted around every rosette and then quilted a feather wreath in the center. The only marking I did was a line for the spine of the feather.


Okay, I'm happy with this but now what? Echo quilting (three rounds) around the inside edge of the feathers and then I started filling the inside of the wreath with with random shapes and filler designs!


Here's a close-up for a better look!


I'm really enjoy doing this type of filler design because I quilt a pattern until I'm tired of it and then do something different. If I work myself into a small spot I might throw in some little circles so I can work my way out. It results in a complex design that is surprisingly easy! On March 28, 2014 I published instructions and step-by-step diagrams of how I do it. You will find the post here.


I'm a quilt-by-the-seat-of-my-pants kind of quilter so what next? I decided to echo outside the wreath with three rounds of echo quilting and I'll fill the area inside the black print border with large meandering feathers! Rather appropriate for a quilt called Yellow Bird!


This quilt is going very quickly and my new Juki and I are working as one! I won't have time to sew for the next three days so the rest of the quilting will have to wait!

Tomorrow I'll publish Block 7 in my Value Proposition Hexagon Quilt Along. I hope you like the block! I do; it is one of my favourites!

Until tomorrow, happy sewing!
Karen H
Tuesday, July 1, 2014

"Do you know where my shirt is" and Gutermann thread

This will be a surprise for my friend Babs! She came over to baste a quilt top that she made and when it was done we folded it up to pin baste another quilt top. She packed everything to go home but guess what she forgot to take with her? Her quilt! Perfect opportunity for me to share it with you! I think it has a real French "provencal" feel to it!

Yellow Bird by Babs, 2014

She calls her quilt Yellow Bird because that was the name of one of the fabrics she used, the black, white and yellow border print! She combined it with the subtle yellow background print. It gives the quilt such a lovely fresh look and feel. But this beautiful quilt has a dark side! Each of the hexagon flowers had a black and white check hexagon in the center but the fabric didn't come from a quilt shop. No, Babs cut up her husband's favourite shirt to make those hexagons! Naughty Babs but honestly it was the perfect choice for the hexagons! Good thing he does his own laundry! He has no idea that his shirt was repurposed!

Here you can see the border print used as a border.


It was also used to make the fussy cut hexagons.


The hexagons were machine appliqued to a lovely yellow background.


The hexagons were appliqued the squares were stitched together. Single hexagons were appliqued over the intersections. Babs used these same techniques to maker her quilt What the Hexagon? She likes making the rosettes of hexagons but didn't want to spend time making a path so this method was a great alternative. It also allowed her to use hexagons of different sizes that were leftovers from other projects or that were given to her. The diamond hexagons were made by my Mom and given to Babs. She wanted to use them so this quilt was the perfect project!

What the Hexagon by Babs, 2011

If you use Superior Threads you will know that the cap pops off so you can anchor your threads. I also use Gutermann threads and there is a little spot where you can wrap the cut end of your thread so it doesn't unspool. You can see it at the bottom of the spool on the left. I was looking at the spool and wondering if the piece at the bottom could be popped to make wrapping thread easier and guess what? It does! You can see it on the spool on the right! Who knew? Well now you know!


The following has nothing to do with quilting but I wanted to share. This is Dog the Cat, 7.6 petite pounds of cuteness lounging in the yard two days ago. She was a beloved member of The Girl's family.


Dog had a rough beginning but when she was rescued by The Girl and Goat she found a loving home where she was cherished and adored. Some thoughtless person put out antifreeze likely to deal with local skunks and raccoons. It is a cruel thing to do to any being. While Dog's suffering is over thanks to the compassionate care she received from the veterinarian The Girl and Goat are beside themselves. Dog was a tiny little girl with a big personality and her passing has left a huge void.

Until I post again, please go and give someone you love a big hug!
Karen H