Showing posts with label fob. Show all posts

Thursday, October 16, 2014

Sewing jewelry

I like having "sewing jewelry"; it doesn't improve the quality of my work but it fun to have and nice to look at! Today I thought I would share a couple of my favourites with you!

I love scissor fobs and tassels for small scissors because it makes it so easy to find them when they are in a box with sewing goodies! I made this scissors tassel several years ago! It has a large lobster claw clasp so that I can remove the tassel if necessary. The berry and pomegranate colours of the beads are so juicy!


Another bit of sewing jewelry that I made is a necklace with a Clover Thread Cutter. I use it when I'm hand sewing but I've also worn it as a necklace and I always get compliments!


If you aren't familiar with a Clover Thread Cutter it is the little round disc. Inside the disc is a circular blade; you just push your thread between the notches  and your thread is cut. This is a great tool to have around your neck when you are out and sewing because you don't have to worry about losing your scissors! I collect interesting beads like the face bead and I find a place where I can show them off!


I've got to get to the post office to mail OhioLori her scissor fob. She said she likes roses so I used a fabric with wild roses.


On the other side of the fob is a butterfly! I sure hope she likes it as it is one of a kind and was made especially for her!

Time for me to get back to the Gardens of a King blocks. Tomorrow it is time for Block 14 in my Value Proposition Hexagon Quilt Along. This time you will use "made" fabric for some of your hexagons. What is that you ask? Well you'll just have to come back tomorrow to find out!

Until I post again, happy sewing!
Karen H

Sunday, September 21, 2014

Fuss, free spirited quilts and a fob

There's been a lot of fuss about a newly released book Unconventional and Unexpected Quilts Below the Radar. And I have to tell you I've been intrigued. This morning I read a review of this book by fiberchick and you can read it here. It was very interesting and I think this book is going to go on my wish list!


Fiberchick wrote "These quilts are the most colorful, joyful and soulful expressions of their creators' spirit. Made of polyesters, wools and corduroys as well as cottons they are the embodiment of recycled materials. They were made for warmth and they were made to be used. Stylistically, these patchworks intersect traditional quilts and purely improvisational ones. They are abstract in pattern and yet have form". After reading this I immediately thought of a wonderful quilt that was at my Guild's quilt show. It was made by Jennifer K and it is her first quilt. The name of the quilt is "The Cottage Quilt". Tell me, is this not an amazing quilt? Note: it does not have a blue border; that is the back of the quilt on the other side of the frame.


This is what Jennifer had to say about her quilt: "There was a threadbare bedspread at our family cottage - a vintage 1970 floral. in purple, turquoise and green, which started life as my bedspread at home when I was a kid. I decided to "upcycle" it into a crazy quilt using the same colour palette but more saturated and punched with a bit of hot pink, funky "me" patterns, all kinds of different fabrics and embellishments "galore". This was all before I learned how to quilt! My sewing machine was broken so I started piecing by hand - and couldn't stop! This is my first quilt." I had a chat with Jennifer and every piece of fabric had some sort of meaning. There is a rosette in the centre that is made from a fragile scarf that she remembers her mother wore when she was a child. Her mother told her it was also worn by her mother. All in all there are five generation of fabric remembrances in this quilt! In my humble opinion it is a beauty and quite possibly the most unique and special quilt in the show! I suppose it is what would be called a utility quilt but I don't think that term does this or others of its ilk justice. Right now I can't think of a better name but it is certainly is a free-spirited quilt!

I made a scissor fob for one of he vendors at our quilt show, Anita of Cotton Mill Threadworks. Anita sells Superior Threads, a personal favourite of mine! You know I love grasshoppers so I appliqued and embroidered the little critter on a pretty piece of fabric! She loved it!


So day one of the quilt show is down and day two is about to start. I will share lots of pictures from the show in the coming days!

Until I post again, happy sewing!
Karen H

Wednesday, September 3, 2014

Another 241 Tote Bag with hexagons

I signed up for another one of Lia's Handmades Secret Tote Bag Swaps. This time everyone is making the Noodlehead 241 Tote. It is a great pattern that is fast, fun and easy to make! My partner wrote in her profile that she loves hexagons but has never made a hexagon quilt! I decided to make her a bag that is embellished with hexagons. I started with a dark taupe fabric that has a linen look about it; I rough cut it larger than the pattern piece, layered it on t80/20 batting and quilted with free form quilting.

Side A

Side B

My next step was to trace the  pattern on the front of my quilted panels so that I could accurately place my hexagons. They were hand appliqued in place. Once the applique was completed I trimmed the panel to the correct size. I did it this way because the dense quilting may have reduced the size of the panel so the bag wouldn't go together properly. Also I wanted to minimize fraying from handling whilst doing the applique.


And here's the finished bag. I lined it with a happy lime green and added a pocket that was fussy cut from a Kaffe print.

The bag has a magnetic closure.


These are the goodies I tucked inside. In the centre is a little zippered pouch and then from the top working clockwise are yellow bee note cards, a little olive green silk notebook, 100 1" hexagon papers, a Prym Needle Twister, a scissor fob/pincushion, Schmetz topstich needles and a hardcover needle book made from the lining fabric.


I made the pouch from a pattern I found here. The hardcover needle books make terrific gifts even for friends who don't sew because they still need a place to store needles and pins. The pattern can be found here. The scissor fob/pincushion is my own design and you can  read my tutorial so you can make your own!


My partner has now received her bag and she is very happy with everything! There's a knock at the door - I wonder who it is? Go grab yourself a cuppa - I'll be right back!

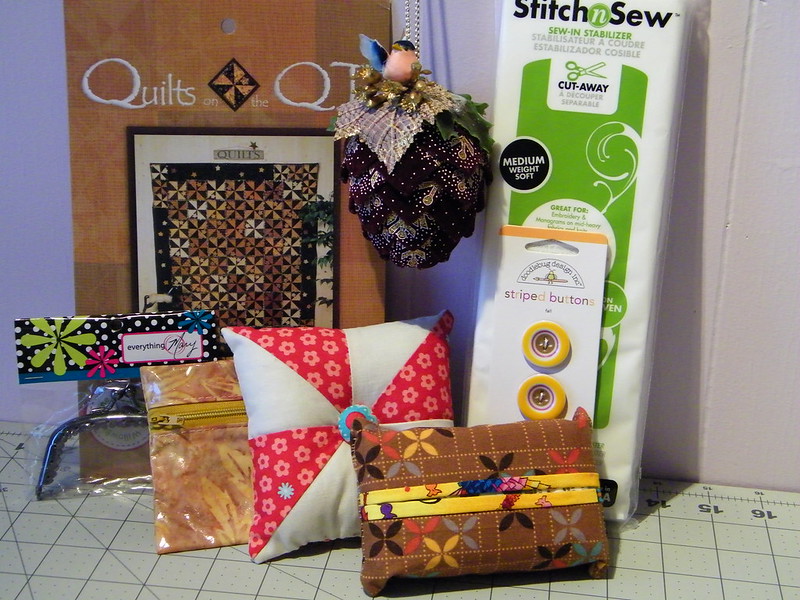
It was the letter carrier with a package. What was inside you ask? A gorgeous tote bag from my secret partner, CeLynn in Colorado. She was worried that she didn't get the colours right but she sure did! But first look at all the lovely goodies she tucked inside the bag! There was a quilt pattern, pincushion, purse frame, buttons, zippered pouch, tissue holder, stabilizer and an lovely little fabric pine cone ornament. Who's a lucky swapper? Me of course. But the best part is yet to come... the bag is STUNNING!


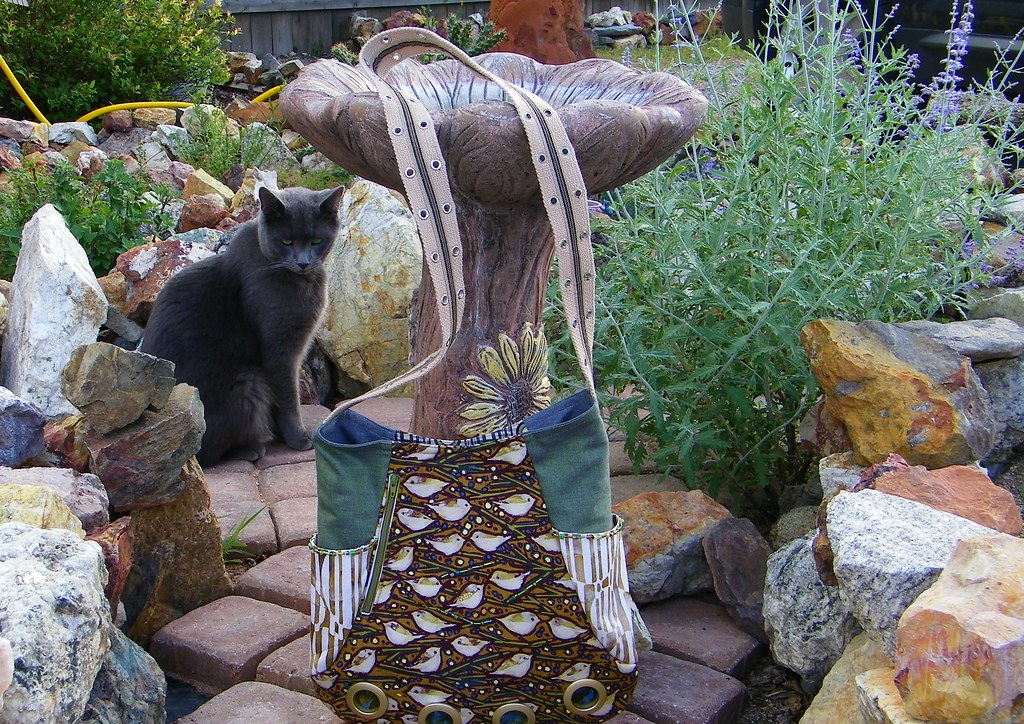
These are pictures taken by CeLynn. I had to share this one because I love seeing the grey guy lurking in the background. Now tell me, isn't this bag fabulous? I think it is perfect for the Autumn!


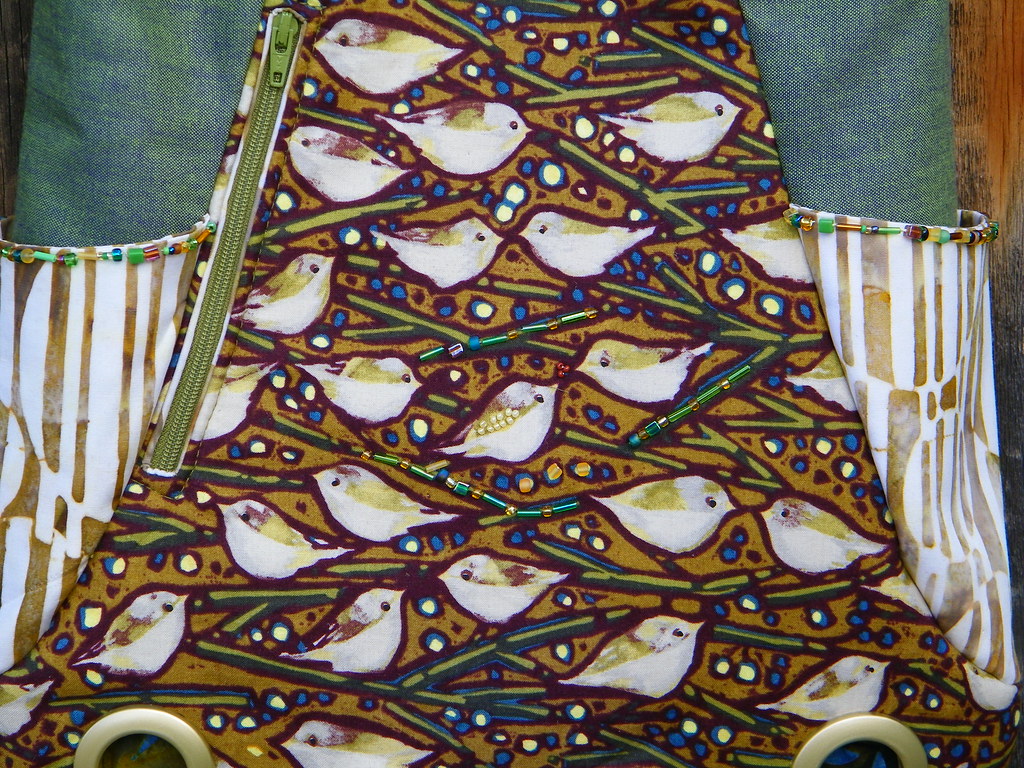
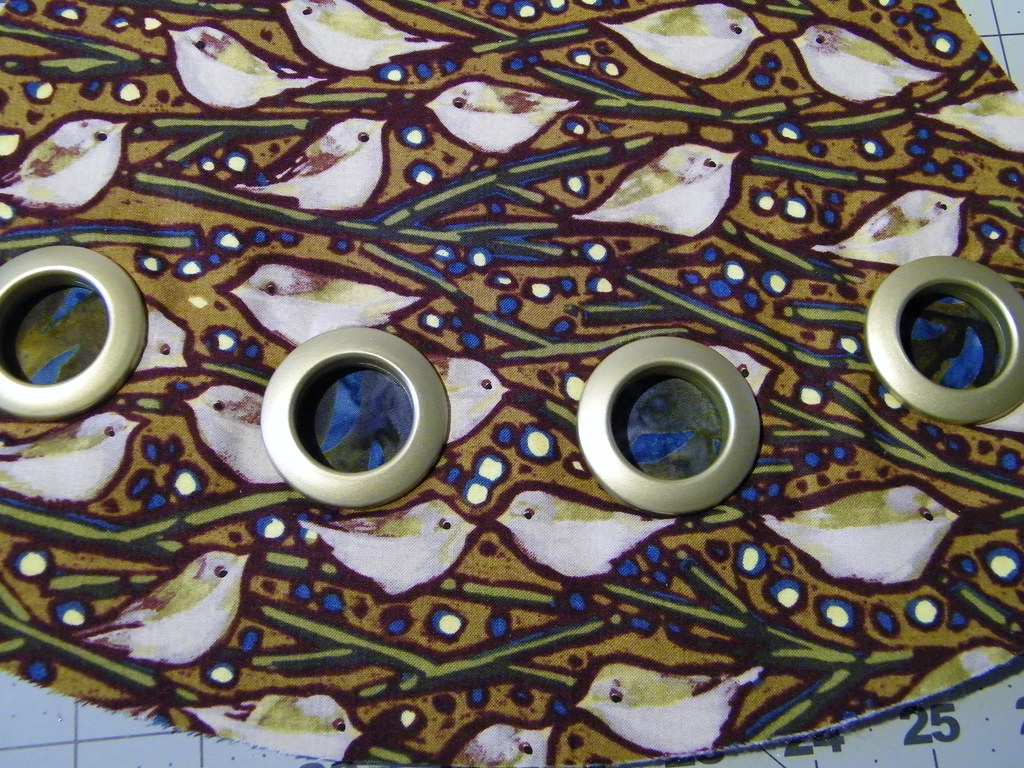
She added a zipper on the left, beaded the front panel and side pockets, added grommets with batik inserts at the bottom and the strap is a hemp like fabric with grommets. Lots of attention to detail!


Here's a close-up of the bead work and zipper.


Look at the grommets with the batik inserts! Love them!


I'm off tomorrow to prepare the instructions for Block 11 of my Value Proposition Hexagon Quilt Along. I'll have the instructions available for you early Friday morning. We are going to try something new with this block and I hope you'll find it fun and maybe use the idea for other quilts!

Until I post again, happy sewing!
Karen H

Monday, June 9, 2014

Tutorial: Hexagon Scissor Fob Pincushion

Time for a new tutorial! I made a little scissor fob/pincushion and many of you were interested in detailed instructions so you could make one for yourself so I am pleased to share with you how I made mine!


Hexagon Scissor Fob Pincushion Tutorial

Basic Supplies:
2 - 1 1/4" paper hexagons (use larger if you prefer)
2 - pieces of fabric, one for front and one for back
12" cording
Assorted beads (2 larger beads for cord, seed beads and 5 pony beads for corners)
Fiberfill stuffing
All the usual sewing necessaries (needle, thread and scissors)


Construction Method:
Baste your fabric to the paper hexagons in the usual manner.

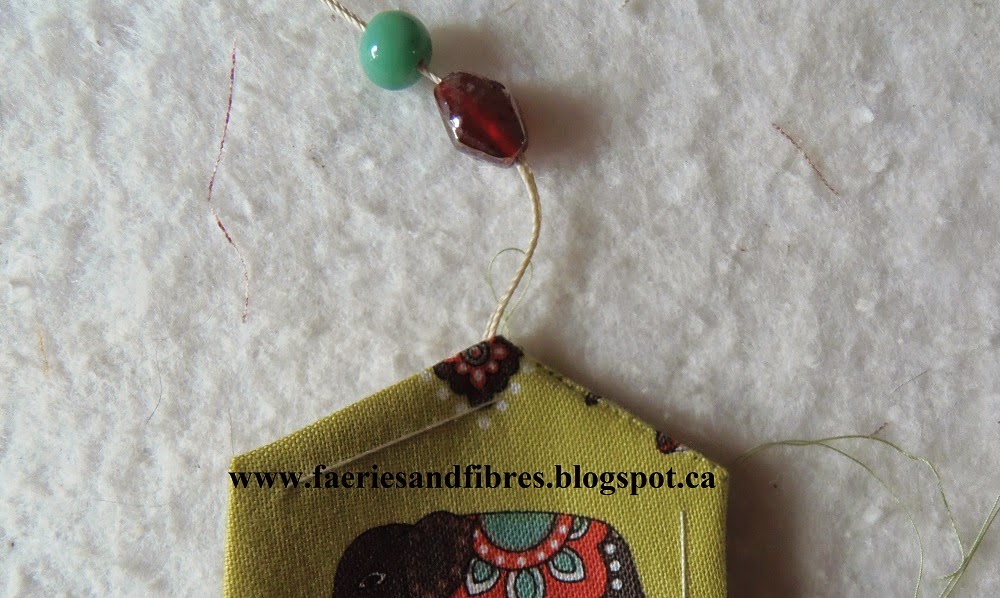
Thread both ends of your cord through the two larger beads. I like to place the larger bead close to the hexagon fob so it will be closest to the cut ends of the cord. Tie the loose ends making a good double or triple knot.


Place your two hexagons with wrong sides together. Use a thread that matches your hexagon and begin sewing at the right hand corner as indicated by the red circle.


Sew until you get one stitch short of the top corner. At this point you will want to insert the cord. Do so by tucking the knot between the hexagons. Take tiny stitches on either side of the cord and also through the cord.

Continue stitching the hexagons together for another 1/4" and stop for a moment. At this point you will want to make a knot in the cord so that the beads don't slip off. I don't make this knot beforehand because it makes it more challenging to stitch in the cord.


Continue sewing the hexagons together until there is one side still open. If you squeeze the sides gently it will pop open making it easier to stuff! Stuff it so it is nice and firm making sure to get the filling right into the corners. HELPFUL TIP: I like to use a bamboo skewer or and orange stick to tuck the stuffing inside because the wood "grabs" the stuffing.


Once it is stuffed stitch the opening closed. Do not tie off the thread - you will use it for the beading.  At this point you can remove the basting threads or you can wait until you've finished beading. The papers will remain inside the the fob.  To bead the edge take a pony bead (the red one) and a seed bead (the green one) on your needle and slide them onto the thread.


Take your needle through just the pony bead and into the hexagon. Bring up your needle a few threads over; this is the point where the next bead will be attached. Draw up your thread to snug the beads up to your hexagon. The green seed bead will appear to sit on top of the red pony bead. Continue adding beads in the following manner all around the hexagon: slide a seed bead on your needle, take a stitch into the hexagon through the same spot as your thread and bring the point of your needle up a few threads over. Draw up the thread to snug the bead up against the hexagon. When you get to each corner you will pick up a pony bead and a seed bead and you will take your needle through just the pony bead.

At some point you may run short of thread. When this happens take a few small stitches as though you were sewing the hexagons together. Take a stitch in the same spot to make a loop and run your needle through the loop two or three times. Draw up the thread and a tiny knot will form on the sewing line. Take your needle through the same hole and draw it up on the back. Clip the thread.


To start a new thread make a knot in  your thread. Bring the needle up through the back hexagon and up on the sewing line where the next bead will be stitched. Give your thread a tug to bury the knot. Take a stitch to anchor your thread and continue beading.


When you get to the last bead you will want to take a few tiny stitches to anchor your thread. Take one last stitch in the same spot to make a loop and run your thread through it two or three times. When you draw up your thread a tiny knot will form on the sewing line.


Take your needle down through this knot on the sewing line and draw it up on the back hexagon. Clip your thread. If you haven't already done so, remove your basting stitches and you are done! The paper templates will remain inside the fob.


And here is the finished scissor fob!


I hope you've enjoyed my little tutorial for making a Hexagon Scissor Fob Pincushion! You can make them so pretty with a piece of fabric that is fussy cut and some gorgeous beads. My Guild has a quilt show coming up in September and there will be a members' boutique where we can sell our wares. I plan on making some of these fobs to sell! I hope that they will be a hit!

Speaking of beads, I am addicted to them and can never resist adding to my collection. One of the shops I really like is BeadFX. If you are like me you'll be drooling over all of the gorgeous beads that are available! A girl can never have too many sparkly bits!

Until I post again, happy sewing!
Karen H

Tuesday, June 3, 2014

Little gifts, more Grannies and the latest African quilt

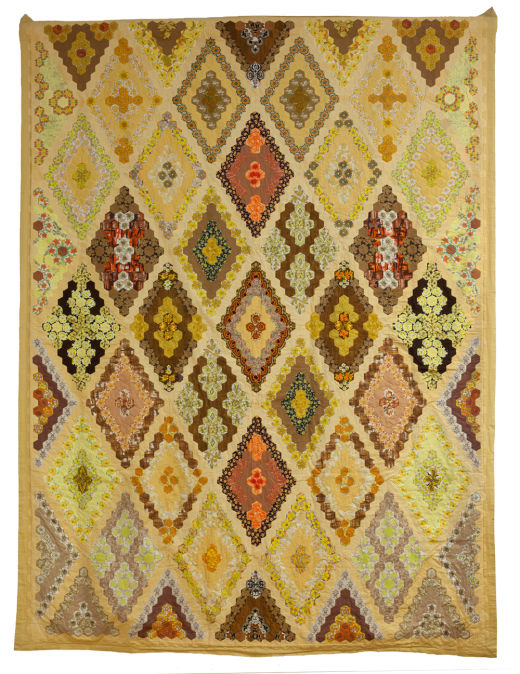
Yesterday Dorothy left a comment and she asked what are Godstone Grannies (GG). Dorothy is new to my blog and she is a no-reply blogger so I couldn't email her directly. For those of you who are new to my blog I send an email reply to every comment.. So what is the Godstone Grannies (GG) quilt (or coverlet as it is described)? It is a quilt that was made by a group of women in the WI Denman College. I came across a picture of the quilt at the Quilt Museum and Gallery in York. The quilt was made in the early to mid 1960s. You can read my post about it here.
Godstone Grannies Coverlet, c1960-1965

 I've made three little gifts to go with the tote bag for my secret partner. She likes hexagons so I hope that these will tickle her fancy. On the left is a hardcover needle book. I used a pattern from The Studiolo which you can find here. On the far right is a tissue hold which I made from a tutorial on Melinda's Quilts Etc blog and you will find the instructions here. Both are super easy patterns, especially the tissue holder. If it takes you more than five minutes to make you probably took a coffee break! Really, it goes together that quickly!

 In the middle is a scissor fob/pincushion and it is my own design!


I fussy cut the elephant and a complementary fabric for the back of the fob and basted both to paper hexagons. Once stitched together and stuffed I embellished with beads. The fob has a looped cord so it can be attached to a pair of scissors. It sure makes finding the scissors easy when there's a mess on the table (not my table of course but someone else's messy table)! Or it can just be used as a mini pincushion. I think it is adorable! If anyone wants a detailed tutorial just leave me a comment and I'll work on it!


My Mom has another African quilt on the go. She has asked me to quilt it for her and of course I am happy to do that for her. Once quilted she will be adding the embellishments! Can't wait to see what she does but I know it will be interesting. I'll baste it up and quilt it. Fingers crossed I'll be able to show you the quilting later this week! The inspiration for this quilt was Allison Wilbur's quilt which she made for Quilt for Change. To find out more please go here!


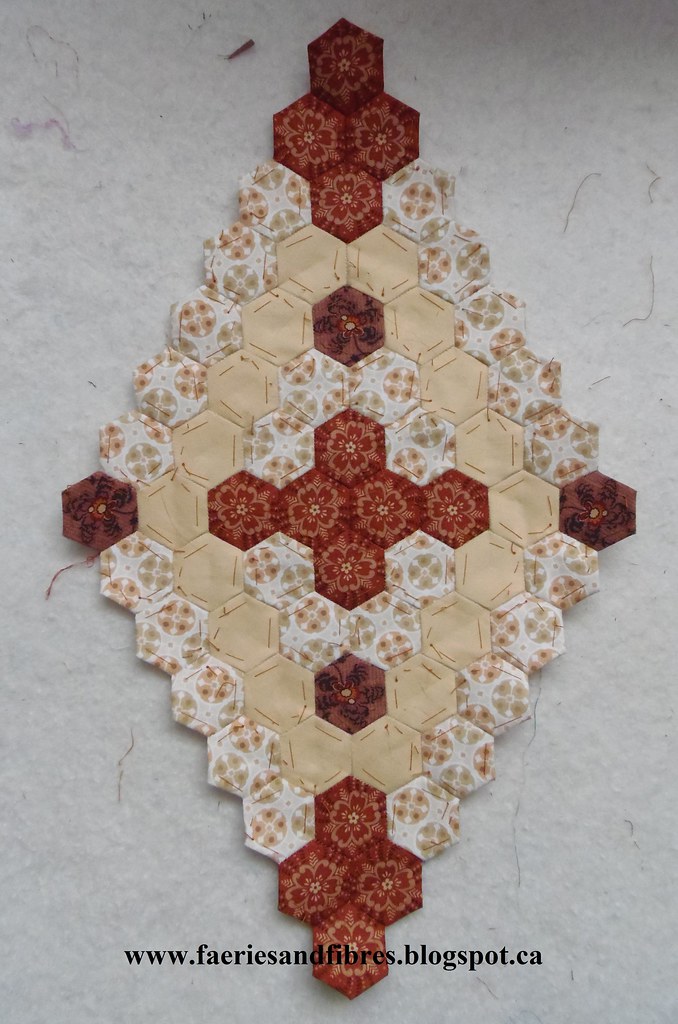
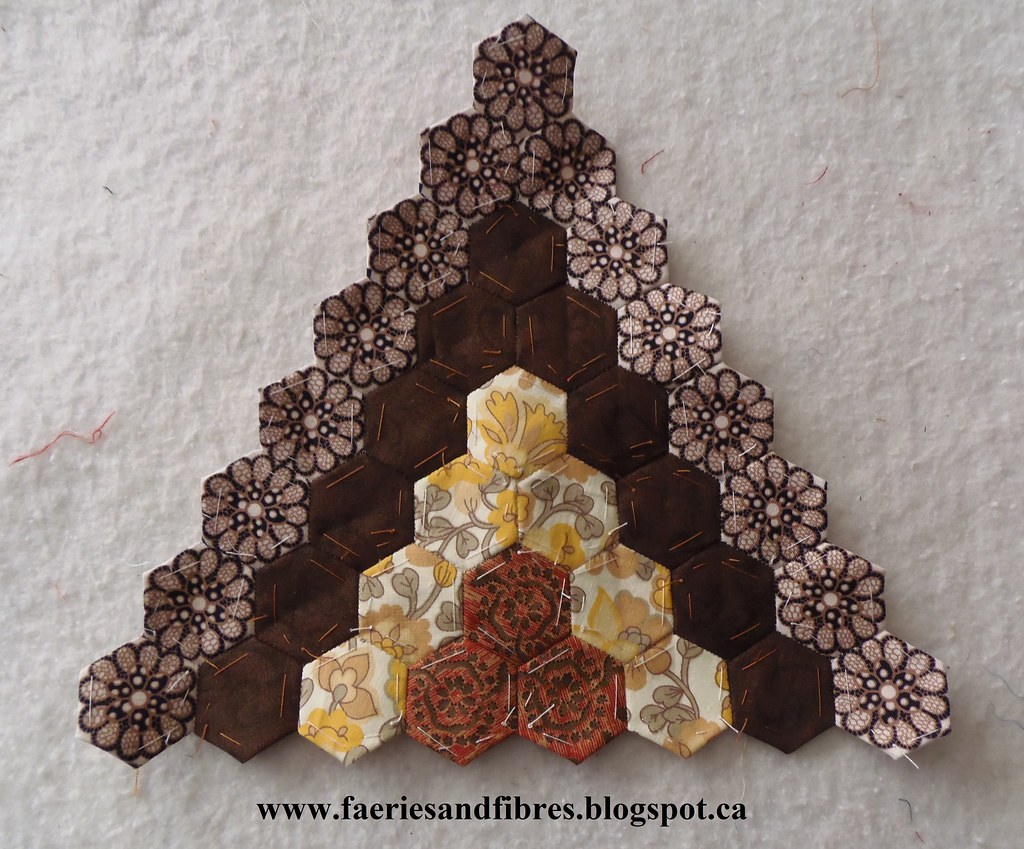
Are you sick of seeing my Godstone Grannies (GG) blocks? Well the "to be stitched" pile is getting smaller and smaller so pretty soon I'l be showing you pictures of the GG blocks being stitched together into the quilt top! For now I've got two more blocks to share!


This is another GG filler block for the bottom edge of the quilt.


That's about it for today. Looks like I have some quilting to to so until I post again, happy sewing!
Karen H