Showing posts with label stripes. Show all posts

Saturday, February 6, 2016

What to do with all the little beauties?

If you've been following my blog you know I have a giveaway running right now. I've just published five new booklets of hexagons designs in my Craftsy shop. You have until Sunday, February 7, 2016 at 09:00 EST (that's 9:00 a.m. EST) to enter. You could be one of five lucky winners of one of my Easier Than Pie & Beyond booklets of hexagon designs. To enter simply leave a comment on this post telling me which booklet is your favourite! The designs look complicated but are so easy you won't believe it! If you can baste a hexagon and sew a straight line you will have no problem mastering these elegant designs!

I've promised to show you what I did with my hexagon rosettes made using my Easier Than Pie & Beyond methods and designs. So let me start off by showing you what a bunch of them looked like tacked to a small design wall. When selecting fabrics they were not made to go together; they are all made with scraps and leftover strips of fabric. I made them simply to illustrate my designs.  Each one is a little gem but I think that when they are clustered together so closely they loose a little of their sparkle. They need some distance between them in order to shine.


So what is the solution? Well I could have cut squares of fabric and appliqued each one to a square and then simply stitched the squares together with or without a sashing OR I could have surrounded each rosette with another round of hexagons and then sew them together with a path of hexagons. Rather than make a decision right off the bat I decided to delve into my stash of fabrics and look for inspiration. My gut told me that the rosettes had a buttery feel to them so I focused on buttery coloured fabrics and this is what I pulled.


The top fabric is what I used in the centre of each rosette . The next fabric had some of the same colours. It isn't a fabric I would have normally selected when shopping but it was under $5/yard (this girl loves a bargain) so I bought a couple of yards with a view to fussy cutting them at a future date. I wasn't crazy about the fabric which made the idea of hacking it up much easier! The bottom fabric was a small piece of fabric sent to me by a friend. I love directional prints and this is right up there as one of my favourites. My plan was to surround each rosette with the bottom two fabrics.

I have also been holding on to a smaller piece of fabric that would make a lovely border and it worked perfectly with the colours I had already selected. I wasn't sure whether I would use the floral print as a border or the black and gold bar print portion. I didn't have enough of the fabric to be able to use both parts. That decision would have to wait. The first thing to do was make an open donut that would surround each rosette.


I made an open donut to surround each rosette. Notice how I captured just half of the brown print from the middle fabric. I think it looks like little crowns that will look perfect atop each hexagon in my rosettes. The buttery yellow striped fabric positively vibrates! I used the stripes as my registration marks to line up my hexagons for placement and then cutting.


I know you are wondering what the rosettes will look like when they are surrounded by the open donut. Here is the first rosette. It is called Blenderizer and it is in Booklet 4 of my Easier Than Pie & Beyond hexagon rosette patterns.


Here is another rosette, Tea Time from Booklet 1. Notice that I didn't capture the same part of the striped print as in the rosette above. That is because I wanted to use the fabric efficiently and the repeat (the distance between the beginning of the print) was quite large so the space in between would have been wasted. Instead I cut one set of hexagons and then moved just enough to cut the next set of hexagons on the strip. In doing this there was very little waste and while the part of the stripe that was used is different around each rosette they all work because they are cut from the same fabric.


Once all the rosettes were surrounded it was time to decide "what next". I have written about breaking down hexagons into component shapes such as diamonds and triangles.  My Road 66 is made with diamonds and triangles as connectors and that is what I decided to do with my Easier Than Pie & Beyond rosettes. I had a fabric in mind and hoped it would work. It did!

Tomorrow I'll announce the winners of my draw and will tell you more about the Easier Than Pie & Beyond quilt top! Don't forget to leave a comment here to be entered to win one of my books of patterns! Until tomorrow, happy sewing!

One last bit of business, I'm linking up with The Needle and Thread Network's WIP where Canadian textile/fibre/fabric artist bloggers share with others. If you are a Canadian blogger why not join it and if you are from other part, pop on over and see what others are doing!

Karen H

Thursday, July 3, 2014

Working with directional prints and 81

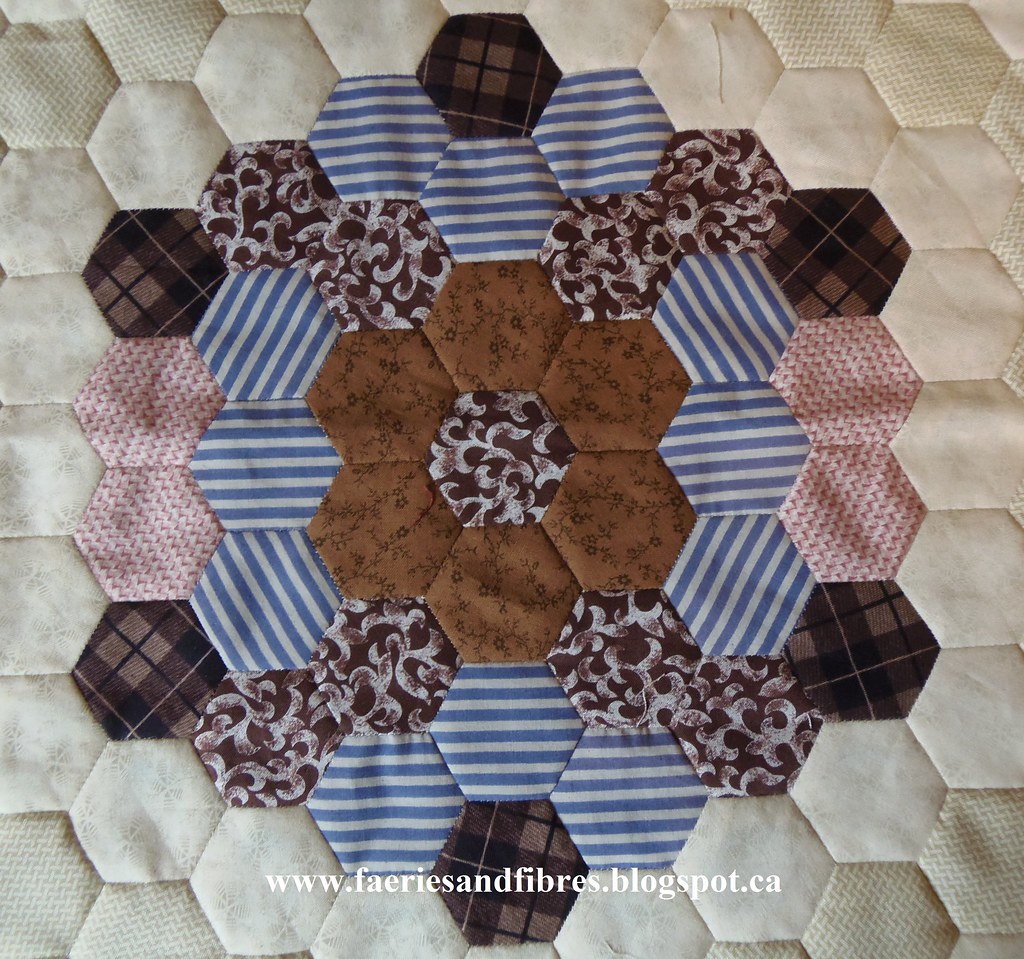
When I published the pattern for Block 6 of my Value Proposition Hexagon Quilt Along (QAL) I suggested that if you work with a directional print such as a stripe that you pay particular attention to the direction of the stripes. Below is my Block 6. Notice how the direction of the stripes on the sides are mirror images. The same is true for the top and bottom. I find that this formal balance is easier on the eyes and it places the focus is on the block design and the central rosette in particular. When the stripes are just placed any which way the eye can't find a place to rest.


I want to thank Bunny of The Creative Hare for allowing me to share her attempts at Block 6 with you. Bunny had asked me to look at her block and tell her what I thought of her first attempt. The colours are wonderful (that batik glows like a sunset) but the stripes do not appear to be arranged in any particular fashion. It is hard to know where to look - the block is loaded with movement but it is frenetic which is to say wild and uncontrolled. When I look the block my eyes are drawn to the striped hexagons on the left side. I suggested that she rearrange the stripes with the goal of making them more symmetrical.


This is Bunny's second attempt. While the top and bottom are not identical they are very similar and the result is a much more balanced and visually pleasing block. The stripes also create a subtle secondary pattern and that focuses the eye on the rosette in the center of the block. I also think that the colours are more pronounced in this block! The block has a more complex and layered look and all that was required was to move around the directional fabric hexagons! Simply beautiful!


This lesson can be applied to all blocks, not just hexagons, and the result will be a block or quilt that is much more interesting! Try it with a small nine patch block to see what happens! One more skill to add to your tool box!

My Guild is having a quilt show in September and there's nothing like a quilt show to light a fire. I've registered several quilts and half of them are not yet quilted. One of the quilts is 81 The Giant Monstrosity. It looks washed out with the light shining through it but it is anything but washed out.


I've appliqued little butterflies all over the quilt but have done so in a symmetrical fashion!


81 is big..... 92" x 95" and I've been worried about quilting something so large. But I've pin basted the quilt and last night I bit the bullet and got started. I was thinking that the 9" harp in the Jukster might be tight but as it turns out it is just fine. Let the quilting begin!


Until I post again, happy playing around with your directional prints!
Karen H

Thursday, August 22, 2013

Picadilly to the Nines - How I cut striped fabric for the border

All of the hourglass blocks are sewn into nine patches. The next step is to sew them together to make the border. I need a break from part of the quilt so decided to work on the small striped border that will be between the centre panel and the hourglass blocks.


That means it is time to cut the striped fabric! Stripes are easy to cut because the print can be used as a cutting guide. I need strips that are 2 1/4" wide. There is a thin gold stripe with a dark band on either side. I will use this gold line as my placement guide. It will be the centre of the strips this means there will be 1 1/8" on either side of the gold line 1 1/8 + 1 1/8 = 2 1/4").


I used a 6 1/2" ruler and lined the 1 1/8" mark at the top and bottom of the ruler on the gold line. I placed white dots on the gold line for the photograph. I like to use the smaller ruler because I get a more accurate cut. A 12" ruler is just too long for this delicate job.


1 1/8" mark at the top

1 1/8" mark at the bottom


I cut and them move the ruler lining up the 1 1/8" marks and cut another six inches until I've cut the length of the fabric. Once the strip is cut I turn so the fresh cut edge is to my left. I line up the 2 1/4" mark on that edge I trim the excess fabric on the right.


I repeat this process until I have the desired number of strips.
 
I cut the first to strips and was so eager to see how this border would look on the quilt that I decided to stitch them to the quilt right away! I am really happy with how it looks! And when the hourglass blocks are added it is going to be a bobby dazzler!
 
 
Look how perfectly the pattern matches up on the mitre! Stripes are so much fun to work with and they add a special touch to quilts. When you know how to cut them it is a breeze and sure to impress!


I've also been working on the diamonds that will go in the border of 81. My plan was a border around the entire quilt with a line of diamonds appliqued to the background fabric to finish the quilt top as was done on the original.
 
My quilt "81"

Diamond border on the original

I've decided a row of single diamonds won't be substantial enough for my quilt. As I played around with the based diamonds I realized that four stitched together into a larger diamond will be more dramatic so that's what I've been doing. These are some of the diamonds I've made.


And this is what they will look like on a border strip....much better!


Until I post again, happy sewing!