No, wait....it's measure twice and cut once. Doh!!! I cut some background blocks onto which I planned to applique four of my Brinton Hall rosettes and applique them I did. When I put the four blocks together to admire my work I realized that two of them were smaller. I quick check revealed that I cut two of the backgrounds 1/2" narrower (the length was fine). As my old Mom would say, dough head! What's a quilt maker to do? Well these blocks are alternated with squares of print fabric so I might just cut some of the print squares a little larger so that I don't have to re-do the blocks. Or I will reverse sew, cut two more background squares and applique the hexagon rosettes for the second time. My mantra is "if it bothers you fix it but if you can live with it, live with it". I like to let a little time pass before I make my decision. It is amazing but the more time that passes, the easier it is to live with the little imperfections. It is kind of like wrinkles. The first one comes as a bit of a shock but after while you learn that you can live with it (and its many neighbours).
I've got four more rosettes made for my Brinton Hall quilt. I adore this fabric and do not want to waste even a scrap of it so what I did was put the fabric on my printer and I made a copy. I cut out hexagons from different parts of the fabric and when I liked what I saw I place the copied fabric and cut out the real fabric being sure to leave a generous seam allowance. I generally use a 3/8" for all of my English paper pieced hexagons.
This is one of my favourite fabrics. I love not only the colour but also the energy of the wavy stripe. I wish there were more of these types of fabrics on the market.
Isn't this one fun? I love the effect of the pale green arches - they look like curve edged star points.
This is hands down one of my favourites. This is yet another wavy print that creates so much visual interest. I think that the turquoise/red colour combination is an absolute classic.
I've also been working on The Meadery. The central medallion is still in the works but I've started on some of the outer components. There will be two large diamonds that will be on either side of the medallion. I'm not sure what I will put in the middle of the diamonds so while I give it a little more thought constructed the first two rounds of diamond hexagons. I'm using my open donut method so this means the diamonds are not stitched closed and they won't be closed until I start adding them to what I put in the middle. So here is the first round. It is a directional print so I was careful with the placement of the hexagons.
This will be the second round and it too is a directional print. The colour looks washed out but it is a lovely creamy yellow - like Cornish clotted cream. Yum!
This is what the two rounds together. There will be at least another three rounds but I've not decided what colours I'll use although I want to stay within the cream and honey family.
I had previously shown you my little hexagon pincushion.
I wasn't 100% satisfied with it so I played around with it and I've made a second pincushion. I'm much happier with the results. I'm going to write up the instructions and I'll share with you how I made it so that you can make your own. Time permitting I'll have it available on Friday. Failing that it will be sometime this weekend.
I thought you might enjoy seeing a new picture of Jinx. He likes to climb a ladder to get on top of the arbor. Here he is sitting atop the ladder. What a guy! I can't believe he has been with us for a year. Where does the time go? The good news is that he is maturing and has (for the most part) stopped stealing my sewing!
I'm linking up with Feline Friday over at Sarah Did It. Who knew that cats like tomato soup? I sure didn't!
That's it for today. Until I post again, happy sewing!
Karen H
Showing posts with label Brinton Hall. Show all posts
Wednesday, August 26, 2015
Monday, August 24, 2015
I've been busy and more blocks
Phew! I've been busy, way too busy lately! I'll be teaching a workshop on English paper piecing in London, Ontario this fall. I've been putting together my course material and samples and wanted to test out the course so I ran a mini workshop on Saturday. I had a few samples on the table to help inspired and get the creative juices flowing. In no time flat I had the students sewing up a storm.
I was able to fine tune my workshop and it is ready to go. I won't share a picture of my class sample because if you've never done any English paper piecing you would be overwhelmed and think that you couldn't make it. However once I share my tips and techniques it is the easiest thing ever!
I've been on a couple of road trips to quilt shops - such a treat for someone who doesn't drive. I went to Sew Sisters in the west end of Toronto. She has a good selection of contemporary prints and wonderful pricing. There is always a room full of sale fabrics. I bought fabric.
I've also been to Quilt Junction in Waterford, Ontario. This is a really lovely little store with a wonderful selection of the types of prints I love - old fashioned florals and Civil War type prints.The owner is Lana and she is very warm and welcoming. We talked briefly about the possibility of a workshop so if you live out that way and are interested sign up for the shop newsletter. I bought fabric.
The third shop I visited was The Quilting Bee in Fonthill, Ontario. There is a huge selection of Civil War prints and floral prints. This shop is bright and airy and there is a large sale section in the loft. This is my second visit to this shop (I went last year to hear Edyta Sitar). I bought fabric.
I've been trying to work on my Brinton Hall quilt (from QuiltMania magazine) and have some hexagon rosettes stitched (these are 1" hexagons). Here are the first four. They must be appliqued to a background fabric.
The six outer hexagons are from a treasured piece of fabric sent to my be a friend in the US. It is a border print so careful cutting produced that narrow orange ring around the centre.
I love what can be done with chevron type prints. I chose to use a centre hexagon that resembles the outer fabric so that the entire unit appears to be cut from a single piece of fabric. What fun!
The centre of this rosette was made from the last scrap of the fabric used for the first rosette. Directional prints create such vibrant and lively blocks, don't you agree?
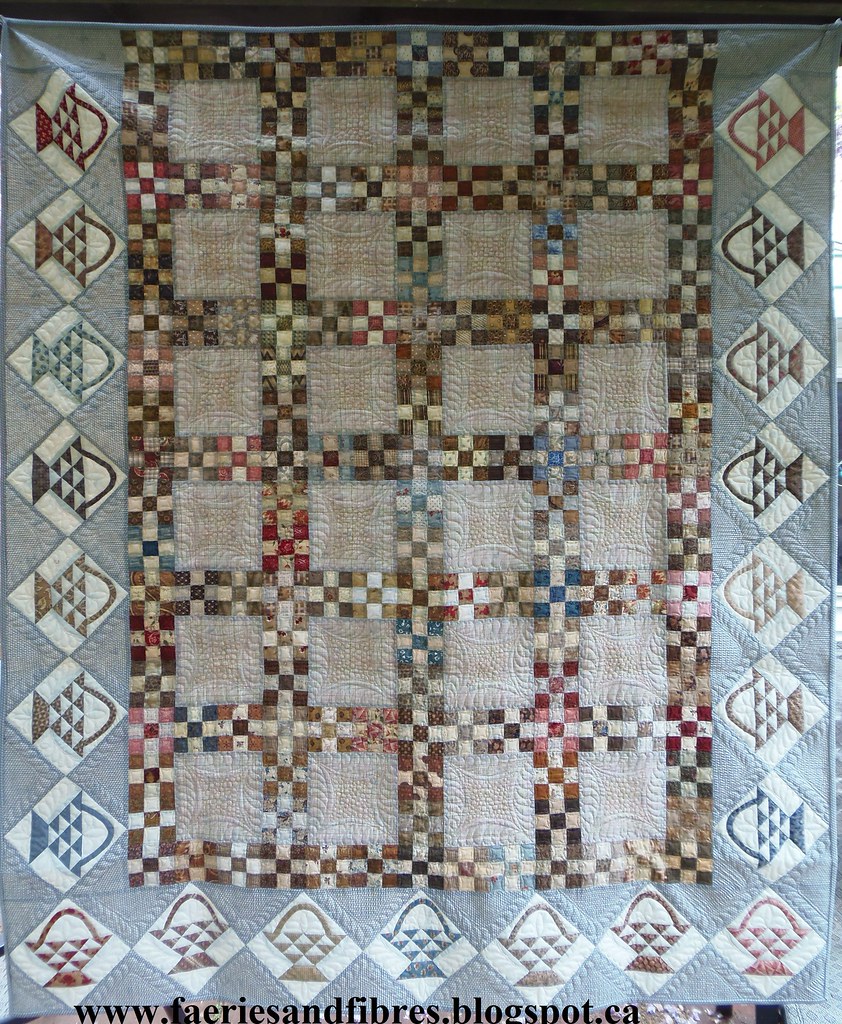
One final note is that I have had several of my patterns listed for free so if you haven't downloaded them yet now is the time to do so. As you know I've been moving them over to Craftsy and will start charging a small fee for at least two of the patterns starting in early September. Those patterns will be 81 The Giant Monstrosity and Baskets and Nine Patches.
I was able to fine tune my workshop and it is ready to go. I won't share a picture of my class sample because if you've never done any English paper piecing you would be overwhelmed and think that you couldn't make it. However once I share my tips and techniques it is the easiest thing ever!
I've been on a couple of road trips to quilt shops - such a treat for someone who doesn't drive. I went to Sew Sisters in the west end of Toronto. She has a good selection of contemporary prints and wonderful pricing. There is always a room full of sale fabrics. I bought fabric.
I've also been to Quilt Junction in Waterford, Ontario. This is a really lovely little store with a wonderful selection of the types of prints I love - old fashioned florals and Civil War type prints.The owner is Lana and she is very warm and welcoming. We talked briefly about the possibility of a workshop so if you live out that way and are interested sign up for the shop newsletter. I bought fabric.
The third shop I visited was The Quilting Bee in Fonthill, Ontario. There is a huge selection of Civil War prints and floral prints. This shop is bright and airy and there is a large sale section in the loft. This is my second visit to this shop (I went last year to hear Edyta Sitar). I bought fabric.
I've been trying to work on my Brinton Hall quilt (from QuiltMania magazine) and have some hexagon rosettes stitched (these are 1" hexagons). Here are the first four. They must be appliqued to a background fabric.
The six outer hexagons are from a treasured piece of fabric sent to my be a friend in the US. It is a border print so careful cutting produced that narrow orange ring around the centre.
I love what can be done with chevron type prints. I chose to use a centre hexagon that resembles the outer fabric so that the entire unit appears to be cut from a single piece of fabric. What fun!
The centre of this rosette was made from the last scrap of the fabric used for the first rosette. Directional prints create such vibrant and lively blocks, don't you agree?
One final note is that I have had several of my patterns listed for free so if you haven't downloaded them yet now is the time to do so. As you know I've been moving them over to Craftsy and will start charging a small fee for at least two of the patterns starting in early September. Those patterns will be 81 The Giant Monstrosity and Baskets and Nine Patches.
81 The Giant Monstrosity
Baskets and Nine Patches
I've got lots more ideas and patterns in the works. As they are published I will make them available free of charge for a period of time so that all you lovely readers can download them. After that I'll move them over to my Craftsy store Faeries and Fibres.
Today I think my day is free so I plan on getting some work done. My fingers are just itching to sew and sew they shall! Until I post again, happy sewing!
Karen H
Friday, July 24, 2015
Green Parrot and Brinton Hall
I've third and final round of hexagons to the top section of my Green Parrot hexagon quilt. I used the same pale green that I used in the medallion. I'm going to have to add a few more hexagons to the corners so I can square it up later.
When I place this top section above the middle section you can see the overall design begin to emerge. You can see the red stars that were removed from my Birds in the Loft quilt. There are three in the picture below and there is one more in the bottom section. Most of the rosettes were removed from the same quilt (and they were already stitched together) so that is why this quilt is coming together so quickly.
The next step is to add the pale green border to the bottom section, make the corner fillers and sew all three sections together into a quilt top. The end is in sight! Yahoo!
The next issue of Quiltmania should be in my mailbox any day now and I am looking forward to the second installment of Leigh Lattimore's Brinton Hall quilt which was inspired by the Brereton bed hangings. The original quilt was made by Anna Margaretta Brereton (nee Lloyd) of Brinton Hall. I was contacted by her 3x great granddaughter and she provided me with some wonderful information about the original quilt which was made in 1800. What I found particularly interesting was that the quilt has undergone at least two remodels. The first was in 1820 or 1830 and at that time diagonal inset strips were added by another quilt maker. One hundred years later it was cut in half vertically and reworked. There was no explanation for either revision to the quilt.
Leigh's interpretation of the bed hangings is much more colourful. I am seriously tempted to create my own interpretation but not until I finish one or two other things. For now I'll share a picture of what I've done so far. The centre section of seven medallions and the long strips at the edges are all thread basted to the pieced background. The blue looks quite vivid on my monitor but it is actually a dull, dusty blue.
There is a narrow 3/4" border to be added to this but I won't stitch it down until I've finished the applique. Are you making a Brinton Hall quilt? If you post pictures on your blog please leave a comment with a link to your blog post so we can all see what you are doing! So far I know of or have found the following:
Karen H
When I place this top section above the middle section you can see the overall design begin to emerge. You can see the red stars that were removed from my Birds in the Loft quilt. There are three in the picture below and there is one more in the bottom section. Most of the rosettes were removed from the same quilt (and they were already stitched together) so that is why this quilt is coming together so quickly.
The next step is to add the pale green border to the bottom section, make the corner fillers and sew all three sections together into a quilt top. The end is in sight! Yahoo!
The next issue of Quiltmania should be in my mailbox any day now and I am looking forward to the second installment of Leigh Lattimore's Brinton Hall quilt which was inspired by the Brereton bed hangings. The original quilt was made by Anna Margaretta Brereton (nee Lloyd) of Brinton Hall. I was contacted by her 3x great granddaughter and she provided me with some wonderful information about the original quilt which was made in 1800. What I found particularly interesting was that the quilt has undergone at least two remodels. The first was in 1820 or 1830 and at that time diagonal inset strips were added by another quilt maker. One hundred years later it was cut in half vertically and reworked. There was no explanation for either revision to the quilt.
Leigh's interpretation of the bed hangings is much more colourful. I am seriously tempted to create my own interpretation but not until I finish one or two other things. For now I'll share a picture of what I've done so far. The centre section of seven medallions and the long strips at the edges are all thread basted to the pieced background. The blue looks quite vivid on my monitor but it is actually a dull, dusty blue.
There is a narrow 3/4" border to be added to this but I won't stitch it down until I've finished the applique. Are you making a Brinton Hall quilt? If you post pictures on your blog please leave a comment with a link to your blog post so we can all see what you are doing! So far I know of or have found the following:
- LuAnn of Loose Threads is here;
- Nan of Do It Right Quilter is here;
- Nathalie of Les Tresors de Nath is here;
- Cecile of Inspirations is here;
- Kelly of Always Applique is here and
- Katy of Katy Quilts is here.
Karen H
Saturday, June 20, 2015
Row by row I'm making slow progress
I've had a busy several days so there isn't much sewing to show but I did get my Brinton Hall blocks stitched into rows and I've also made all of the filler pieces for the top, bottom, corners and sides. First I'll start with the rows.
These are the filler pieces. I've made six of the unit at the top. It will fill in the "V" in the top and bottom rows and also it will also fill out the corners as it connects to the side units of which there are four.
When joined this is what the units that fit the corners will look like.
The top and bottom rows have all of their fillers attached. The middle row is snuggled up between them to give you an idea of how it will look!
So now the rows can be stitched together and then the whole thing will be appliqued to a background fabric. So far everything has come from my stash and I've got a lovely blue that will work just fine for the background. My plan is to prepare it today so that once the rows are stitched together I will be ready for the next step!
It is a short post today. Hopefully there'll be more to share soon! Until I post again, happy sewing.
Karen H
These are the filler pieces. I've made six of the unit at the top. It will fill in the "V" in the top and bottom rows and also it will also fill out the corners as it connects to the side units of which there are four.
When joined this is what the units that fit the corners will look like.
The top and bottom rows have all of their fillers attached. The middle row is snuggled up between them to give you an idea of how it will look!
So now the rows can be stitched together and then the whole thing will be appliqued to a background fabric. So far everything has come from my stash and I've got a lovely blue that will work just fine for the background. My plan is to prepare it today so that once the rows are stitched together I will be ready for the next step!
It is a short post today. Hopefully there'll be more to share soon! Until I post again, happy sewing.
Karen H
Wednesday, June 17, 2015
Brinton, a bird and Enduring Grace
The last two blocks for the centre of Brinton Hall are now stitched! This is a series quilt from QuiltMania magazine and it began with issue 107.
The next step is to sew the seven blocks together and then add the filler pieces.
I've also added a dark round to the parrot block which is for the quilt that will be made with the leftover rows from Birds in the Loft. The dark border really makes the centre shine. I'm pulling fabrics for the next rounds and am narrowing down my choices. I really need to come up with a name for this quilt because it helps me keep the project organized in my mind!
I've also got another picture of the old hexagon quilt project I pulled out. It is my version of a quilt in the Shelburne Museum collection. It was pictured in a book Enduring Grace by C&T publishing. The original quilt was made by Jane Morton Cook in 1820-1840. The book was published in 1997 and I think I bought it around that time so I expect that is when I started the quilt!
There was no pattern in the book so I drafted my own. Here is a picture of the centre of my quilt. I appliqued the hexagon unit to borders and then there are small and large hexagon rosettes appliqued in the borders. All are finished except for the corners. I stopped when I reached the point where I had to stitch the corner units to the borders. I've now set them in and am basting the rosettes (which were already made) so that they can be appliqued. The quilt will need a border and the fabric has been ordered and should be here any day now!
So many projects on the go and not enough time! Plus I've still got oodles of ideas for more quilts.
Until I post again, happy sewing!
Karen H
The next step is to sew the seven blocks together and then add the filler pieces.
I've also added a dark round to the parrot block which is for the quilt that will be made with the leftover rows from Birds in the Loft. The dark border really makes the centre shine. I'm pulling fabrics for the next rounds and am narrowing down my choices. I really need to come up with a name for this quilt because it helps me keep the project organized in my mind!
I've also got another picture of the old hexagon quilt project I pulled out. It is my version of a quilt in the Shelburne Museum collection. It was pictured in a book Enduring Grace by C&T publishing. The original quilt was made by Jane Morton Cook in 1820-1840. The book was published in 1997 and I think I bought it around that time so I expect that is when I started the quilt!
There was no pattern in the book so I drafted my own. Here is a picture of the centre of my quilt. I appliqued the hexagon unit to borders and then there are small and large hexagon rosettes appliqued in the borders. All are finished except for the corners. I stopped when I reached the point where I had to stitch the corner units to the borders. I've now set them in and am basting the rosettes (which were already made) so that they can be appliqued. The quilt will need a border and the fabric has been ordered and should be here any day now!
So many projects on the go and not enough time! Plus I've still got oodles of ideas for more quilts.
Until I post again, happy sewing!
Karen H
Monday, June 15, 2015
Birds and more
Two more Brinton Hall blocks are stitched. Do you recognize the bird fabric in the first one? It is from the same fabric that I used for the four medallions in Birds in the Loft! I love the old fashioned look of those little birds. The remind me of pretty little postcards from the early 1900s.
I love the little basket filled with flowers!
That's a total of five picture blocks made which means there are only two to go! I've also been sewing together scraps for the pieces that will fill in the sides. I need a total of four of them.
I love making these fabric pictures framed with hexagons so I've made one as a centerpiece for a medallion quilt that will be combined with the extra rows of rosettes that I removed from Birds in The Loft. It looks a little insipid and pale but I plan to add to it so that it is more dramatic!
I've got another picture of one of my old incomplete quilt tops that I came across. I showed you a picture of part of it in my last post. This is the centre medallion. You can see there is a hard crease from being folded for such a long period of time. I estimate I made this more than ten years ago. I'm determined to complete the quilt top in the next few weeks so stay tuned for more pictures!
Looks like I've got my work cut out for me so I had best get going. Until I post again, happy sewing!
Karen H
I love the little basket filled with flowers!
That's a total of five picture blocks made which means there are only two to go! I've also been sewing together scraps for the pieces that will fill in the sides. I need a total of four of them.
I love making these fabric pictures framed with hexagons so I've made one as a centerpiece for a medallion quilt that will be combined with the extra rows of rosettes that I removed from Birds in The Loft. It looks a little insipid and pale but I plan to add to it so that it is more dramatic!
I've got another picture of one of my old incomplete quilt tops that I came across. I showed you a picture of part of it in my last post. This is the centre medallion. You can see there is a hard crease from being folded for such a long period of time. I estimate I made this more than ten years ago. I'm determined to complete the quilt top in the next few weeks so stay tuned for more pictures!
Looks like I've got my work cut out for me so I had best get going. Until I post again, happy sewing!
Karen H
Saturday, June 13, 2015
Brinton blocks and more
I've completed two more blocks for my Brinton Hall quilt. These blocks come together so quickly. If you missed how I made them you can read about it here. The hexagons are 1". I cut 2 1/2" strips of fabric (across the width of fabric) and rapidly cut the hexagons for the frame.
I've also been basting leftovers for the side filler pieces that will be needed when the blocks are made and stitched together.
I've added the final wavy appliqued border to the sides of Value Proposition and I've removed four rows from Birds in the Loft to make it less large. It is now 100" long (give or take) and I can live with that.Unfortunately it is raining so the pictures will have to wait until it is dry outside. I've designing a medallion that I can surround with the leftover rosettes from Birds. I need to sort out the colours I'll use and then I can start cutting and basting!
I found another hexagon project in with my fabric and most of the work was done but I think I got sick of it so I just put it away. I've had a look at it and am in love once again so I'm going to finish it up. Here's a sneak peak. More about this quilt in the days to come!
I'll leave you with a picture of the lads, Gump (left) and baby Jinx (right). It is so funny how the old guy fell in love with the baby (he generally hates all other cats). These two are inseparable now! Mind you I think Gump would be just as happy if Jinx would just give him a little alone time! For my part I am happy that he appears to be losing his interest in my patches. He hasn't stolen any in weeks however earlier in the week he tried to run away with a pair of scissors! Crazy cat - doesn't he know that you need an opposable thumb to use them and more importantly NO RUNNING WITH SCISSORS JINXY!
My chores await so until I post again, happy sewing!
Karen
I've also been basting leftovers for the side filler pieces that will be needed when the blocks are made and stitched together.
I've added the final wavy appliqued border to the sides of Value Proposition and I've removed four rows from Birds in the Loft to make it less large. It is now 100" long (give or take) and I can live with that.Unfortunately it is raining so the pictures will have to wait until it is dry outside. I've designing a medallion that I can surround with the leftover rosettes from Birds. I need to sort out the colours I'll use and then I can start cutting and basting!
I found another hexagon project in with my fabric and most of the work was done but I think I got sick of it so I just put it away. I've had a look at it and am in love once again so I'm going to finish it up. Here's a sneak peak. More about this quilt in the days to come!
I'll leave you with a picture of the lads, Gump (left) and baby Jinx (right). It is so funny how the old guy fell in love with the baby (he generally hates all other cats). These two are inseparable now! Mind you I think Gump would be just as happy if Jinx would just give him a little alone time! For my part I am happy that he appears to be losing his interest in my patches. He hasn't stolen any in weeks however earlier in the week he tried to run away with a pair of scissors! Crazy cat - doesn't he know that you need an opposable thumb to use them and more importantly NO RUNNING WITH SCISSORS JINXY!
My chores await so until I post again, happy sewing!
Karen
Thursday, June 11, 2015
Brinton Hall - the start and a little tutorial
I've started the blocks for Brinton Hall. The pattern is by Leigh Latimore and Part 1 was published in issue 107 of QUILTmania. One of the things I like about the quilt design are large prints framed by hexagons. This is the same basic method that I used in my quilt Butterscotch Ripple. Both quilts are/will be made with 1" hexagons.
The pattern instructs one to make a ring of hexagons and then applique them to a square of fabric. I'm sure that this works for many but I do things a little differently and today I'll share how I am going to make the seven framed prints!
The first step was to cut out paper hexagons that are the size of the fabric that will be surrounded by a ring of hexagons. I traced around this shape on a blank piece of paper. My goal was to create a window template that I could move around on my fabric to locate the part of the print I wanted to use and to make sure that the print was correctly positioned. I put some small pieces of double-sided tape on the wrong side of the window template.
I moved the window around on my fabric until I was happy with what I saw and then applied some pressure so that the tape would stick to the fabric. I used a Frixion pen to trace inside the window (you could use any fabric safe marker that you like).
The fabric was cut out with scissors leaving a generous 1/2" seam allowance all around.
I placed my ring of hexagons on the fabric lining up the inner edges of the ring with the lines that I drew with my Frixion pen. I used applique pins to hold the ring in place and then I thread basted it to the fabric but glue basting with a product such as Roxanne Glue Baste-It would work equally well.
I'll cut out the remaining six motifs, make the rings and thread baste them to the motifs. Then I'll have a little pile of hand sewing at the ready. But of course I had to sew just one to see how it will look! I've also added the background hexagons (I'll attach the same arrangement of background hexagons to each framed picture).
I love the idea of framing large prints with hexagons. It makes for a quilt that is much faster and easier to make and it is a wonderful way to use fabulous, large prints!
Also I've reached a decision about Birds in the Loft. I am removing two rows from the top section and two rows from the bottom section. The top section rows have been removed and the quilt stitched back together. I'm working on the bottom section. I always sew my rosettes, rows and sections in the same manner so if I have to do any amount of reverse sewing I know exactly how to do it! I'll post pictures of the edited Birds in the Loft when it is finished!
Until I post again, happy sewing!
Karen H
Butterscotch Ripple by Karen H 2013
The pattern instructs one to make a ring of hexagons and then applique them to a square of fabric. I'm sure that this works for many but I do things a little differently and today I'll share how I am going to make the seven framed prints!
The first step was to cut out paper hexagons that are the size of the fabric that will be surrounded by a ring of hexagons. I traced around this shape on a blank piece of paper. My goal was to create a window template that I could move around on my fabric to locate the part of the print I wanted to use and to make sure that the print was correctly positioned. I put some small pieces of double-sided tape on the wrong side of the window template.
I moved the window around on my fabric until I was happy with what I saw and then applied some pressure so that the tape would stick to the fabric. I used a Frixion pen to trace inside the window (you could use any fabric safe marker that you like).
The fabric was cut out with scissors leaving a generous 1/2" seam allowance all around.
I placed my ring of hexagons on the fabric lining up the inner edges of the ring with the lines that I drew with my Frixion pen. I used applique pins to hold the ring in place and then I thread basted it to the fabric but glue basting with a product such as Roxanne Glue Baste-It would work equally well.
I'll cut out the remaining six motifs, make the rings and thread baste them to the motifs. Then I'll have a little pile of hand sewing at the ready. But of course I had to sew just one to see how it will look! I've also added the background hexagons (I'll attach the same arrangement of background hexagons to each framed picture).
I love the idea of framing large prints with hexagons. It makes for a quilt that is much faster and easier to make and it is a wonderful way to use fabulous, large prints!
Also I've reached a decision about Birds in the Loft. I am removing two rows from the top section and two rows from the bottom section. The top section rows have been removed and the quilt stitched back together. I'm working on the bottom section. I always sew my rosettes, rows and sections in the same manner so if I have to do any amount of reverse sewing I know exactly how to do it! I'll post pictures of the edited Birds in the Loft when it is finished!
Until I post again, happy sewing!
Karen H
Tuesday, June 9, 2015
Birds in the Loft - the BIG reveal
I've been busy, very busy! I finished Birds in the Loft and added borders to two other quilt tops. Today I'll share all of them with you plus my next project!
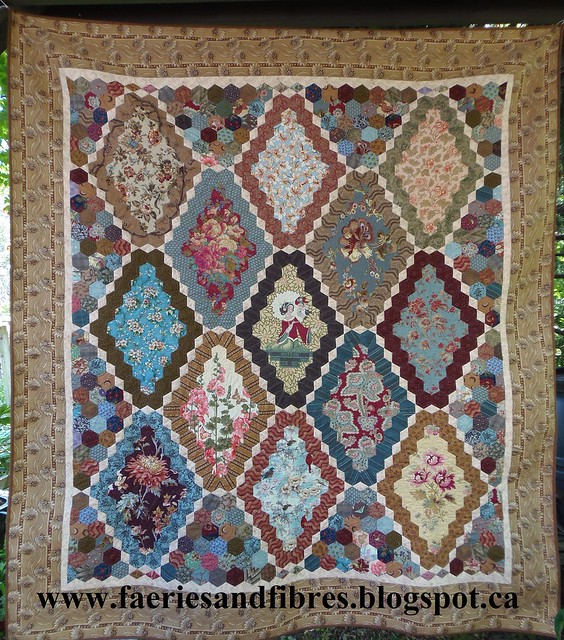
My Birds in the Loft hexagon quilt is together and as promised it is BIG! Very big! It measures a whopping 97" by 128"! Even I was shocked at the measurements and I already knew it was big (I think I was afraid to measure it until it was done). Not only is it big but it is also very heavy. Honestly this means it is not a quilt that could be used because it is too long for even a king size bed!
I ordered a Hobbs Polydown king size batt because it is lightweight (this quilt does not need more weight) and I'll have to look at getting extra wide backing rather than using a pieced backing. Given its size there is a good possibility that it will never get quilted. On the other hand I might just take a couple of rows off the top and two off the bottom to make it shorter. It would still be wide but it would be more of a square than a rectangle. Oh well, I had fun putting it together and for me that's what it is all about. I might have fun taking it apart and putting it back together again too! I am sure that I would eventually find a use for the leftover hexagons (there would be 50 of them if I take out the rows).
For now I have smaller quilts that can be basted for quilting. I added a lovely wide border to my Lozagons hexagon quilt. My plan is to fill that border with free-form feathers similar to those I quilted in Babs quilt Yellow Bird quilt. I'm not sure how I would machine quilt this one and may consider combining hand and machine quilting. I'll decide when it is pinned and ready for quilting!
Finally I added borders to my Value Proposition hexagon quilt. I appliqued the quilt top to side strips and then I added the top and bottom borders. I have a lovely wavy brown stripe fabric and I think I will applique it to the sides of the quilt.
If you are new to my blog Value Proposition was a hexagon quilt along in 2014. You will find all of the instructions and patterns under the tab Quilt Alongs by Karen H at the top of this page.
One final note about Value Proposition; I found a mistake! I am always going on about the use of directional prints and as I started pinning the borders to the quilt I found a mistake. The striped hexagon in the red circle is going in the wrong direction. How the heck did I miss it?
I also tend to go on quite a bit about learning to live with mistakes but if you just can't live with them, then one should fix them. This is a mistake (albeit a tiny mistake) that would bother me so fix it I did. It isn't a big change but it would have bothered me knowing it was there!
I've been casting about for a new project and have settled on a series quilt in QUILTmania (issue 107). The name of the quilt is Brinton Hall by Leigh Latimore. The first part is the blue section with all of the hexagons. I think it will be a great way to use scraps and also to feature some large prints in the seven panels in the centre. I've already started pulling fabrics!
That's it for today. Until I post again happy sewing!
Karen H
My Birds in the Loft hexagon quilt is together and as promised it is BIG! Very big! It measures a whopping 97" by 128"! Even I was shocked at the measurements and I already knew it was big (I think I was afraid to measure it until it was done). Not only is it big but it is also very heavy. Honestly this means it is not a quilt that could be used because it is too long for even a king size bed!
Birds in the Loft by Karen H 2015
I ordered a Hobbs Polydown king size batt because it is lightweight (this quilt does not need more weight) and I'll have to look at getting extra wide backing rather than using a pieced backing. Given its size there is a good possibility that it will never get quilted. On the other hand I might just take a couple of rows off the top and two off the bottom to make it shorter. It would still be wide but it would be more of a square than a rectangle. Oh well, I had fun putting it together and for me that's what it is all about. I might have fun taking it apart and putting it back together again too! I am sure that I would eventually find a use for the leftover hexagons (there would be 50 of them if I take out the rows).
For now I have smaller quilts that can be basted for quilting. I added a lovely wide border to my Lozagons hexagon quilt. My plan is to fill that border with free-form feathers similar to those I quilted in Babs quilt Yellow Bird quilt. I'm not sure how I would machine quilt this one and may consider combining hand and machine quilting. I'll decide when it is pinned and ready for quilting!
Lozagons by Karen H 2015
Finally I added borders to my Value Proposition hexagon quilt. I appliqued the quilt top to side strips and then I added the top and bottom borders. I have a lovely wavy brown stripe fabric and I think I will applique it to the sides of the quilt.
Value Proposition by Karen H 2015
If you are new to my blog Value Proposition was a hexagon quilt along in 2014. You will find all of the instructions and patterns under the tab Quilt Alongs by Karen H at the top of this page.
One final note about Value Proposition; I found a mistake! I am always going on about the use of directional prints and as I started pinning the borders to the quilt I found a mistake. The striped hexagon in the red circle is going in the wrong direction. How the heck did I miss it?
I also tend to go on quite a bit about learning to live with mistakes but if you just can't live with them, then one should fix them. This is a mistake (albeit a tiny mistake) that would bother me so fix it I did. It isn't a big change but it would have bothered me knowing it was there!
I've been casting about for a new project and have settled on a series quilt in QUILTmania (issue 107). The name of the quilt is Brinton Hall by Leigh Latimore. The first part is the blue section with all of the hexagons. I think it will be a great way to use scraps and also to feature some large prints in the seven panels in the centre. I've already started pulling fabrics!
That's it for today. Until I post again happy sewing!
Karen H
Subscribe to:
Posts (Atom)