Showing posts with label Birds in the Loft. Show all posts

Friday, June 26, 2015

Two finishes (sort of)

Today I have two finishes for you. When I say finishes I mean they are quilt tops but they are technically not "finished" because they are not quilted. They will eventually be quilted but I've got a trunk show in July and if I baste them for quilting they will be far too bulky to take to the show. My trunk show will be part of a huge outdoor quilt show in Toronto. It will be at Black Creek Pioneer Village and the name of the show is Quilts at the Creek. I went in 2013 and there were over 300 quilts on display. You can get a sneak peek of what I saw here.  If you are in the Toronto area you really should plan on attending this show. It is well worth the price of admission!

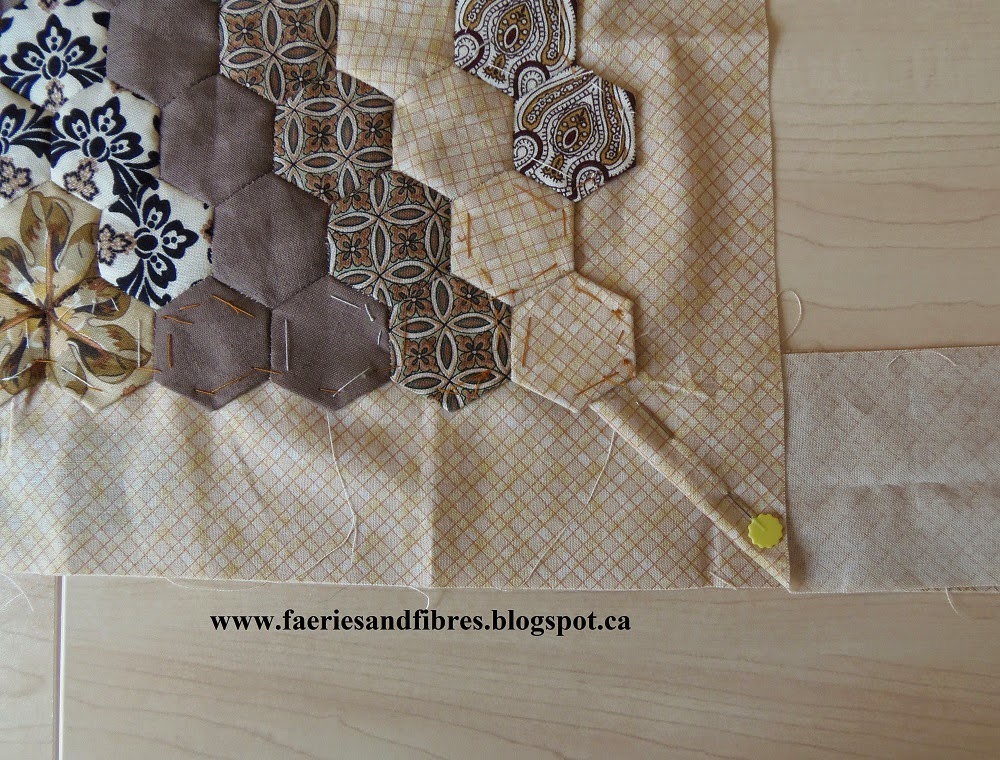
I have finished the border on Value Proposition hexagon quilt. When I last showed it to you I had a print border at the top and bottom and an off-white border on the sides. I thought the side borders looked rather bland and unfinished. They needed something dark on the edges. I have an old wavy print in my stash so I cut it out and appliqued it on top of the off-white border.


This is the finished quilt top. I like the result.


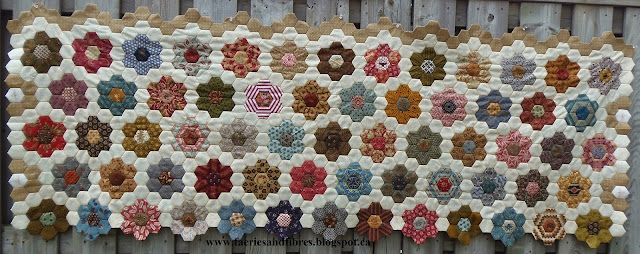
I also managed to take a picture of my "edited" Birds in the Loft hexagon quilt. At 128" long it was just too long so I removed two rows of hexagon rosettes from the top and two from the bottom. This is the before picture.


This is the final quilt top after the rows were removed. It is still large but it is much more manageable and I think it looks more like a quilt and less like a carpet!


The extra hexagon rosettes will be used to surround my parrot medallion quilt. The leftover stars from the border of Birds will be incorporated in the medallion. I've already prepared two of them for the sides of the frame for the medallion and I've now completed the second pair for the medallion. These two will be above and below the medallion.


Now I can start putting the hexagon frame together so I can add it to the parrot medallion. Pictures will follow! I'm also going to start cutting strips of fabric for the extra rosettes I need to surround the parrot medallion. Work, work, work but oh what fun it is!

Until I post again, happy sewing!
Karen H

Tuesday, June 9, 2015

Birds in the Loft - the BIG reveal

I've been busy, very busy! I finished Birds in the Loft and added borders to two other quilt tops. Today I'll share all of them with you plus my next project!

My Birds in the Loft hexagon quilt is together and as promised it is BIG! Very big! It measures a whopping 97" by 128"! Even I was shocked at the measurements and I already knew it was big (I think I was afraid to measure it until it was done). Not only is it big but it is also very heavy. Honestly this means it is not a quilt that could be used because it is too long for even a king size bed!

Birds in the Loft by Karen H 2015

I ordered a Hobbs Polydown king size batt because it is lightweight (this quilt does not need more weight) and I'll have to look at getting extra wide backing rather than using a pieced backing. Given its size there is a good possibility that it will never get quilted. On the other hand I might just take a couple of rows off the top and two off the bottom to make it shorter. It would still be wide but it would be more of a square than a rectangle. Oh well, I had fun putting it together and for me that's what it is all about. I might have fun taking it apart and putting it back together again too! I am sure that I would eventually find a use for the leftover hexagons (there would be 50 of them if I take out the rows).

For now I have smaller quilts that can be basted for quilting. I added a lovely wide border to my Lozagons hexagon quilt. My plan is to fill that border with free-form feathers similar to those I quilted in Babs quilt Yellow Bird quilt. I'm not sure how I would machine quilt this one and may consider combining hand and machine quilting. I'll decide when it is pinned and ready for quilting!

Lozagons by Karen H 2015

Finally I added borders to my Value Proposition hexagon quilt. I appliqued the quilt top to side strips and then I added the top and bottom borders. I have a lovely wavy brown stripe fabric and I think I will applique it to the sides of the quilt.

Value Proposition by Karen H 2015

If you are new to my blog Value Proposition was a hexagon quilt along in 2014. You will find all of the instructions and patterns under the tab Quilt Alongs by Karen H at the top of this page.

One final note about Value Proposition; I found a mistake! I am always going on about the use of directional prints and as I started pinning the borders to the quilt I found a mistake. The striped hexagon in the red circle is going in the wrong direction. How the heck did I miss it?


I also tend to go on quite a bit about learning to live with mistakes but if you just can't live with them, then one should fix them. This is a mistake (albeit a tiny mistake) that would bother me so fix it I did. It isn't a big change but it would have bothered me knowing it was there!


I've been casting about for a new project and have settled on a series quilt in QUILTmania (issue 107). The name of the quilt is Brinton Hall by Leigh Latimore. The first part is the blue section with all of the hexagons. I think it will be a great way to use scraps and also to feature some large prints in the seven panels in the centre. I've already started pulling fabrics!

That's it for today. Until I post again happy sewing!
Karen H

Wednesday, June 3, 2015

Two thirds of a Bird

It is almost there - one more seam to go! Yes, my Birds in the Loft hexagon quilt has one more horizontal seam to be worked (and the red border pieced joined) and it will be a quilt top! The most recent addition is this section 


was added to this section. I knew that the border was good but wasn't sure how it would look when I started sewing the sections together. I liked all of the individual components but was concerned that they might not play nicely together. Once it was stitched and hung for picture taking all of my concerns dissipated!  I am very happy with how it looks


In any event, this is the result when the top and middle sections were joined!


Today I will start working on the final seam and I'll also have to find a place large enough to hang and take pictures of the completed quilt top.

I've been asked to do a workshop on English paper piecing in November so I'll be sharing pictures of the project I have planned in the very near future!

Until I post again, happy sewing!
Karen H

Monday, June 1, 2015

The middle section of Birds is done!

The middle section of Birds in the Loft hexagon quilt is together and that means the quilt top is almost done. The two side sections are now stitched to the centre medallion and I am beyond thrilled with how it looks! I think the border creates a really nice visual stop and it frames the quilt perfectly!


There are only two seams left and they will be be those that attach the top and bottom units to the centre. Once they are added it will be completed and it will be time to think about a new project. I've got oodles of ideas plus one or two projects to finish. Maybe I'll finish one of them before I start something new! Time will tell.

Until I post again, happy sewing!
Karen H


Saturday, May 30, 2015

Getting to the bottom of things and a new tip for fussy cutting

And what exactly are those "things"? Why they are the hexagon rosettes that were stitched together complete with border to make the bottom section of my Birds in the Loft hexagon quilt! This weekend my goal is to complete the middle section. Fingers crossed that on Monday I'll have something exciting to share with you!


There were several questions about the Tulip Hiroshima Milliners Straw Needles.

First off the size I am using is No. 10. I bought them from Hancocks of Paducah. In Canada Sew-Sisters carries this brand of needle however they do not have the Milliners Straw Needles on their site. I've written to ask if they carry them and will keep you posted in case you want to give them a try! Yes they are expensive. I paid $7.65US for six needles however I plan to look after them so that I get lots of use out of each one. And let's put it in perspective.....when you pay $15/m for fabric the needle is the least of the expense of making a quilt! There are other less expensive brands available. I believe that John James also makes a straw needle. If you know of an online Canadian shop (or US shop) that sells Milliners Straw Needles why not leave a comment and share the information with all of us?

I had some used 3/4" hexagon paper and decided to cut some fabric and make a rosette. It isn't in aid of anything - it was just fun, mindless sewing. This is what I made.


The striped outer ring of hexagons is a directional print. Notice how a subtle stripe radiates out from the centre? What you may not notice at first glance is that the stripes radiate out from the point of a hexagon on six of them and on the other six they radiate out from a flat edge.


When I want to cut a fabric like this what I do is draw an arrow on the hexagon paper to show the direction of the stripe. Then I tack my paper to the fabric with the arrow matching the direction of the stripe and I cut out the fabric with scissors. When it comes time to sew them together I sort them into two piles (stripes from the point and stripes from the flat edge). To sew them together I just alternate a stripe from the point with a stripe from the flat edge! This technique will work with any directional print and it makes the sewing together so easy because you don't have to think about what way the fabric is meant to be positioned! If you use this technique for the hexagons that surround the centre you would only need six that radiate from the same direction. If you wanted to add another round of hexagons to what I've done you would need six and twelve.

That's it for today. Until I post again, happy sewing!
Karen H

Thursday, May 28, 2015

Come together, right now!

The various pieces of my Birds in the Loft hexagon quilt are coming together. This part goes fast! I know I have previously mentioned that it is big. I was wrong. It is not big....it is VERY big. I really should have used 3/4" hexagons. Oh well, it is what it is!

I showed you the right middle section and I've now stitched it


to the centre panel.


And this is what it looks like! I'm afraid to measure it....it is that big!


The stitching goes fast because it is a fairly straight seam. I used off-white thread and the reason is that at least one hexagon in each seam contains the path fabric (the path is the area between the hexagons made with the off-white fabric).

Also I have decided to try my new milliners needles. Missie of Traditional Primitives swears by them for English paper piecing. Debra of Patchwork Sanity swears by them for applique. Both women were absolutely right. The long, thin needles pierce the fabric like a hot knife cutting through butter. My needles are Tulip Hiroshima Needles. They are not inexpensive but they make a big difference in the sewing.


I am able to catch fewer threads making the stitches even less visible. Now don't get me wrong; I don't mind seeing a bit of the stitches because it shows the hand of the maker. But I want them to be small stitches. If you struggle with small, tidy stitches I would encourage you to give milliners needles a try. One note of caution: the eye of the needle is small but it threads so easily. I think that the reason for that is that the bore hole in the Hiroshima needles is smoothed in both directions so there are no burrs inside the eye. This is a significance from other needles which have a nap inside the eye of the needle. If you try to thread a needle and the thread just will not go through turn the needle and thread in the other direction.

That's it for today. Until I post again, happy sewing!
Karen H

Tuesday, May 26, 2015

The mitered corner on Birds

I told you that I wanted to miter the corners of the final red strip that will surround my Birds in the Loft hexagon quilt. There are many ways to do it. I wrote about how I attached the borders and mitered the corners on my hexagon quilt Good Golly Miss Mollie here.


Good Golly Miss Mollie by Karen H 2014

To make the miter for Birds I doing it a little differently. I joined two strips of 2 1/2" red fabric by sewing a diagonal line. The result is the mitered corner.


The mitered corner is on the floor with the quilt.

At the yellow arrow you can see that folded the strip under and pressed a 1/4" seam allowance. This will be the finished edge that is on the front of the quilt and strip on the left side will be under the folded edge. To start I flipped the left strip out of the way (yellow circle) so it doesn't interfere with the pinning.


The first place I pin is at the corner (green arrow).l I want the miter to line up with the hexagon (more or less). I then continue pinning as demonstrated in my previous post.  The yellow circles indicate where I've pinned the strip so that it lines up with the seam allowance of the hexagon. The pins in the blue circles are added after to hold the hexagon tight to the strip. The other edge of the quilt is the side edge and I made sure the strip was 1/4" in from the inner "v" of the hexagon and I pinned (red circles).


I turn the quilt so that the right side is facing up and I pin the folded edge to the loose strip making sure that the strip to the left of the pin is laying flat and smooth! I thread baste the quilt to the strip and applique with red thread! Where the strips are joined will also be an applique stitch to join the strips.


So that's how I will be doing it.

Until I post again, happy sewing!
Karen H

Saturday, May 23, 2015

Adding the final border to the side of Birds

It is time to add the final strip of red to my Birds in the Loft hexagon quilt sections. My plan is to applique the quilt sections to a 2 1/2" strip of red fabric so that the quilt will have a straight outside edge. I had promised to show you how I do it and today is the day! My plan is to use the leftover strips of reds that I used for the "made fabric" hexagons. I may have to cut a few more but first I'll use up what I have.

The first step is to make the cat get off the scraps of red! If you don't have a cat just skip this step.


I am going to stitch the red strips to one of the side panels. The little yellow "tents" come right to the edge so the extra bit of red will create a visual stop so that the tent points float and don't get cropped when the quilt is bound.


A few of the red strips were stitched together. I need a strip that is at least 5 inches longer than the length of the side of the quilt I am working with.


I pressed the outside edges of the panel with a hot, dry iron and removed the papers.


Although I could use Roxanne Glue Baste-It (basting glue) to hold the red strip in place I decided to use tiny applique pins to hold the red border strips to the quilt and then thread baste them into position.


I place the strip on the quilt making sure that the strip extends  a couple of inches beyond the end of the quilt. I line up the strip 1/4" in from the "v" that is created where the hexagons are joined and I pin it in place with an applique pin (red circles). The area in the green circle will be the next to be pinned.


Working from left to right I smooth the strip making sure it is laying flat. Any excess fabric is pushed to the right. Once the fabric is smooth and taught I hold it in place between my fingers and place a pin. Continue in this way and while doing so .....


shoo the cat as required. If you don't have a cat please skip this step.


The pinned border will look like this from the right side. You can see the pins on the right side (inside the red circles) and the red border fabric is laying flat and smooth. Continue pinning the strip and


once again shoo the cat as required.


Once the entire strip is pinned to the quilt I thread baste it in place so that it is ready for the hand applique. The pins are removed.


Here you see the right side of the quilt with the red pieced border and the red finished border stitched together. The extra strip of red really makes the little yellow "tents" stand out nicely!


If you are wondering about the loose fabric at the top and bottom of the red strip please stay tuned because I will be explaining the reason for it and what I will be doing it!

Time for me to do a little more basting while little you-know-who takes a cat nap! All that help with pinning has worn him out so he found a nice sunny spot and is fast asleep in the sunshine!


In my next post I hope to show you how I'll add the border to the top section (complete with mitered corners. Until I post again, happy sewing!
Karen H
p.s. If you have a troublesome pussycat why not link up with Sarah's Feline Friday?

Thursday, May 21, 2015

Tricks and treats!

Debra is a master appliquer and when I heard that she was doing a free demonstration of applique with heat resistant templates I was thrilled. Some techniques I can figure out easily just by looking at a picture but sometimes I want to see a live demonstration so when I heard that Debra was going to show how she does it I jumped at the opportunity!

Debra brought her design board with blocks that she made using heat resistant templates and starch.


The little baskets on the left are from a pattern called Trick or Treat in the the book When the Cold Wind Blows by Barb Adams and Alma Allen of Blackbird Designs.


The hexagon blocks on the right are a design called Garden Pavers and there is a free pattern for a table runner. Just click here. Debra says she is going to make an entire quilt with these hexagon blocks!

Debra's demonstration was very helpful and  informative. I found it interesting that she just uses her finger to apply the starch to the seam allowance before pressing it over the template! I also learned that you really need a seam allowance that is less than 1/4" to get smooth curves and turns. She also highly recommended Tulip Hiroshima Needles (#10 Milliners Needles - Straw). I ordered some to try them out. They are very nice needles to work with. They are thin and flexible and just glide through the fabric. I still like to use Roxanne Applique Needles but these ones are quickly gaining a place in my sewing kit!

I have the book When the Cold Wind Blows in my library so I pulled it out and decided make a block to try out what I had learned. I also timed myself.  Debra told us the first basket she appliqued took 30 minutes but with practice she got it down to 15 minutes. The starch basting is quick and easy and then I used my Roxanne Glue Baste-It to hold the handle and basket in place. I looked at the clock and started stitching. On hour later this is what I had!


I like the basket but there are roughly 300 of them in the quilt so unless I get faster (or do machine applique which is an option) it would take me a very long time to make that quilt. However I will cut and starch baste some baskets and keep them in a bag so that if I need some hand stitching (or decide to machine applique) they will be ready and waiting! They don't take much fabric (the background is a tiny 5 1/2" square) so they are a good way to use up scraps.

Speaking of scraps I've been stitching my red scraps together to make this red border for my Birds in the Loft hexagon quilt. I had to add a few red pieces to either side to bring it to size and I have done that.

It was time to add the border to the top section of the quilt.


That border is now stitched to the top section of the quilt! What a difference a border makes to a quilt.


The final step is to applique this section to a 2 1/2" red border so that I have straight edges! The end is finally in sight! I think that the final red border made with my leftovers will be yet another improvement. Hopefully I can get it stitched down today or tomorrow. And you just have to know I'll show you how I did it (mitered corners and all)!

Until I post again, happy sewing!
Karen H