Showing posts with label Parrot. Show all posts

Friday, July 24, 2015

Green Parrot and Brinton Hall

I've third and final round of hexagons to the top section of my Green Parrot hexagon quilt. I used the same pale green that I used in the medallion. I'm going to have to add a few more hexagons to the corners so I can square it up later.


When I place this top section above the middle section you can see the overall design begin to emerge. You can see the red stars that were removed from my Birds in the Loft quilt. There are three in the picture below and there is one more in the bottom section. Most of the rosettes were removed from the same quilt (and they were already stitched together) so that is why this quilt is coming together so quickly.


The next step is to add the pale green border to the bottom section, make the corner fillers and sew all three sections together into a quilt top. The end is in sight! Yahoo!

The next issue of Quiltmania should be in my mailbox any day now and I am looking forward to the second installment of Leigh Lattimore's Brinton Hall quilt which was inspired by the Brereton bed hangings. The original quilt was made by Anna Margaretta Brereton (nee Lloyd) of Brinton Hall. I was contacted by her 3x great granddaughter and she provided me with some wonderful information about the original quilt which was made in 1800. What I found particularly interesting was that the quilt has undergone at least two remodels. The first was in 1820 or 1830 and at that time diagonal inset strips were added by another quilt maker. One hundred years later it was cut in half vertically and reworked. There was no explanation for either revision to the quilt.

Leigh's interpretation of the bed hangings is much more colourful. I am seriously tempted to create my own interpretation but not until I finish one or two other things. For now I'll share a picture of what I've done so far. The centre section of seven medallions and the long strips at the edges are all thread basted to the pieced background. The blue looks quite vivid on my monitor but it is actually a dull, dusty blue.


There is a narrow 3/4" border to be added to this but I won't stitch it down until I've finished the applique. Are you making a Brinton Hall quilt? If you post pictures on your blog please leave a comment with a link to your blog post so we can all see what you are doing! So far I know of or have found the following:
  • LuAnn of Loose Threads is here;
  • Nan of Do It Right Quilter is here;
  • Nathalie of Les Tresors de Nath is here;
  • Cecile of Inspirations is here;
  • Kelly of Always Applique is here and
  • Katy of Katy Quilts is here.
I've got some work cut out for me so it is time to get cracking. Until I post again, happy sewing!
Karen H

Friday, July 17, 2015

Sorting quilts

I've been busy pulling, sorting and refolding quilts for my trunk shows at Quilts at the Creek this weekend. It is a big job but as you can see I've got a "helper". Not much help if you ask me! Sorting quilts will just have to wait until he has finished his little nap.


The title of my talk is "English Paper Piecing and More". It is so hard to decide which quilts to take because they all have some feature that I think might be of interest to others. I will bring a few quilt tops one of which is Gardens of a King, a pattern I tested for Missie Carpenter of Traditional Primitives. The pattern is now available from her shop. You can see my quilt folded on top of the pile in the picture above.  The quilt was made using English paper piecing (EPP). I added my own personal touches such as the sun face in the upper left corner and a moon face in the lower right corner. It is a little detail that makes the quilt my own. I also added some butterflies and ladybugs in the floral applique b locks in the borders.

Gardens of a King by Karen H

I plan on taking Flora and Fauna, Parts of the Garden as part of the "more" portion of my talk. This quilt does not use EPP but it is one of my quilts that I love the most because of all of the little details. It was a challenge quilt. There were three fabrics that had to be used (all of which I detested and did my best to disguise) and I was able to add an additional six fabrics. I chose three greens, one brown, one blue and a very busy print on a butter colour background. I fussy cut last fabric to create all sorts of additional colours, plants and creatures. I also the wrong side of the blue fabric in the kit and that gave me two shades of the same fabric. You can't do this will all fabrics but in this case it worked!

Flora and Fauna, Parts of the Garden by Karen H

One of the reasons I like Flora and Fauna is because of all the little vignettes that I was able to create within the quilt. Here are a few examples.


I know this quilt appears as though it was difficult to make. I didn't have much of a plan for this quilt other than there would be a circle of blue in the middle for the sky. I would border it with a narrow bit of green for the grass and then a wide border of brown for the earth. The last border would be a pale green just because I like green! I used a fabric safe marker to draw the stems of the plants that would start at the green grass and reach up toward the sky. They were embroidered with two strands of floss. Once I had that framework completed I just started filling in the spaces with bits of this and that. I quilted tunnels for the ant colony in the brown border and then filled the tunnels with little brown ants. I worked on this quit top while sitting outside and as I saw bees, grasshoppers, butterflies, inchworms and other insects I would find a space where I could add them to the quilt. If I liked what I had done I would repeat it in other areas of the quilt! The more I added the more ideas I had. Before I knew it the whole thing was chock-a-block with creatures and plants. You don't have to make an entire quilt of detailed creations - you could just take one or two tiny details to a big quilt. Small details have big impact. That's what I did when I added bee details to the centre medallion of my quilt Mom's Flower Bed. The following pictures shows the centre medallion. On the blue-green batik hexagons that connect the green stars I added bees. The bee bodies were cut from yellow fabric. The stripes were added with my Sakura Pigma pens and then I appliqued the bodies to the hexagons. The wings were drawn on the fabric with my Sakura pens. Once this was done I cut my hexagons and continued English paper piecing in the usual way.


This is a close-up of the bees. Want to make your own bee? I did a little tutorial and you will find it here.


Bees not your thing? How about adding a grasshopper? I like to sneak a grasshopper into a quilt and tell the recipient it is there but not where it is. It is especially fun for children to search their quilt for the grasshopper! The tutorial is here.


I continue to work on my Green Parrot hexagon quilt but every time I put it on the floor to have a look this is what happens! There are plenty of places to wrestle but it seems that Green Parrot holds particular appeal for the boys, Jinx and Gump.


And when exhausted from wresting this is what happens. Jinx stretches out to have a nap on the quilt. Cute but not at all helpful!


I have managed to stitch the olive-brown border to the top section of Green Parrot. The final round will be a dusty pale green. I'm thinking I will fill in the "Vs" at the top with more pale green to finish the top edge but I'll make that decision when I get to that point.


There'll be little or no sewing for two days but it will be fun to share my quilts with others at Quilts at the Creek and I'm really looking forward to touring the outdoor show where 300 quilts will be on display. I'll try to take pictures and share them with you in an upcoming post. My talks will be at the Town Hall at 11:30 on Saturday and Sunday. If you are at the show and have time please pop in and say hello!

That's it for me until next week. Happy sewing!
Karen H

Sunday, July 12, 2015

Mixing browns for the border and some reader questions about English paper piecing

The Green Parrot hexagon quilt is coming along nicely. You may recall that I added the dark brown border to the sides of the middle section. If not, here it is.


The same dark brown will border the entire quilt however I didn't quite have enough fabric (I was 10" short) so what I did was cut all of the hexagons that I could with the fabric I had and divided them into two equal piles, one for the top section and the other for the bottom section. I placed the top section on the floor and started placing the dark brown hexagons working from the middle top out towards the corners. I also placed some on the sides working up towards the corners. When they were all positioned I counted the number of hexagons I needed for the corners and cut them out from the new dark brown fabric. I stitched all of the brown border hexagons together into one long noodle and attached it to the top section.


The browns are different but because they will be placed strategically it will appear as though the addition of this fabric was intentional rather than out of desperation!

I've also cut out the olive-brown hexagons for the next round and I've basted them, stitched them into a noodle and attached the noodle to the left side of the middle section. There is not as much as an ombre effect as I would have liked however the fabric is a repeat of what is already in the quilt and I like the way the border looks. The final round will be the pale green from the centre (or at least that is my plan at this moment in time but that could change)!


I had a lovely email from a reader who is going to start her first hexagon quilt and she wanted some guidance on English paper piecing. The first bit of advice I always offer is to start out by making one hexagon rosette. While you may like the look of hexagons and English paper piecing you may find that it isn't your cup of tea. Before you cut up a stack of fabric make sure that it is something you will enjoy.


I was asked about basting the hexagons. I prefer to baste from the back so that the thread does not pierce the paper. This allows me to use my papers multiple times. I published a little tutorial here. Basting from the back will feel awkward at first but stick with it. If you baste through the paper the basting thread must be removed but if you back baste the thread stays in. You just pop out the paper! One advantage of this method is that the seam allowances remain held down in place.


If you thread baste through the paper you don't need a lot of stitches. You will notice in the example at the top that there are four stitches (see picture on left) and one of those four is just an extra stitch to hold the basting in place before I clip the thread which does not get knotted at the end in this method.

If folding over the seam allowances is a challenge try finger pressing them over the paper before you start basting. Eventually you will find that this step is unnecessary because you will know that the edge is folded over right at the edge of the paper.


An alternative to thread basting is starch basting the seam allowances. There is an excellent tutorial on this method at Traditional Primitives. She uses freezer paper hexagons and once the seam allowances are starch basted she removes the hexagon and reuses it!

Starch basting method from Traditional Primitives

I was asked if I press the hexagons after they are basted and the answer is a big "no"! You may find that there are slight variances in the size of your hexagons. If there is a soft crease you can ease in the extra bit of hexagon but if there is a hard crease from pressing it makes easing very difficult. I find that I never have to press my hexagon quilts until I am ready to baste them for quilting. They are handled so much that the folded seam allowances are well pressed with my fingers.

That's it for today. If you will be in the Toronto area next weekend it is Quilts at the Creek and I'll be doing a trunk show Saturday and Sunday. It is always a great show and a beautiful venue!

Until I post again happy sewing.
Karen H

Friday, July 10, 2015

Updates on my hexagon quilts (some of them)

Today is a bit of a mish mash of two hexagon quilts so let's get started.

I've added the first of three borders to the middle section of my Green Parrot hexagon quilt. It looks small but I think that it is going to finish at a nice manageable size unlike many of my quilts which tend toward the giant size.


The dark brown at the outside edges adds a really dramatic element to the quilt. It doesn't appear so in the picture but when all three sections of the quilt are laid out on the floor magic happens! The next round will be an olive-brown print and my hope is that it will give an ombre effect to the border.

I continue to work on appliqueing the hexagon rosettes down to finish my copy of  Jane Morton Cook's hexagon medallion quilt that was pictured in the book Enduring Grace.


The original quilt measures 99" x 115" and my quilt will be very close to that size. What is it with me and big quilts? I just don't know when to stop. In any event I took a quick picture of my quilt and this is what it. I worked on it so much that I got sick of it and had to put it away for years (many years). But now I'm seeing it with fresh eyes and am crazy about it. I'm having so much fun looking at all of the fabrics that I used in my rosettes!


I had some lovely fabric and fussy cut two birds to go on the sides of my quilt. I framed them with thin strips of a grey-brown and then appliqued the units to the side panels which were then filled in with large and small hexagon rosettes. You can see the bird in the following picture.


I will add a border to this quilt and think I have just the right fabric. It is from the line Palampore/Tree of Life by Mary Koval. This would be a great fabric for fussy cutting and for broderie perse work. I bought mine from Reproduction Fabrics. I've purchased from Margo and Reproduction Fabrics a couple of times and have been very pleased with the selection of fabrics and the service.

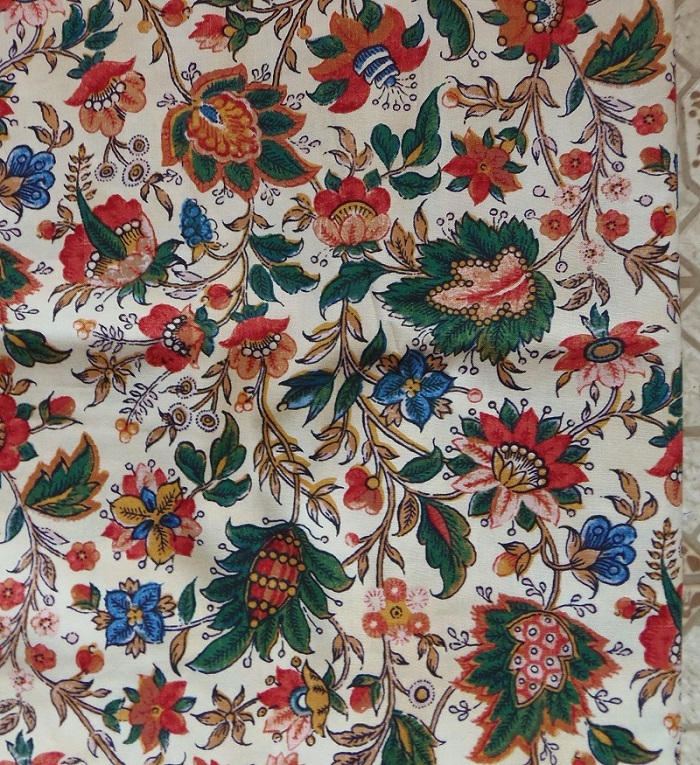
Palampore/Tree of Life by Mary Koval

I follow many blogs one of which is Carli's Good Earth Quilting. She has a real talent for giving older fabric a new life. Carli makes commissioned art quilts and I believe is well known for her T shirt quilts. In her most recent post she wrote about trying out one of my tutorials for making star hexagon rosettes. You can see her stars and read her review of my tutorials here.  She made her stars with one of my earlier tutorials and this is the star in that tutorial. You will find Part 1 here and Part 2 here. In the picture you can see that I thread basted through the paper and fabric however since that time I have begun basting from the back and I wrote a tutorial on basting "made" fabric in this way and you can find it here.


Angie of A Quilting Readers Garden is another fun blog and she recently posted a picture of her star. You can see her star and read her post here.

You will find Part 1 here and Part 2 here. In the picture you can see that I thread basted through the paper and fabric however since that time I have begun basting from the back and I wrote a tutorial on basting "made" fabric in this way and you can find it here.

Until I post again, happy sewing!
Karen H

Monday, July 6, 2015

Green Parrot continues to grow

Sewing, sewing, sewing! I've stitched the units that will attach to the sides of the medallion of my Green Parrot hexagon quilt. Although the units appear fussy cut they aren't. I've just taken extra care when orienting the hexagons and sewing them together. My fabrics were all cut across the width of the fabric so that the same print is repeated across the width of the strip. When I cut the individual hexagons it creates the illusion of fussy cutting without the effort.


All of the hexagon rosettes for this quilt and Birds in the Loft were made it pairs. The advantage of this is that when I lay out the rosettes to plan where each will go I only have to plan half of the quilt. When I am happy with the arrangement I write the number on the paper so that I know where it will go in the quilt.  You can see in the picture above that the red print in the upper left corner is repeated in the lower right corner.

 To illustrate here is my Birds in the Loft hexagon quilt map. I've numbered the placement of the rosettes starting in the upper left corner of the top half of the quilt. The bottom half is identical to the top half but the numbering starts in the lower right corner. I don't need to have the path attached to the rosettes - what I want to do is ensure that the placement of the rosettes is pleasing to the eye. I can add the path and start sewing the rosettes into rows at my leisure!


Now lets get back to Green Parrot. Once the side units were constructed I could attach them to the medallion and I did.


Now it is time to get serious about the borders. I plan to add three rounds of hexagons to the quilt. I'll use the darkest brown from the medallion, followed by the olive brown from the centre and finally the pale green. It will be boring basting and sewing the same fabric over and over but I think that the final result will be very effective.

That's it for today. Until I post again, happy sewing!
Karen H

Saturday, July 4, 2015

A noodle is stitched to the Green Parrot

Remember the "noodle" I constructed for my Green Parrot hexagon quilt? Here is a little reminder of what it looked like. It will surround the medallion that I constructed. I don't close the circle so it just looks like a big noodle when it isn't pinned to the fence (or stitched to a quilt). You can see that it isn't joined inside the red circle in the lower right hand corner. It makes it easier to attach to the medallion if I don't close it. Also I can use a single colour of thread to sew it to the medallion so I don't have to constantly change colours! In this case I will use an ecru thread because the border around the medallion is cream and pink.


So the "noodle" is now stitched to the medallion and this is what it looks like.The lighting wasn't very good so it looks rather dusty. The next picture I take will be better.


The next step is to finish the side units that will be added to the medallion. The Green Parrot fabric had some tiny little scenes so I fussy cut two and surrounded them with green. They will be placed on either side of the side stars.


I've started thinking about how I will border the quilt. I was thinking I would repeat the dark brown fabric from the medallion and border the entire quilt with it but I don't have enough so I am going to get creative and pull a similar fabric and see if will work. After that I'm not sure what comes next but we'll seen soon enough!

Until I post again, happy sewing!
Karen H

Thursday, July 2, 2015

Parrot, arrows & diamonds

The top section of Green Parrot is now put together. I still have to decide what I will do with the border. I had better decide soon! I am constructing my quilt (as always) in sections. The bottom will be identical to the top, and then there are the sides. You've seen the middle section which is now stitched together.


I'll add the sides to the middle section once they are constructed so there will be three pieces, the top (as shown above), the bottom and the middle. It is at that point that I will decide what to do with the border. I'll make it and attach it to the sections. It is much easier to work with the sections rather than adding the border to the entire quilt top. The sewing is going fast now so it won't be long until I need to decide on the border.

I teased you with a picture of the middle of an old hexagon quilt that I started many years ago.


This one deserves to be finished so it has been added to the current pile of projects. Want to see what the entire top looks like? Well here it is! My working name for this quilt top is diamonds and arrows. Before you people get too carried away I have to tell you that this quilt is MUCH easier to construct that you think. The hexagons are 1" and I foundation pieced on the hexagon paper before continuing in the usual method of English paper piecing. There are lots of tutorials on my blog about this technique. Just click on the tab English Paper Piecing Instructions & Hexagon Fun. If you don't find what you are looking for just ask. I'll can add a link to a tutorial OR I can write a new tutorial to explain what I did and how I did it!


My plan is to add another border of the dark brown  spikes before adding more hexagon stars. If I were to make this again there are some changes I would make but for the most part I am happy with what I've done.

On June 28 I shared some of the things I do to help speed up the process of sewing. Bees Knees Granny was kind enough to share what she does and it is brilliant! She wrote "My focus for needle threading is best at the beginning of the session. I use a Clover needle dome to hold up to ten threaded needles. Great for travel, too. Whether using the needle dome or a pincushion, I knot the thread as I thread each needle, then pull the thread so the knot is right up against the eye. The thread never falls out of the needle while stored this way--just remember to pull the knot down before beginning to sew!" Great tip and one which I'm going to use.


Until I post again, happy sewing.
Karen H

Tuesday, June 30, 2015

Getting to the bottom of it

I am ready to get working on the top and bottom sections of my Green Parrot quilt and will reuse the two sets of two rows of rosettes that I removed from my Birds in the Loft hexagon quilt. There were 25 rosettes in each set, 13 in one row and 12 in the other. I split this section so that there were 9 rows in the top row and 8 in the second row. The remaining 7 rosettes (4 in one row and 3 in the other) were stitched to one of the stars that were removed from the sides of Birds in the Loft. I  had added a round of dark cream and pink hexagons around the stars which will fit into the top and bottom of the medallion.

Stars removed from Birds in the Loft

Once the star was stitched to the remaining rosettes, the unit was added to the left side of the two large rows of rosettes.The red arrow shows where the rosettes were removed and where they were moved to. This will be the bottom edge of the quilt so the unit is hung upside down!


I've been working on extra rosettes that will be needed to fill the area to the right the star. I also need to add a row of cream hexagons to the top of the quilt so it has a nice finished edge. The parrot will attached to the star. The parrot unit is almost sewn together so there will be a picture of it in my next post.

I had used a cream fabric for the path (the area between the rosettes) my Birds in the Loft quilt but during the making of it I ran short so I added another similar cream fabric. I thought I would have enough of it to complete Green Parrot however I will be just a little short. So what's a quilt maker to do? I will add a third fabric. Unfortunately I don't have a cream that is the same value but I do have one that is just slightly darker so I will place it strategically on the sides of the quilt. This will make it appear that the addition of this fabric was intentional and it will create a design element. Interesting things can happen when you run short of fabric. That's exactly what happened when I made Stars in the Loft. I thought I had enough path fabric but was very wrong. I ended up have to add five or six fabrics. It is impossible to tell from this picture but the extra fabrics add depth and interest.

Stars in the Loft by Karen H

So my tip for today is this: if you are planning on making a hexagon quilt why not consider using several fabrics of the same value and colour for your path? I think rosettes surrounded by assorted black prints would be very dramatic!

Before I go I'll leave you with a close-up shot of another one of my very old works-in-progress that I recently pulled out. I so enjoyed making the rosettes for Stars in the Loft (see my page English Paper Piecing Instructions & Hexagon Fun for tutorials on making those rosettes) that I decided to create another quilt. My starting point was the print fabric in the very centre. I thought it would be great for a star centre so I fussy cut it and then made the star points. I thought another round of star points would be even more exciting so I added the darker pink star points. As I worked I sketched it out on paper and the design slowly emerged. I'll share more pictures in the near future! And I'll work out the design to finish this top because I think it deserves a fine finish!


Until I post again, happy sewing!
Karen H

Sunday, June 28, 2015

The Green Parrot - Round Two

I've stitched all of the pieces for the second round for the Green Parrot hexagon quilt. This is the parrot.


This is round two stitched together into a "noodle". Notice that the round is not closed (see the area with the red circle). A "noodle" is a circle or oval of hexagon units sewn together into a long strip which can then be sewn to whatever it is it will surround. It is the same method that I describe as an "open donut" only on a larger scale. I find it makes the sewing go faster and so much easier.


I am constantly asked how it is that I work so quickly so I thought I would share a few of the things that work for me,

  • I find that if I work on something I am enjoying I sew fast. When it isn't as much fun I slow down. To overcome this I always have my quilt in various stages so I can work on what tickles my fancy at that moment whether it is cutting strips of fabric into hexagons, basting or sewing hexagons together;
  • When I baste I work with a very long thread because basting using a lot of thread so the less I need to thread the needle the better. I baste with a darning needle because it is less flexible and it is longer so it is easier to hold;
  • When I sew hexagons together I use a short length of thread because there is less thread to draw through the fabric. So what is a short length? I work with roughly 12" of thread. If I finish sewing a seam and there is a little thread leftover I will use it to baste a hexagon rather than throw it out;
  • I always have a bag of fabric hexagons in a little bag with a needle, thread and small scissors and I toss it in my handbag. When I am out if there is down time I can baste or sew the hexagons. This is particularly helpful for path hexagons because there are so many of them and they are boring. By basting/sewing a few when I am out it cuts down on the monotony;
  • When I have a pile of path hexagons basted I sew them into pairs. Again, this is a great way to use leftover bits of thread (assuming the colour works);
  • I always have multiple needles threaded and ready to go. I've recently switched to milliners needles for sewing the hexagons together. These are long fine needles and I find that the longer needle puts less stress on the finger joints and this fine needle makes it easier to pierce just a few threads of fabric when joining hexagons.
So there you have it - a few things that work for me! I was also asked by JP (sorry JP, you are a no reply blogger so I couldn't send you an email) if I could discuss how I start and carry out my design process. What a great suggestion. I will definitely do a post to explain the processes I use but need to give it some thought so that it is useful to you people!

So today my plan is to attach the "noodle" to the parrot. This picture will give you an idea as to how it will look.


It is a grey, rainy day here so it is perfect sewing weather. Until I post again, happy sewing.

Karen H

Friday, June 26, 2015

Two finishes (sort of)

Today I have two finishes for you. When I say finishes I mean they are quilt tops but they are technically not "finished" because they are not quilted. They will eventually be quilted but I've got a trunk show in July and if I baste them for quilting they will be far too bulky to take to the show. My trunk show will be part of a huge outdoor quilt show in Toronto. It will be at Black Creek Pioneer Village and the name of the show is Quilts at the Creek. I went in 2013 and there were over 300 quilts on display. You can get a sneak peek of what I saw here.  If you are in the Toronto area you really should plan on attending this show. It is well worth the price of admission!

I have finished the border on Value Proposition hexagon quilt. When I last showed it to you I had a print border at the top and bottom and an off-white border on the sides. I thought the side borders looked rather bland and unfinished. They needed something dark on the edges. I have an old wavy print in my stash so I cut it out and appliqued it on top of the off-white border.


This is the finished quilt top. I like the result.


I also managed to take a picture of my "edited" Birds in the Loft hexagon quilt. At 128" long it was just too long so I removed two rows of hexagon rosettes from the top and two from the bottom. This is the before picture.


This is the final quilt top after the rows were removed. It is still large but it is much more manageable and I think it looks more like a quilt and less like a carpet!


The extra hexagon rosettes will be used to surround my parrot medallion quilt. The leftover stars from the border of Birds will be incorporated in the medallion. I've already prepared two of them for the sides of the frame for the medallion and I've now completed the second pair for the medallion. These two will be above and below the medallion.


Now I can start putting the hexagon frame together so I can add it to the parrot medallion. Pictures will follow! I'm also going to start cutting strips of fabric for the extra rosettes I need to surround the parrot medallion. Work, work, work but oh what fun it is!

Until I post again, happy sewing!
Karen H