Showing posts with label foundation piecing. Show all posts

Friday, February 21, 2014

Messing around with hexagons

I'm busy sewing together the blocks for my Mom's Lazy Punk quilt and hopefully it will be a quilt top today. Fingers crossed.

In the meanwhile I thought it is time for more hexagon fun using my foundation pieced English paper piecing (EPP) technique. I've posted on this topic many times but if you are new to my blog I most recently wrote about this method on January 19 and January 20, 2014.

So today I'll show you a fast fun star and then I'll mix things up a little!

This is the basic shape for the individual hexagons. I drafted six of them plus a blank for the center. I am working with 1" hexagons and you will find a master template that you can use under my tab English Paper Piecing and Hexagon Fun.


This is the foundation pieced hexagon ready to be basted. Notice that the seam allowances are trimmed so that they just clear the corners. I like to have a generous seam allowance of roughly 3/8". It makes basting much easier. I just use my scissors to trim the hexagon.

I like to take an extra stitch at the top because there is extra fabric from the seams and this extra stitch will keep everything nice and flat.


When I get to the base I make sure that the sides are folded in an d then the base of the star point is folded down. This keeps the bulky seam allowances away from the corner making the piecing of the basted hexagons very easy.

Six hexies are basted and the star points facing out.


They can also be turned so that the points are facing in. Play around with them and have fun!


All six hexagons need not be the same. What if you took these two hexagons and combined three of each to make a star?


You might come up with something likes these interesting arrangements!


I'm linking up with A Quilting Reader's Garden for hexie Friday where you'll be able to find some hexie inspiration! Check back regularly as others add links to their blogs and projects.

While you are out and about don't forget to visit Jan's Sew and Sow Farm. Today is day 4 of her giveaway and the prize today is honeycomb papers (elongated hexagons) and a honeycomb template. You can get up to five chances to win. Just go here to read more and enter!

Until I post again, happy sewing!

Monday, January 13, 2014

Thinking outside the half square triangle (HST)

Last week I did a demonstration at my Guild meeting and the topic was "Thinking Outside the Half Square Triangle (HST)". I thought I would share what I talked about with you! Before I get started might I suggest that you get yourself a cup of tea!

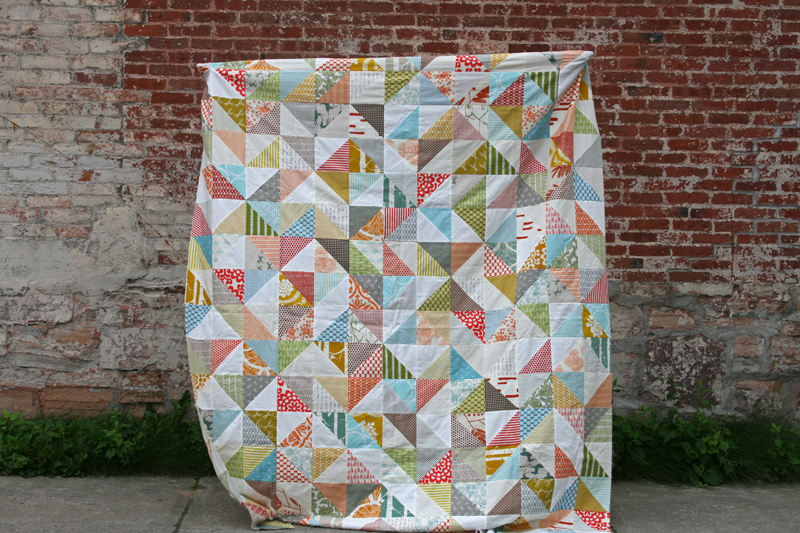
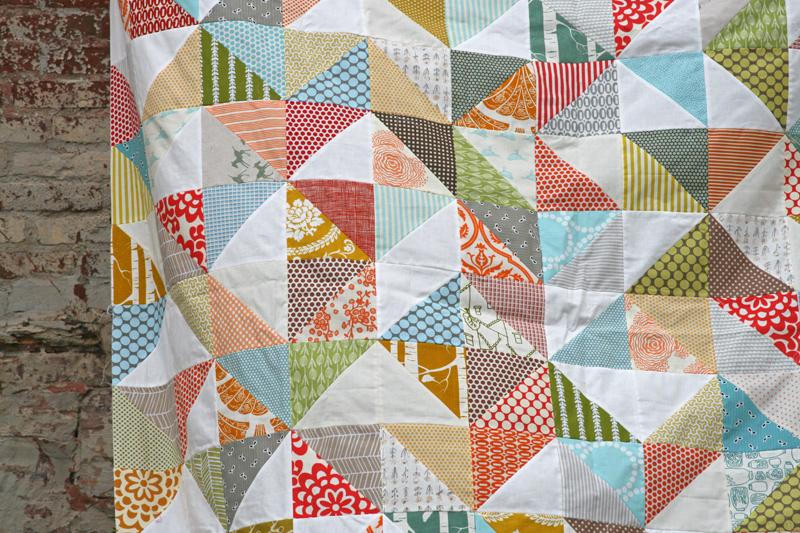
I started off by explaining the basic method for making HSTs. I had stacks of charm squares (they measure 5") and 2 yards of plain white fabric so from the white fabric I cut a stack of 5" squares. I marked a diagonal line on the wrong side of the white fabric. I place a white square on a charm square with right sides together and stitched on either side of the line. I cut on the line and pressed toward the print fabric. The blocks were then trimmed to 4 1/2" (they finish at 4"). Although I used charm squares you could use any size. Determine the size to cut simply add 1" to the measurement of the finished HST that you need. For example if you want a 3" finished HST you'll cut your patches at 4". So what do you do with all these HSTs? How about a lovely quilt like this one from Film in the Fridge? To me this looks like a quilt that is meant to be used and loved!


I next talked about foundation paper pieced HSTs. Foundation papers cam be purchased or they can be printed for a fraction of the cost. There are a number of  websites where you can find the papers. I've been using papers from Quilting and Whatnot; you will find them here and they are free!!! The smallest is 1/2" finished and they go up in increments of 1/4" all the way to 2 1/2". The sheet shown below will produce 36 precise 2" HSTs in a matter of minutes. Not too bad! If you don't need that many HSTs you needn't use the full sheet; just use the number of rectangles you need to obtain the desired number of HSTs (one rectangle produces two HSTs).


I like to use inexpensive paper such as newsprint but 20lb Bond will also work if that's what you have. Test print one page. There is a test square in the upper right corner (I've outlined it in pink); it should measure 1" exactly. If it doesn't you need to go back to your print operations and make sure that you are printing "actual size" or "no scaling". The language used will vary so if you can't find these terms you may have to consult your printer manual. I used green to highlight the sewing lines. The solid lines are the cutting lines.

Cut your fabric a little larger than the paper. Place the darker fabric down with the right side facing up. Place the lighter fabric on the darker fabric with the right side facing down. Place the paper on top of the fabric and pin parallel to each sewing line. Shorten your stitch length. I have a Janome and I like to set my length at 1.8.


To start sew onto the paper and sew on the dashed zigzag lines until you get to the other side. Sew right off the paper.

Repeat on all dashed lines. Once the sewing is complete trim the outside edges on the solid lines and then cut the foundation paper on the horizontal and vertical lines. You will have 18 rectangles if you used the 2" paper.

Cut the rectangle on the diagonal line and press toward the darker fabric. Remove the paper and you are done!

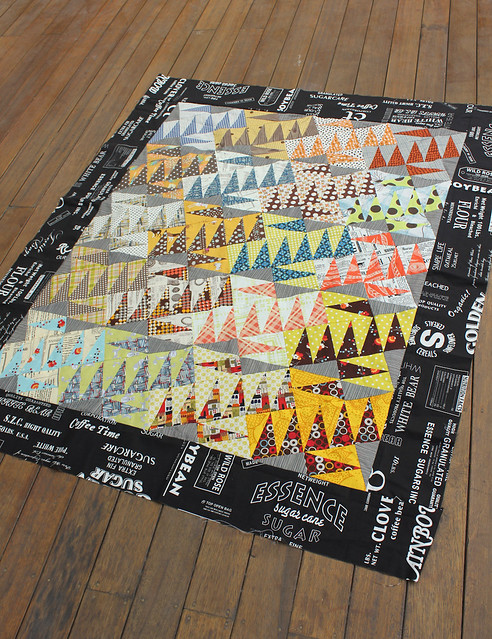
What to do with all the HSTs? Well you could organize a swap with your friends or you might want to make a lovely quilt like Under the Big Top. To read more about this quilt visit Humble Quilts where you can also read about the quilt that inspired Lori!

Under The Big Top by Lori of Humble Quilts

I've got a lot of scraps that I couldn't part with but didn't know what to do with them until I can across a terrific little tutorial at Buttontree Lane for stitchy flippy HSTs. I combined my scraps with the HSTs that I made with my charm squares. I simply placed a scrap on the white  side of my HST making sure it was at an interesting angle. I stitched it down, flipped it and trimmed the excess fabric! If it wasn't quite large enough to cover the white I repeated with another scrap. The result is fun, fast blocks! There are all sorts of possible arrangements for this block.


The last thing I talked about was half rectangle triangles HRT. These are just as fast and fun to make as a HRT! Instead of cutting squares I cut rectangles that measured 5" x 7" but you can use any size you want. Like the HST, I would simply add 1" to the height and width of the finished size of the HRT you need. The lighter fabric is marked with a diagonal line from corner to corner. The trick to HRTs is how you position the rectangles.You give the top triangle a twist and line up the opposite corners. Pin and stitch 1/4" away on either side of the line.


Simply cut on the pencil line and press the block. Trim it up to 4 1/2" x 6 1/2. This will give you a finished block size of 4" x 6". I like to place my ruler on the block and trim a little off the top and a little off the bottom so that the angle of the triangle comes precisely into the corner. Notice that the two HRTs are identical.


If you want HRTs with a slant in the opposite direction you will need to rotate the fabric so that the diagnonal is in the opposite direction.


And these are the two HRTs that you will end up with!


For more detailed directions please refer to my January 2014 Block of the Month pattern. These HRTs are so versatile. You could make a quilt of giant 54-40 or Fight blocks like this one. If you start with the sizes I described above the block will measure 20". It wouldn't take many blocks to make the quilt and there are lots of nice open spaces for practicing your machine quilting!


Check out this beauty made by Amy of Badskirt! Amy has a tutorial on her blog for making this quilt with triangles but I think that HRTs would work a treat!


I hope you enjoyed what I've shared and that your are inspired to look at your scraps in a new way! Until I post again, happy HSTing and HRTing!

Karen H

Tuesday, August 6, 2013

Easier Than Pie and Easier Than Pie and Beyond!

At last the promised booklets are now available! The first, Easier Than Pie discusses English Paper Piecing (EPP). I've provided the basics of EPP techniques that work for me. I've included information about making homemade tools to make the job easier, fabric cutting, fussy cutting, basting, piecing and assembling.


The second booklet is titled Easier Than Pie and Beyond - Where Foundation Piecing Meets English Paper Piecing. Again I've provided the basics of how I foundation piece my hexagons. This booklet is a follow up to Easier Than Pie.


Both booklets are under a new tab, English Paper Piecing & Hexagon Fun. I'll also post other tutorials that I've published and I'll add links to my posts with hexagon and English paper piecing how-tos!

In addition to the booklets I've also posted Master Hexagon Templates in three sizes, 1/2", 3/4" and 1".

You may have to resize them to get an accurate measurement. In addition there are lots of places on the internet where you can find free templates.  The hexagon size is based on the length of each side, not the width or height of the hexagon.  I like to use these masters for my hexagon projects for a variety of reasons:
  • it is inexpensive. You can purchase precuts however if you need thousands of them it can get pricey;
  • when I don't feel like sewing I'll spend some time cutting hexagons and then I just store them in a zip lock bag;
  • I've always got them on hand;
  • I can resize the Master Hexagon Templates if I need an odd size and then that resized Master becomes a new master from which I make more copies. I needed hexagons that were larger than 1/2" and smaller than 3/4" so I was able to resize to 5/8". It doesn't sound like much but when you start adding up all those 1/8" differences it adds up and can make a significant difference in the final size of the quilt.
I hope you like the booklets and that they will give you lots of ideas for creating some beautiful quilts. As always if you have a blog or website please feel free to link back to my blog so that these instructions can be shared with others. I put a lot of time and effort into them and ask that you give me credit and please don't take my work and reproduce it as your own!

So the brown border on Butterscotch Ripple is finished. All that was left was the creamy toffee inner border and I decided to go with figure 8s. I did the straight edge first and was very pleased with the effect.


I next worked on the uneven edge and it filled in nicely; I am happy with the effect. The figure 8 is so easy to doodle and it is just as easy to quilt. Best of all if the loops are uneven it really doesn't show. I just fill in a space freehand but if you want to try it and are nervous, draw a line with a fabric save marker through the centre. It will give you something to aim for so that the loops can be similar in size.


Here it is all quilted and waiting to be bound. I love the backing fabric.


Until I post again, happy sewing!

Monday, August 5, 2013

What to do when the fabric isn't quite right and a BIG surprise!

Sometimes you have a fabric and it isn't quite right. I have a lovely red maple and oak leaf fabric and it has the odd bunch of acorns here and there. I love this fabric and used it to make a quilt and have fussy cut leaves for wallhangings.


I used this fabric to make a One Block Wonder quilt. I was very happy with the finished quilt top however the white highlights on the acorns stuck out like a sore thumb and since the similar blocks are clustered together when making a One Block Wonder the white was more prominent than it was in the fabric. Problems need solutions so what I did was use a Sakura Pigma Brush (it is like the Sakura Pigma pens only it has what looks like a felt tip so it gives more ink coverage) and I gently ran it over the white highlights.


In the picture below the acorns is the upper left corner have not been altered. The acorns in the lower right corner have had brown ink applied to them.


 This is the quilt. I think is looks rich and elegant....maybe a bit like a Persian carpet or a paisley.

These are some of the blocks which had a lot of acorns. The white has been softened with the brown ink so that they are much better.


And the corner with a mitred corner - I used my sneaky mitred corner technique (you'll find it under Tips and Tutorials). I also touched up the acorns in the border fabric and on the binding!


You can also use this same technique if you've quilted with a light coloured quilting thread and have inadvertently strayed onto a darker fabric. If the quilting thread is noticeable simply take a fabric marking pen in a colour that works with your fabric and gently touch the quilting thread to mute the colour. You don't want to hold the pen on the thread because it will wick up the ink - just lightly touch the stitches to soften the colour.
 
Well I've got some good news for you! The English paper piecing and foundation pieced hexagon instruction manuals that I've been promising should be posted tomorrow! The first is titled Easier Than Pie - English Paper Piecing for Beginners. The second is titled Easier Than Pie and Beyond - Where Foundation Piecing Meets English Paper Piecing. Here are some foundation pieced hexagons to tempt you!
  
 
I will also be posting Master Hexagon Templates for your use. You will be able to print or copy what you need and then cut them out. I prefer to cut out my own hexagons because precuts can get expensive if I am making a large quilt. 
 
I hope you'll enjoy the instruction manuals and the templates and if you want to post a link my blog so that others can access my instructions that would be terrific!
 
Until I post again, happy sewing!

Thursday, August 1, 2013

Swirls in Butterscotch Ripple and basting hexagons

I'm working away on two projects, one for me and one for you! Butterscotch Ripple is coming along nicely now that I have a full head of steam. All of the feathers in the diamonds are done as is the next border of circles. I've now filled some of the inner diamonds with swirls. There will be some filled with feathers but I've not yet decided on the feather motif that I will use. Tomorrow I'll make the decision after al of the swirls are quilted.


The second project I am working on is the first of two instruction booklets for English paper piecing. It is coming along a littler slower than I had hoped but that is because I am trying to provide as much detail as possible, especially for beginners. The second booklet will discuss foundation pieced hexagons and that is in the works too!

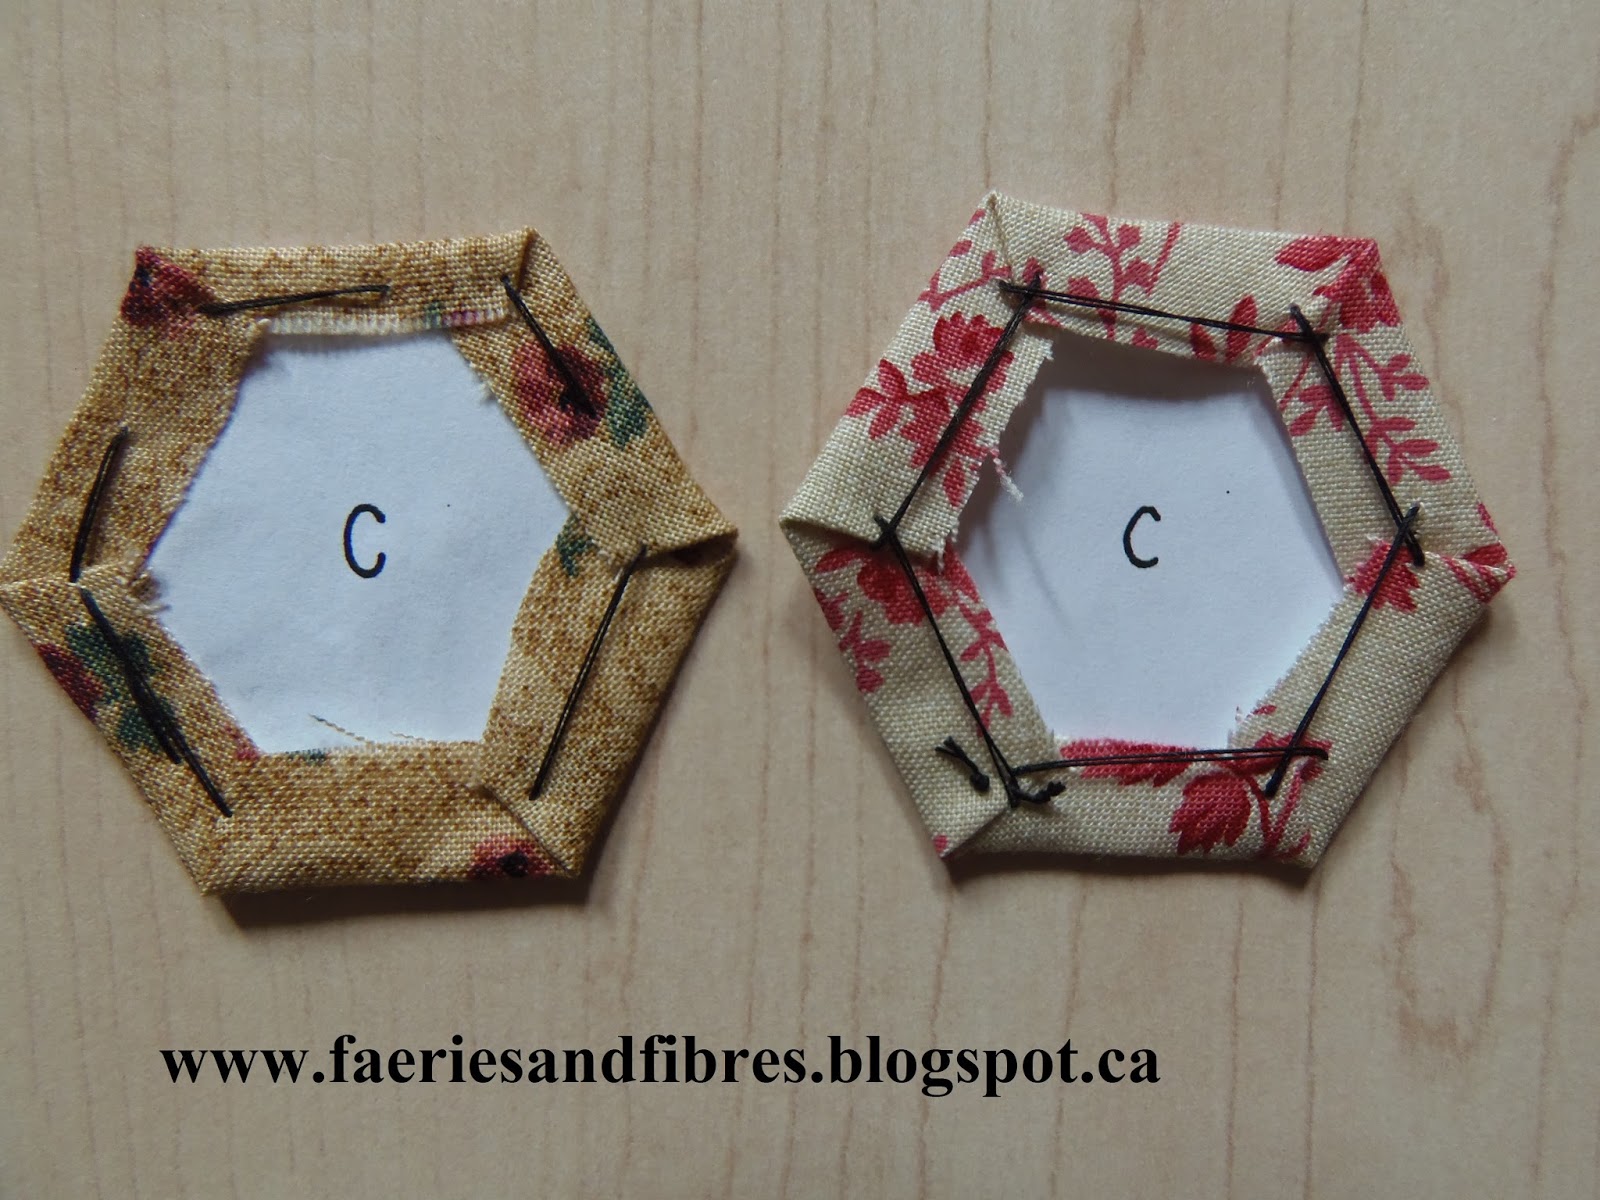
One of the things I'm writing about is threat basting hexagons. There are two different methods that I am aware of: with one method the basting thread is removed and in the other it remains in the quilt. The following pictures show both methods. The thread pierces the fabric and the paper of the hexagon on the left and the basting thread will be removed. In the hexagon on the right the basting thread only pierces the fabric so it will remain in the hexagon . I've used black thread so that you can see the basting.


Each method has its place but I prefer the method that stitches the fabric to the paper hexagon. There are three reasons for my preference: I find that the folds and corners are crisp with this method, I can see the basting threads on the right side of the quilt so I know if a paper is still in the hexagon and I don't need to worry about thread colour (a dark colour basting thread that is left in could potentially show through the fabric in the finished quilt). If I am foundation piecing the hexagons I always baste through the fabric and the paper.

And speaking of foundation piecing, here's another foundation pieced star that is surprisingly easy! Both stars are made from the same template.


Some foundation pieced hexagons have seams that run into corners and when sewing the hexagons together after the foundation piecing they can be a little tricky because of the bulk at the corner. With this hexagon template there are no seams that run into corners so the stitching together of the foundation pieced hexagons is a breeze!


So that's what I'm working on. My brother is making a violin!


He did all this inlay work. It is called purfling!


And here's what's in the garden today!

Obedient plant

Grazing on the forest canopy

Until I post again, happy sewing!