Showing posts with label hexies. Show all posts

Thursday, May 15, 2014

More GG blocks and an amazing giveaway

Tomorrow morning I'll publish Block 3 in the Value Proposition Quilt Along (QAL).  It is an interesting block that allowed me to make good use of lots of small scraps. You can make your block with as few as three fabrics, one light, one medium and one dark or you can go the scrappy route like me! This is also a great place to experiment with a directional print such as a striped fabric! Have I whetted your appetite? Tune in first thing tomorrow morning for Block 3!

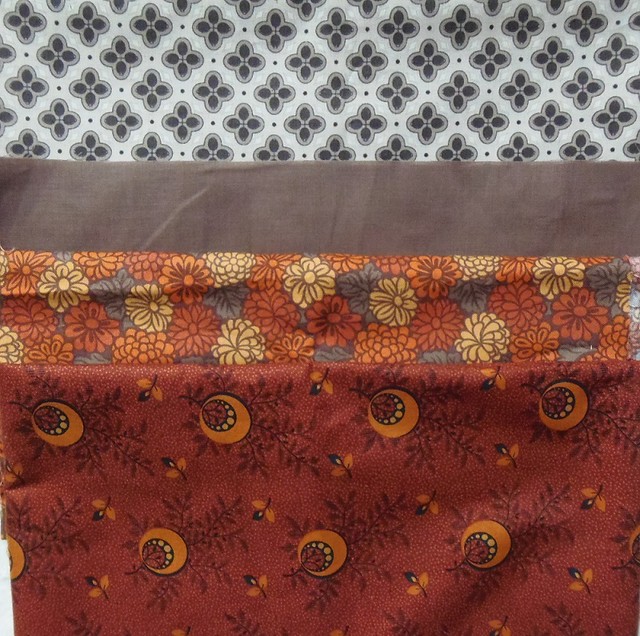
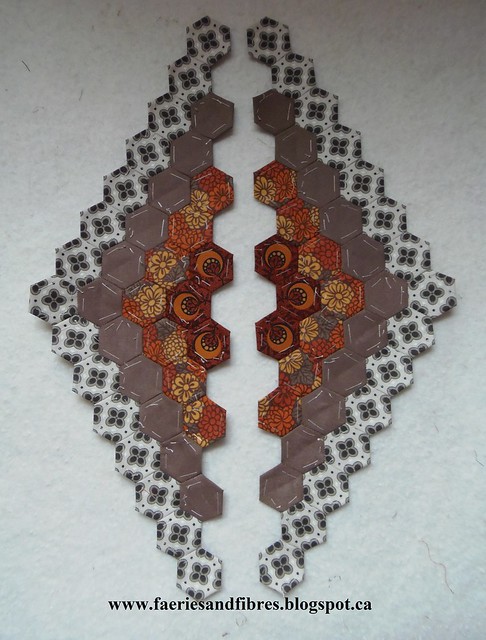
I've completed two more blocks for my Godstone Grannies (GG) coverlet. I used four fabrics, three prints and one solid.


If the fabric at the top of the picture looks familiar it is because it is the one I tinted yellow with watercolour paint and textile medium.


This pair of partial blocks will be used along the sides to square up the quilt.


The fabric on the outside round of hexies looks quite different au naturel versus tinted as in the picture below! Some of this is attributable to the tinting and some to the arrangement of the hexagons as a flower in the block below or as a long strip as above.


I mentioned an amazing giveaway and who doesn't love a giveaway? I follow a Vicki's blog, 2 Bags Full.   Vicki organizes an event each January, Grow Your Blog, to help bloggers grown their blogs. Many of you may have found me via GYB. Vicki creates all sorts of interesting little treasures including knitted bird nests. She sells her wares in her Etsy shop. At the moment Vicki has a wonderful giveaway on the go! You won't believe some of the wonderful treasures available to be won. You can see them here and also read about how to be entered in the draw. I've entered so good luck to me and if you enter, good luck to you too!

Until tomorrow, happy sewing!
Karen H

Wednesday, April 16, 2014

Value Proposition - fabric requirements and fabric selection

Today I'm going to write about the fabric requirements for the Value Proposition QAL. Let's start with the path. There are two path options available to you, a single path or a triple path.

Single Path
If you decide to make a single path then you will need only one fabric and 1.25 yards/meters should suffice.


But this is a scrap quilt so there is another option available to you and that would be to use an assortment of fabrics that are very close in value and colour. That is what I did with my quilt Stars in the Loft quilt. I thought I had enough fabric for the path but a it turns out I ran short so I added several other fabrics and I like the result! Now in the picture below some of the fabrics photographed very light in value and you can see how they advance. I wrote about this yesterday. However, when you see my quilt in person the difference in value is less dramatic.

Detail from  Stars in the Loft
Triple Path
 I chose to use a triple path and I used it to create a design element by using two fabrics. In the picture below the middle row of the path is marked in pink.


If you prefer to use a single fabric for the triple path or an assortment of fabrics of similar value and colour as I did with Stars in the Loft you will need a 3.5 yards/meters of  fabric.

If you choose to use two fabrics, one for the outside edges and one for the center of the path you will need 1.25 yards/meters of fabric for the center path and for the outside path on either side you will need 2.25 yards/meters of fabric.

So what did I do? I chose to use two fabrics that are an oatmeal colour with a grey-green shade. One was slightly lighter in value than the other and although the difference is subtle the final result is, I believe, quite elegant!

I used the darker fabric in the center and the light fabric on the outsides but there is no reason why you couldn't do the reverse. The value difference creates a really nice effect in the quilt. Wish I could show it to you now but I can't because it will spoil the surprise! You might want to use an even darker fabric for the center path to create a very dramatic result. I had considered making a turkey red path but in the end went for the subtle look.


I would not recommend using a dark fabric for the path because there is a great risk that the blocks will bleed into the path however if you are keen to have a dark path I would suggest that you postpone your fabric selection until you've made the blocks. That way you can chose a fabric that will showcase your blocks to their best advantage.

Fabric Selection for the Blocks
Value Proposition is inspired by an antique quilt circa late 1800's so I chose to use many older looking prints. Civil War/reproduction prints would work really well. Smaller prints are easier to work with and larger scale prints tended to be more challenging. Tone on tones and textural fabrics worked a treat.


If I needed 12 hexagons but only had enough fabric for 6 then I looked for a similar fabric so I could cut the extra six needed. So what I am saying is don't discount a fabric because you don't have enough of it - just add another fabric of similar value and colour!

I looked for fabrics that had visual interest. In this assortment you can see light colour fabrics with dots and small repeated designs. I used multiple prints in a single block where a particular value was called for. For example if I needed 12 lights I would select 4 or 6 fabrics and cut equal numbers of each to yield 12 hexagons!


I chose to use stripes in several blocks because they add visual interest and create secondary designs beyond the basic design. So pull out your stripes and plaids! While I only have pulled lighter fabrics for the photo I did use darker stripes as well.


We will be working with 1" hexagons and while they are a good size I did avoid large scale, busy prints. The exception to this rule would be a large scale print that is used for fussy cutting or a large scale print that didn't have much variance in value. I did very little fussy cutting in my quilt but you should feel free to fussy cut if you want! Here are a couple of large scale prints. The top fabric would be great for fussy cuts and the lower fabric was a little easier to use provided I avoided having light and dark in the same patch.


Helpful Tip: To give my quilt a cohesive look I did repeat fabrics. I would cut a 2 1/2" strip of fabric and from that I would cut my hexagons. The leftovers were saved for another block. So if you have scraps that are 2 1/2" x 2" they will be large enough for a hexagon so hang on to those little treasures! They might just be the perfect fit for one of your blocks!

Don't worry if you don't have just the right fabric! I might have some tricks to allow you to work with your stash to create something new and interesting!

Well I hope I've given you some food for thought! On Friday I will post the first block pattern. Each block is made up of 37 1" hexagons. If you don't have 1" hexagons you will find a master template on my blog under English Paper Piecing & Hexagon Fun. If you are new to English paper piecing (EPP) I have published a booklet that provides the hexie basics. It is under the same tab and the title is Easier Than Pie - English Paper Piecing for Beginners.

Until I post again, have fun looking through your fabric and happy sewing!
Karen H

Saturday, April 12, 2014

How about another QAL and another GG Block

Who is up for my second quilt along (QAL)? I will launch my next QAL, Value Proposition on Friday, April 18, 2014. It is a hexagon quilt made entirely of 1" hexagons. Over the next several days I'll provide information leading up to the launch so you'll be ready to start sewing next weekend! Thereafter I'll post the block patterns every two weeks. Are you excited? I am!

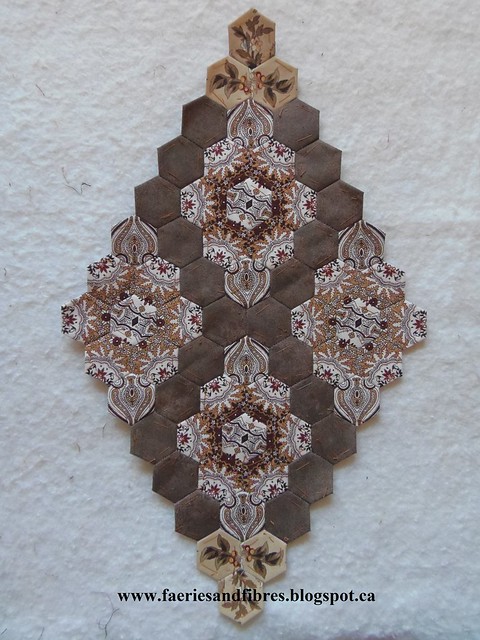
This is my next GG (Godstone Grannies) diamond block. I quite like the lacy feel of this one and I am satisfied with the colours so there will be no alterations to the fabric unlike the block I showed you yesterday! This diamond will be one of a pair. I will make some slight alterations to the layout of some of the hexagons in the second diamond so that the second one will have a slightly different look. The hexies are 3/4" in size so they stitch up a little slower than the 1" size but they are a nice size for fussy cuts!


It is a beautiful day today so I'm off to help my Mom with her garden. When that is done I'll cut out the April block from Julia's Hexie BOM. The April block is a basket and I know what I'm going to do! You can see the April block here. I'm making each block out of blue fabrics (I've always wanted a blue and white quilt). I'll post pictures when it is done!

Until I post again, happy sewing!
Karen H

Tuesday, February 18, 2014

Hexagon Heart


Are you sewing along with me in the Soupcon QAL? If you are more comfortable making a pieced with templates, Mary of Through Rose-colored Trifocals just posted an excellent tutorial! Mary provides detailed instructions and photographs for making the pieced border. You'll also get to see her Soupcon quilt with the pieced border. If you've already made your border and the finished the measurement is not spot on don't worry! I've built in wiggle room so that adjustments can be made without affecting the design of the quilt!


I've been sewing along with Julia Wood's Hexie Block of the Month (BOM) over at The Hexie Blog. The design for January was a snowflake and February is a heart! This was my January block. The little circles of blue in the centre of the background spaces was my own addition. A little bit of embellishment can take a block from pretty to beautiful in only a few stitches.


I liked the open airy feel of the snowflake block. I also liked the blue and white combination so I've decided that the entire quilt will be blue and white.

The February pattern is a heart that is solid hexagons in shades of pink and red. I decided to leave the center of my heart open so that the background fabric would show and it would maintain the open and airy feel of the previous block. The fabric I selected for my hear is blue with a little red it it as a reference to Valentine's Day. To make the block sparkle I used my little start that I demonstrated yesterday. It measures 2 1/2" across.


And here is the finished February block! The hexagons are 1" and the block measures 15" finished. You will find the February pattern here.


My guess is that the theme next month might have something to do with St. Patrick's Day so I'll be looking through my stash of blues for fabrics with some bits of green! The blocks are fast and fun to make so if you are tempted head on over to Julia's blog. You can find the first block, January, here.

I'm linking up with Sarah over at Sarah Did It for her monthly Help with Hexie-Aholics! There's always something interesting to find there so do drop by for a visit!

Until I post again, happy sewing!

Karen H

Monday, February 10, 2014

Tutorial: Basting hexagons my way

If you are here for the Grow Your Blog Event you can enter my giveaway by leaving a comment here.

I promised to show you how I baste my hexagons for English paper piecing (EPP). I enjoy basting because it is a mindless activity but even so I want it to go quickly. At the end I want a neatly basted hexagons with smooth folds and sharp corners so that each will  fit precisely (or close to it) with its neighbour!

To start I use a tiny dab of my glue stick to hold the paper to the wrong side of the fabric. If I'm cutting multiple hexagons I'll often glue the paper to the fabric and then cut the hexagon out with scissors. Unlike other piecing methods the seam allowance doesn't have to be an exact 1/4". Here you can see a hexagon that I cut out. It isn't perfect but there is enough seam allowance all around so that I can baste it!


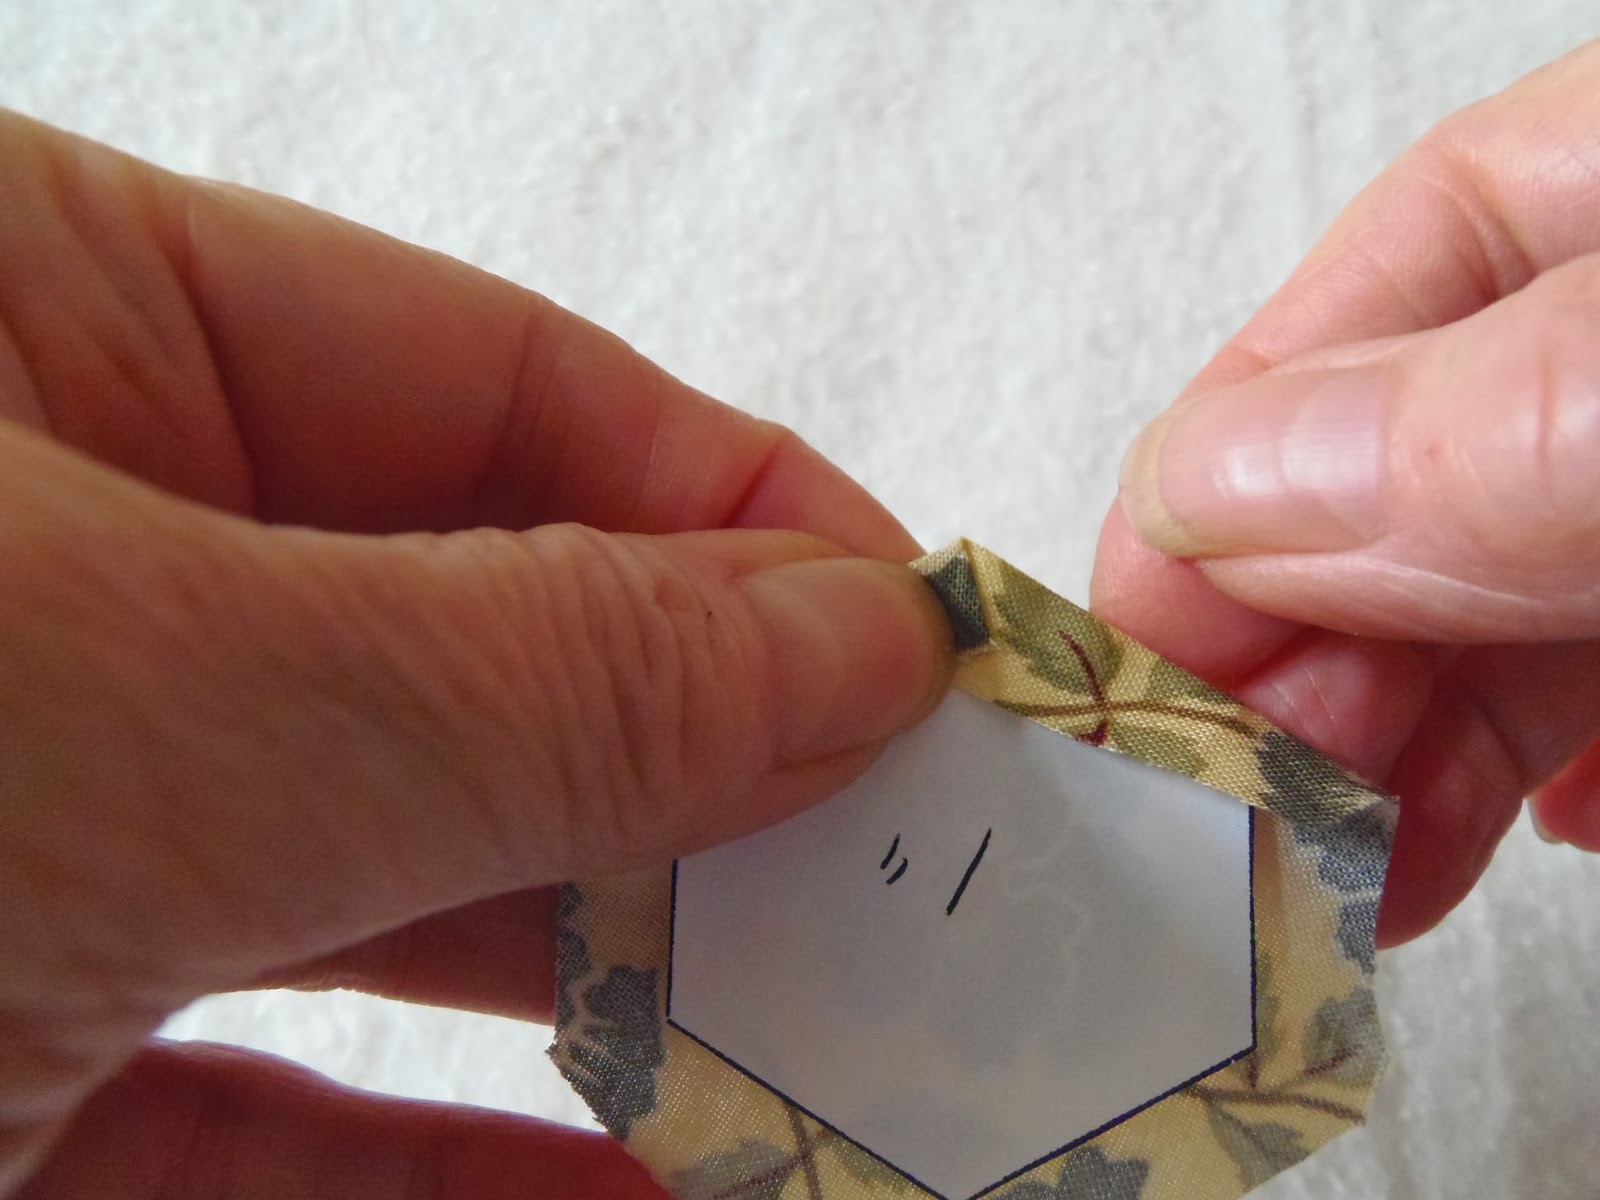
I thread my needle and make a knot at the end so it is ready to go. I like to use inexpensive thread like serger thread. To start I fold the fabric over the paper and I pinch it with my right thumb and index finger at the very edge of the corner.


I rest the edge to the left of the corner against the ball of my index finger (the pointer) and I use my index finger roll the fabric and as it starts to fold over the paper.


I catch the fold with my right thumb to hold it in place;


I then use my left thumb and index finger to hold the fold -it is all one smooth fluid movement! I am ready to start sewing


I bring my thread up from the right side of the fabric just below the fold and take my needle down through the fold and back up close to where the next fold will be made. My goal is to have a smallish stitch over the fold because it will hold it down nice and snug!


I turn the hexagon a little and  repeat the process.


I continue in this manner until I get to the last corner. With my right thumb I fold the fabric and sweep it under the folded fabric for the last side. I make my stitch over the fold.  I take one more stitch in the same way along the first edge that was basted and clip my thread. I don't knot my thread when I'm finished because it will just slow me down when it is time to remove the basting thread.


This is my hexagon from the back. You can see that the stitches are smaller at the corners.


This is my hexagon from the front. You can see that the stitches on the right side are larger. In addition to keeping the folds flat and snug, stitching in this way makes the removal of the basting thread much easier because the stitches on the right side are large. HELPFUL TIP: I use a darning needle (the end with the eye of the needle) to pull out my basting threads. These large stitches make it easy for me to slide the needle under the stitches and pull the thread out.


I find this method of basting quick and easy.

When I'm basting one of my foundation pieced hexagons if there is a fold in the center of a side as is the case with the point of a star I often take an extra stitch to hold if flat.


Pictures are great but sometimes it helps to see live action so I thought I would shoot a video to demonstrate how I baste hexies! It is action packed - snags, tangles and basting all in two minutes of  amateurish video (my first one if truth be told) but it gives you the idea. I considered re-shooting the video but decided that it would be good for you to see that everything doesn't always go smoothly! That includes the shooting - please excuse the blurry shot! I hope the video will be helpful! Once you get the rhythm of the movement down pat the basting goes really fast and it is meditative once you get into the zone! Best of all you have nice sharp corners and smooth folds resulting in perfectly basted hexies!


I hope you've enjoyed this quick tutorial and that you'll give it a try. Until I post again, happy basting!

Karen H