Showing posts with label star. Show all posts

Sunday, November 15, 2015

Teaching and sewing

My mantra is "less talking and more sewing" however as of late I've been doing the reverse. I've been to London (Canada, not England) to do a trunk show of my work and to teach my English paper piecing techniques. The London Friendship Quilters' Guild is a great bunch of quilt makers. They were warm, friendly and inviting. If you live in the area and are looking for a Guild to join, you won't be disappointed. One of the unique things that they do is invite area quilt shops to most of their meetings so that they can talk about their shop and share their wares. What a great service, especially for those who don't drive. This month they had Laurie and Robin from Stitcharie in Wyoming (a small town in Canada, not a state in the US).

They had such interesting fabrics and they also carry Tulip Hiroshima needles and they were very well priced. We made a special trip to the shop after the workshop and I picked up a few pieces of fabric to add to the stash. The women who run the shop are friendly and they clearly love what they do. It was a real treat to visit such a lovely little shop.

I think the members of the London Friendship Quilters' Guild enjoyed my trunk show and the workshop. There was certainly lots of excitement when I started sharing my techniques for made fabric. I think they would have enjoyed having more time spent on fussy cutting so I think I will make some revisions to my course so that I can give more instruction in that area. I didn't take pictures but I know that others did and if and when they forward them to me I'll be sure to share with you.

All this teaching and talking hasn't left much time for sewing but I have completed my Road 66 hexagon blocks and here they are!

I love the wavy red and blue print. There is so much visual interest in a wavy print. I just wish there were more of them on the market. I especially like those that would fall into the reproduction category.

I was sent some pink ombre print by my cyber friend Paula and I used it to make the six hexagons swirling around the middle. It is such a great print. It also comes in yellow and green. I've managed to find an online shop and have purchased some more of it to add to the old stash.


I didn't quite get the white print lines matched up when I was making this block but a little touch up with a brown Sakura pigma pen and you can't even tell. If it isn't right there is usually a way to make it right!


This is the final block. I'm not thrilled with it but I can live with it. I do really like the red flower in the middle and I suppose the yellow round works well. There is a bit of a black print at the outside edges of the yellow hexagons and it softens the corners so that the yellow hexagons actually look rounded. Maybe it is growing on me!


All of these rosettes will be connected with a path made of diamonds rather than hexagons. If full hexagons were used it would result in a much larger quilt. My quilt Butterscotch Ripple was joined with diamonds. It creates a different look to the quilt, one which I really like!
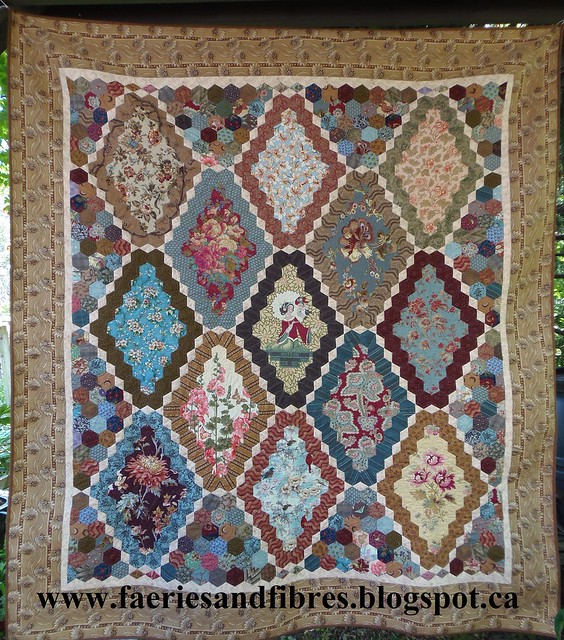
Butterscotch Ripple by Karen H 2013

So where will I get the diamonds? Easy peasy! A diamond is simply one third of a hexagon. In the following picture you can see that I've dissected a hexagon into three diamonds. I already have a master sheet of hexagons that I used for my Road 66 blocks so I'll simply make a copy, dissect the hexagons, make copies of the dissected hexagons and then cut them out.


These diamonds will be relatively small given that the hexagons are 1 1/4" so what I will do before basting is to fold the seam allowances over the paper and give them a finger press; this makes it very easy to ensure that the diamonds have lovely sharp points. In addition I plan on basting through the paper rather than basting from the back. Why you ask? Simply because it will be faster, easier and I don't plan on reusing the papers so if they have needle holes it won't matter.

Before I sign of I want to remind you that diamonds aren't just for connectors. Three diamonds can be fussy cut and then sewn back together to create this sort of effect.


Or how about this one?


If the fabrics aren't fussy cut but instead you use a one dark, one medium and one light fabric you have a tumbling block. Here you can see they are joined with triangles. Where do the triangles come from? Six triangles make the same hexagon so you just divide a diamond in half and voila....magic!


Want to have even more fun? Twelve diamonds make a hexagon star. You need six for the star and six for the background. What I particularly like about this star is that it is the background that is fussy cut and the star is cut from two tone-on-tone fabrics. The fussy cut background was intended to be made into a star but it just didn't work so I hung on to the diamonds until I figured out another way to use them. Never toss those basted hexagons or diamonds because at some point they may come in handy!


If you are interested in reading more about constructing, deconstructing and reconstructing hexagons you can read my blog post here.

I've got almost 30 quilts to unpack, refold and store away until my next trunk show. But first I'm going to make myself a nice cup of tea.

I'm linking up with on Help for Hexie-aholics at Sarah Did It.

Until I post again, happy sewing!
Karen H

Tuesday, April 14, 2015

Persian Tiles, star tutorial and more!

Since my last post was about churn dash blocks I thought I would share a picture of the first miniature quilt that I made because it was made with churn dash blocks. I call it Persian Tiles and it was made in 1998. The six larger churn dash blocks measure 3" and the two small blocks are 1 1/2". All were pieced on the sewing machine - these blocks were not foundation paper pieced!

Persian Tiles by Karen H 1998

I used the method I described here to make the blocks. The pieces for the smaller blocks started a little larger. I made the HSTs and I trimmed them down to size. I just love these little churn dash blocks because they are a terrific way to use small scraps. One thing I've learned over the years is that even the ugliest of fabrics become beautiful if you cut them small!

Time to get back to my Birds in the Loft hexagon quilt. I've selected seven red fabrics that I will use to make 34 stars for the border of the quilt and I've made seven sample hexagon star rosettes.


I've done other tutorials on making them but thought I would do a refresher today.

I start with a sheet of hexagons. I draw a line from the upper left corner of a hexagon and extend it to the lower right corner of the hexagon below. I repeat by drawing a line from the upper right corner of a hexagon and extend it to the lower left corner of the hexagon below. I cut the hexagons out.


I trace around a triangle star point and add a 1/4" seam allowance all around. I cut out the paper template. From my fabric I cut a 2 1/2" strip of fabric. I lay the paper template on the strip of fabric and start cutting the star points. I use my rotary cutter to do this - it is a short cut so I don't use a ruler. If I accidentally cut the paper template I just make myself a new one! I need six star points for each rosette.


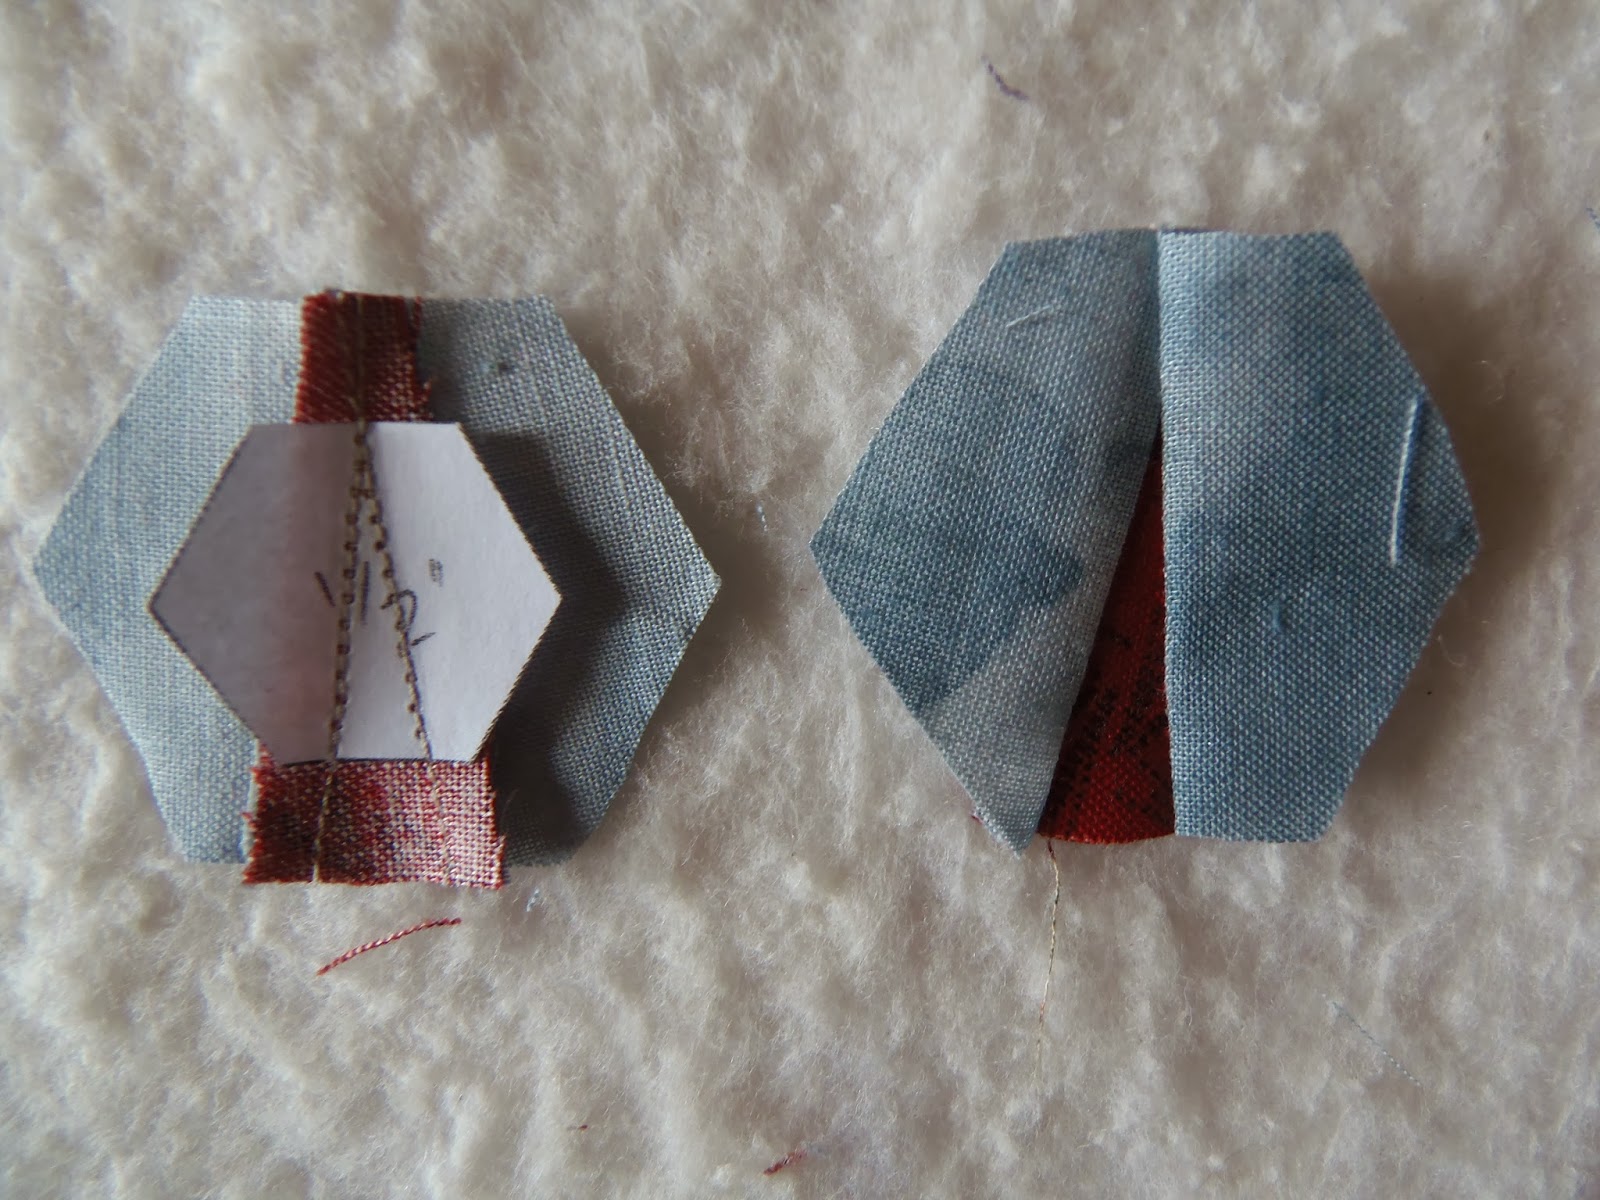
Place a tiny dab of glue on the wrong side of the hexagon in the area that will form the star point. I place the hexagon on the star point (Fig. 1). The lines of the star points are the sewing lines; I make sure that there is a narrow seam allowance (slightly less than 1/4") beyond the sewing lines. If I place the hexagon closer to the bottom the seam allowance will be larger and if I move it to the top it will be narrower. I clip the point of the star fabric so that it is 1/4" beyond the paper  (Fig. 2).


I shorten the stitch length on my sewing machine. I place my hexagon with the star point fabric on the background fabric as indicated in Fig. 3 and I sew from the top to the bottom. It is important that the first seam start at the star point because it will make sewing the next piece of fabric easier. In Fig. 4 I've folded back the paper and I'll trim the seam allowance with scissors to tidy it up. I then fold the paper back, the background fabric is pressed away from the star point  (Fig. 5) and I trim the excess fabric away  (Fig. 6) leaving a generous seam allowance of about 3/8". This will make the basting much easier. I repeat these steps with the fabric on the other side of the star point.


I use a knitting needle, crochet hook or orange stick and slide it between the paper and the star fabric to break the glue bond.


The final step is to baste the star point. I find it easier to fold fabric over the paper so that I don't have bulky corners. Notice in the hexagon on the left that the bottom edge of the star is folded up and the sides are folder over. This makes for nice flat corner with minimal bulk.


I like to use Elmer's School Glue to tack the paper to my fabric because it is washable, fabric safe and does not create a strong bond (that makes breaking the bond between the fabric and paper very easy). I only need to tack the fabric temporarily to hold it in place.


Once I've made six star points I'll stitch them together to make an open donut and then I'll set in the centre hexagon. Once the star is completely surrounded by other hexagons I can remove the papers. I may need a pair of tweezers to grab the smaller pieces on the sides however they tend to come out very easily provided that I shorten my stitch length on the sewing machine.


I've also made some more hexagon rosettes for the quilt.


Don't forget to drop by The Needle and Thread Network for WIP Wednesday.  It's where Canadian quilters share what they are working on!

Time for me to get sewing. Sure hope you enjoyed what I shared with you today. Until I post again happy sewing!
Karen H

Monday, April 6, 2015

Rosettes and a star!

Today I have two new rosettes for my Birds in the Loft quilt plus the test border rosette.


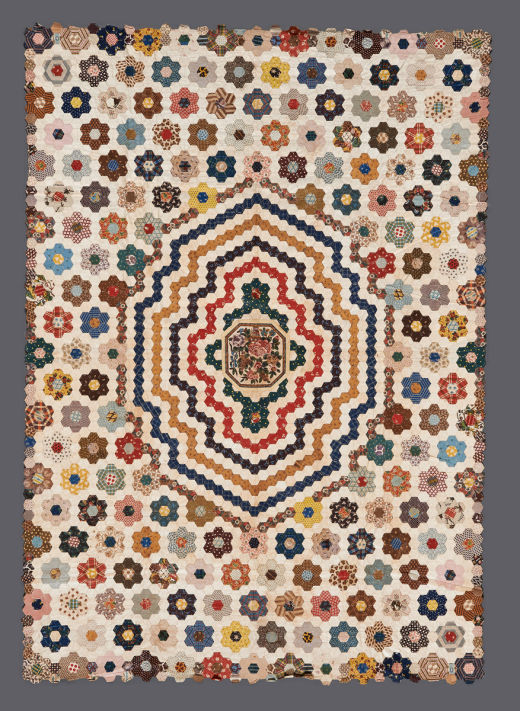
My inspiration for Birds in the Loft is twofold. The first inspiration is an antique quilt in the Quilt Museum and Gallery. I've modified my medallion to make it my own.


I added framed birds to the medallion. This is my version. All the rosettes I've been making and sharing will surround the medallion as in the quilt shown above.


The second inspiration was my own hexagon quilt Stars in the Loft. I plan to use the border design from this quilt for my Birds in the Loft.


I will alternate two different rosettes in the border. The first is the pieced rosette I previously shared. The tutorial is here.


The second part of the border is a rosette with a star. I will need 34 of them. In order to add more visual interest I am using seven different reds to make the stars. In the next few days I will do a fresh tutorial about how I made these rosettes. I've done other tutorials (you can find links under the tab English Paper Piecing & Hexagon Fun) but I've modified my technique slightly. In this example I have basted through the paper but have started basting only on the back so that I don't have to remove the basting threads. I'll let you know how easy or difficult it is to remove the papers when the time comes to remove them!


I enjoy reading and replying to your comments. Lately I've had comments from no-reply bloggers so if you don't hear back from me please know that I am not ignoring you. So what is a no-reply blogger? It simply means that you do not share your email address. When you leave a comment on a blog the blog owner (in this case me) has no way to contact you!  If you want to have your email address attached to your user name you will need to update your profile. If you use Google or Blogger there was a great tutorial on updating your profile on Quiltville's Quips & Snips.

That's it for today so until I post again, happy sewing.
Karen H

Wednesday, November 5, 2014

Ninja Stars and Split Star!

It has been some time since I last shared a hexagon star using my foundation paper pieced English paper piecing technique. I've published a free instruction booklet called Easier Than Pie and Beyond - Where Foundation Piecing Meets English Paper Piecing and you will find it under the tab English Paper Piecing & Hexagon Fun just under the banner at the top of this page. It provides you with all of the basics. I've also published quite a few tutorials on this technique.This star reminds me of those stars that movie Ninjas throw at their enemies so I call it Ninja Star!

Close-up of Loopers in the Sky with Diamonds by Karen H

Close-up of Stars in the Loft by Karen H

It is a very simple star and this is the template I used to make it! The numbers on the template indicate the order of placement of fabric.My method is so easy! The basic foundation paper piecing instructions are here.  The instructions for basting the foundation paper pieced hexagon are here.


I initially developed this technique because I couldn't find the fabrics I wanted to use to make my quilt Stars in the Loft. My solution was to make the fabric on the paper hexagon! I worked a treat and since then I've used this technique with great success to create some interesting designs!


This is such a versatile technique and the possibilities for creating interesting hexagons are limitless. Today I'll share another hexagon star that I made! This one is a little more challenging but the method is the same and you don't have to put many of these stars in a quilt to make it sparkle! I call it Split Star.

Split Star by Karen H

The trick to this one is to use two different values of the same colour to form the star points. I used I light green and a medium green and each was placed in the same position on the hexagon template.


I can just hear you asking "what size are the hexagons?" It is up to you but I used a 1" hexagon to make Split Star. I've used this technique on 1/2" hexagons! What's that you ask? Where do I get the 1" hexagons? Easy!  I've published master templates in various sizes under the tab English Paper Piecing & Hexagon Fun. I just print off one copy of the size I want to use and I draw my sewing lines on it. If I think I'm going to make lots of stars of the same design I'll make copies of my drawing and save it as a master copy from which all copies will be made. If I'm only going to make one or two stars I just draw them on the template and cut them out!

I've got another variation of the Split Star to share with you but I'll save that for another day! I can tell you this - it is fabulous!

Time for me to get back to working on testing the Gardens of a King quilt pattern by Missie. She has published more teasers of her quilt pattern on her blog this morning and you can see them here.

And if you haven't yet visited the Blogger's Quilt Festival please do so! I've got 81 The Giant Monstrosity entered in the Home Machine Quilted category, Cherry Blossom in Original Design and 81 The Giant Monstrosity is also in Viewer's Choice. You can vote for your favourite quilts in these categories and an additional eight categories! Voting is open now until the end of day on Friday, November 7.

Until I post again, happy sewing!
Karen H

Sunday, February 16, 2014

Tutorial: Twinkle, twinkle little star!

I thought today I would demonstrate how I made a little star using my technique for foundation pieced English paper pieced hexagons. I worked with 1/2" hexagons! You can find a master template for the hexagons here.

The first step is to draft the star points. I make marks at the top and bottom edge of a pair of hexagons. These marks will be the width of the base of the star point. You can make the base of the star points as wide or narrow as you want however I would not make it as wide as the hexagon itself because there is just too much seam allowance for a little piece. It is much easier to baste with a narrower base.


 I connect the marks on the diagonal.

I repeat on the other diagonal.

I make two more pairs and then cut them out.

If you are new here my foundation piecing method is explained in my January 19, 2014 post. It is really important to shorten your stitch length! The basting is explained in my January 20, 2014 post.

Here you see a foundation pieced star point on the hexagon. When trimming the excess be sure to leave at least 1/4" seam allowance but 3/8" is even better. I just trim with my scissors. If the seam allowance is too large when I come to baste it I can trim a little bit.

 Here you can see a basted hexagon from the front and the back. The paper is still in place. Notice how the fabric is folded and basted at the base of the star point. Normally the folds would all be in the same direction but in this instance the fold in the lower right corner has changed direction. It makes for a sharp corner.


The basted hexagons are arranged and ready to be stitched together.


Once basted they can be stitched together and a center is added. I'll do a little video in the near future to show you how I set in the center hexagon.

The little star is complete and it measures a dainty 2 1/2" square.


 I used one of these stars to make my miniature quilt Bony Fingers.


I plan to use the star I made in this tutorial as an embellishment on another quilt so it will be appliqued in place. I gave the star a good press with a hot iron and spray starch. I pressed the front and the back. The basting threads were removed and then the paper was removed. To remove the papers I gently opened the seam allowances that were basted under.


I remove the papers from the sides of the star point. My stitch length was shorted so the paper comes out effortlessly.


The last step is to remove  the paper that was the star point from the center. I neatly folded the seam allowances back into place.


And here you see the finished star ready to be appliqued to my quilt!


While this small star looks difficult it is actually quite easy. Just take your time and have fun! If it doesn't turn out it doesn't take much fabric so it isn't a huge loss! If you do make a little star I would love to hear how you made out!

And speaking of stars, Nellie of Nellie's Needles has finished Step 4 of her Soupcon QAL quilt. She wrote "It was a surprise to see how the set in squares border glowed when it was all constructed. I didn't see that effect until it was all sewn together. I'm in love with this piece". She took the words right out of my mouth! That is the very reason I love this border....it really does glow! Nellie's use of the striped fabric just adds a soupcon of excitement! Nellie is working on a second quilt using the basics of my Soupcon QAL pattern and she is creating something really wonderful. You can see it and read about it here.


That's it for today! Until I post again happy sewing!
Karen H