Wednesday, April 30, 2014

Godstone Grannies, border quilting and one more Soupcon

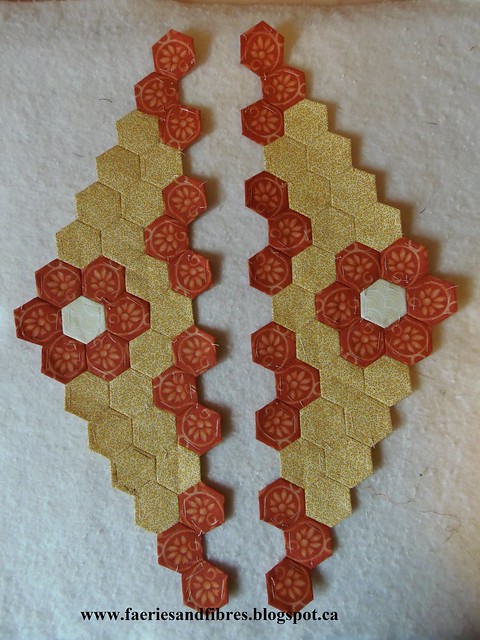
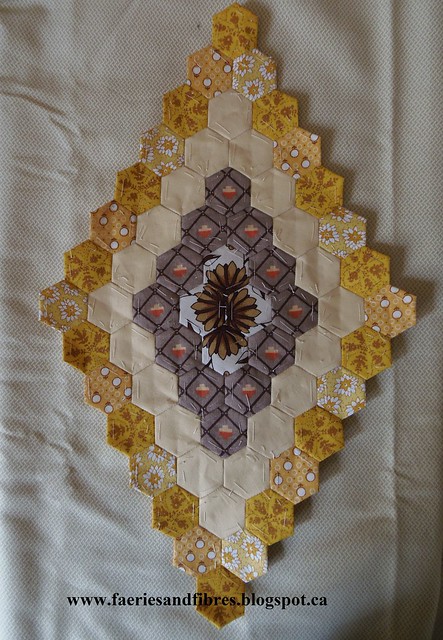
Yesterday I had a nice day of sewing with friends. One of them decided to do a purge in her sewing room and she had a variety of UFOs up for grabs. Some were hers and some were given to her by others. I have one of them and will share it with you in an upcoming post. It is a bit of a puzzle and a bit of a mystery so I might need some help to figure it out!  While others hand quilted and bound quilts I worked on my Godstone Grannies (GG) blocks and this is what I got done!

The two are partial blocks that will be used to fill the sides. The orange hexagons are all fussy cut. I used the orange fabric in these two partial blocks and also in the next GG block.

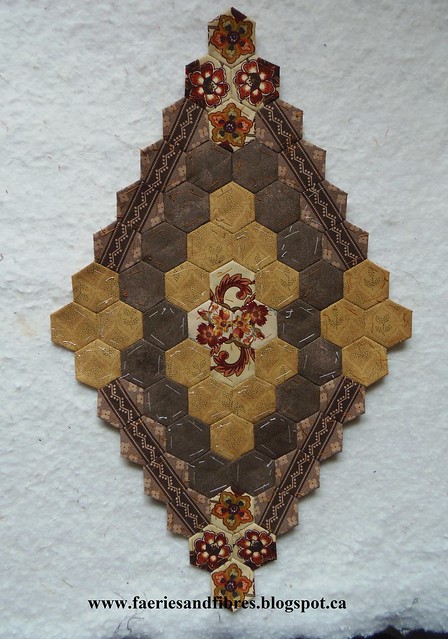
The next block was cut from a solid brown, a brown print and three rust and orange fabrics some of which were fussy cut. I just couldn't get a good picture of the fabrics to show the colours to their best advantage but at least you can see the prints. The orange print in the middle on the right was also used for the two side blocks shown above.


The colours in the picture of my block are much better. I just realized that the four orange circles in the center are stitched together wrong! Oh drat. I've told you before I fix mistakes that will bother me and those that won't I leave as they are. I think that this is one that will bother me so I might just have to do some reverse sewing! Did I say DRAT!!!


It looks like Chantal likes my GG blocks and she is making her own quilt! How exciting. You can see Chantal's blocks here! Is anyone else out there also making the GG blocks? If so I would LOVE to hear from you!

I want to send a lovely big thank you to Eileen. I was struggling with what to do in the hourglass border on Piccadilly to the Nines and she suggested melon wedges. I had been considering this option so Eileen's suggestion just cemented the deal. I quilted this shape in my Baskets and Nine Patches quilt and it is fast and easy. I did it with my free motion (darning) foot. It is one continuous motion; I stitched an "s" curve starting at the top of the border and I stitched the curve in the little triangle to the left and then the triangle below on the right followed by the triangle below it to the left. When I got to the bottom I stitched the "s" curve on the opposite side. When I got to the top I quilted the curve inside the triangle on the top edge to get me over to where the next "s" curve would start.


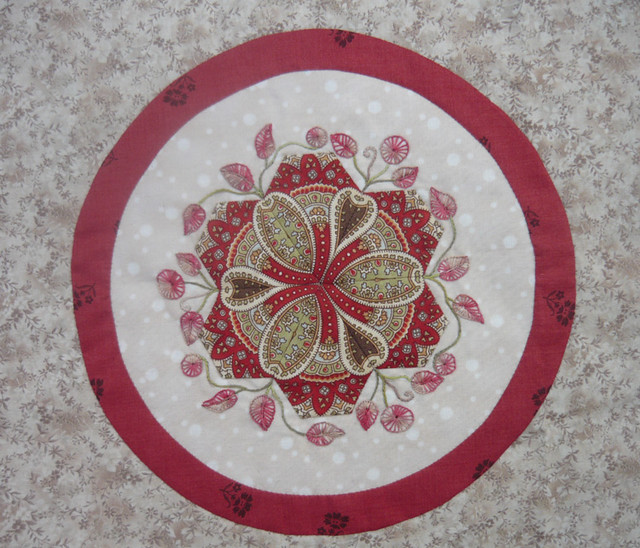
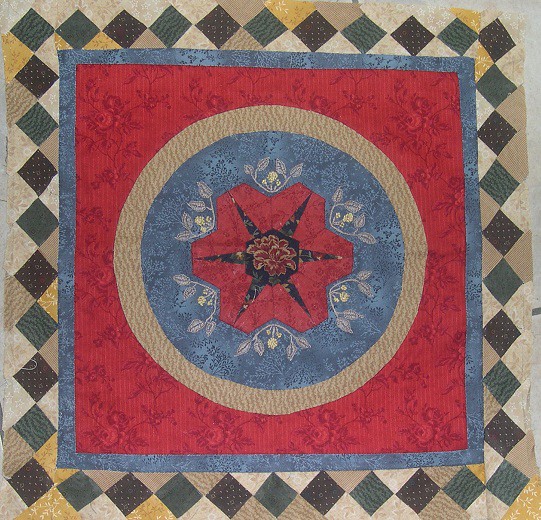
I leave you with one more Soupcon quilt in progress. This one is being made by Raewyn. She posted a picture of her Soupcon quilt at Step 3. I think the fussy cutting is amazing and the embroidery complements it perfectly. I wonder what colour choices Raewyn will make for Step 4. Keep sewing and keep posting pictures on the Flickr group Raewyn so that we can enjoy watching your progress!


Until I post again, happy sewing!
Karen H

Tuesday, April 29, 2014

Some Soupcon finishes

I wasn't going to post today but there are two completed Soupcon tops and one Soupcon variation that I just had to share with you!

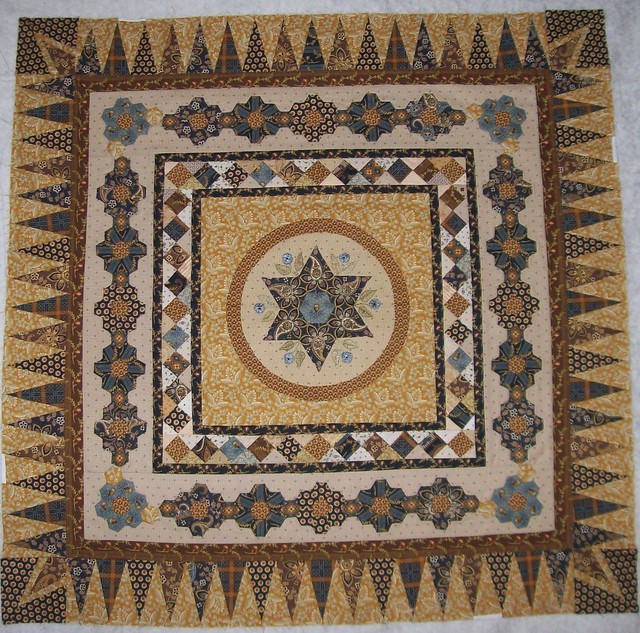
Susan (Stitchin Witch) has make this study in blue and gold. LOVE the corner treatment. Stunning!


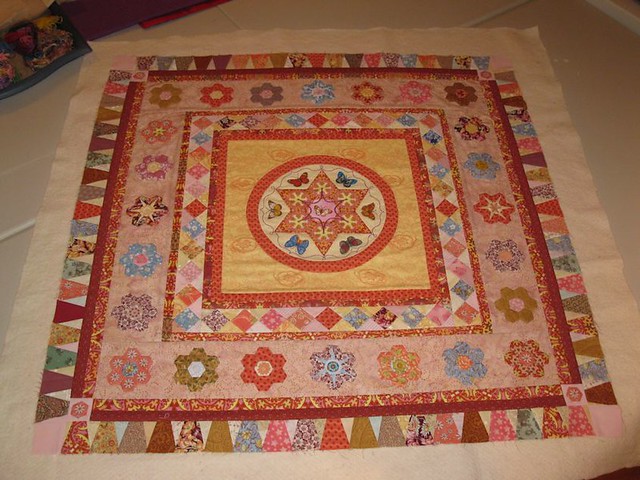
Kat created this delicate butterfly inspired Soupcon quilt. So pretty and so delicate. I love the little fussy cut flowers in the final thin borders. Stunning!


Nellie is an artist. She has taken the basic idea and created a unique quilt. The colours are soft, muted and elegant. She is now in the process of hand quilting this masterpiece! Stunning!


I am so excited by what I am seeing and I'm incredibly proud of what each of these very talented quilters has done.

Right, tea is done so I'm off to a day of sewing with friends! Until tomorrow, happy sewing!
Karen H

Monday, April 28, 2014

More feathers and a soupcon of Soupcon quilts

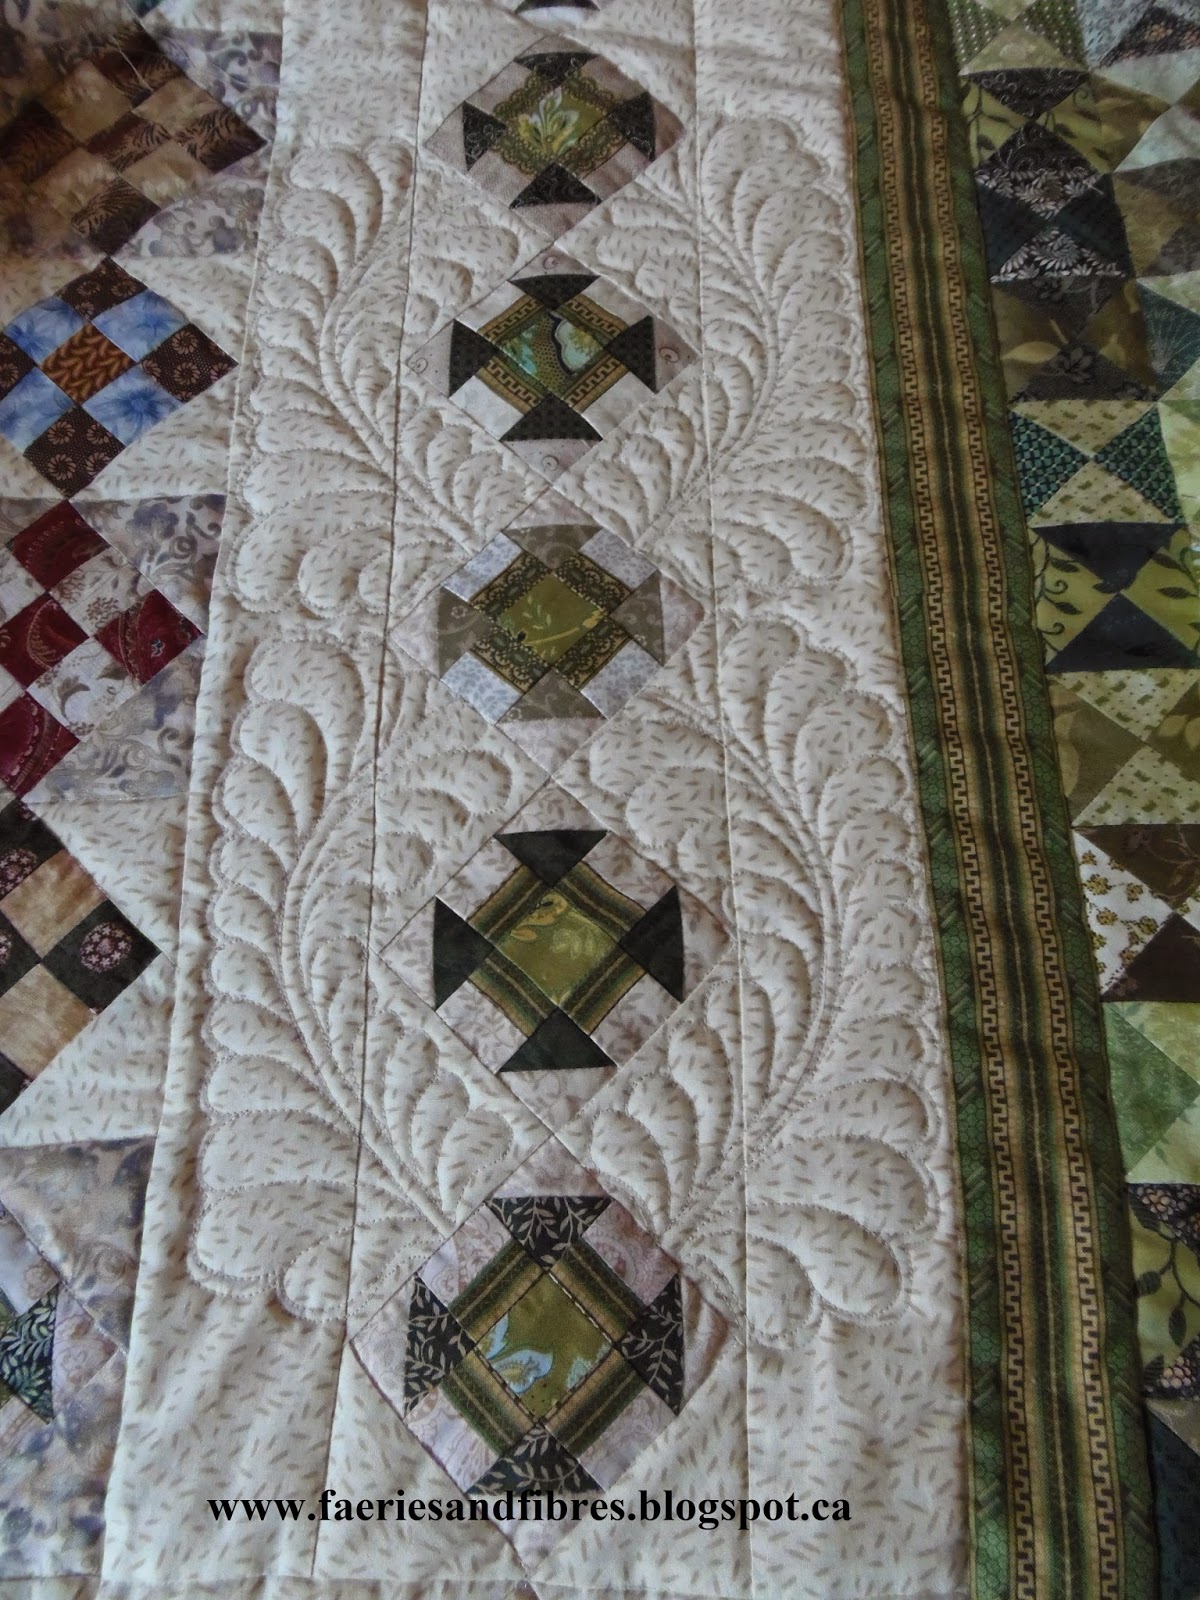
I worked on the feathers in the first border in Piccadilly to the Nines. The sides were done so all that was left was to reconcile the corners. This is what I came up with and it works.


Here are a couple of pictures of the sides and corners quilted.


I think the feathers fill the space nicely. I'll go back later and add more quilting to the nine patches in the center however my next step will be to quilt the hourglass border.


So what to do with the hourglass border? I thought I would do some sort of feather and that I would use my variegated green Fantastico thread by Superior. I just love the colour and the sheen of this thread and I thought it would work on my quilt but I'm not sure I'm happy with the appearance of the plumes. There would of course be echo quilting but I don't think it will change how I feel about the quilting.


I'm going to do some reverse sewing and try something different - maybe feathers with shorter, fatter plumes. And if that doesn't work for me then I might just ditch quilt all of the seams with green thread and call it it a day. In the meanwhile I can work on the green striped border. I'm thinking of doing a figure 8 in gold thread.  I'll share pictures of what I decide to do in the hourglass border but I am curious, have you ever quilted a large area of hourglass blocks and if so what did you do? Did you like it or would you do something different the next time? I'm open to suggestions! Hilda at Every Stitch made a Simon quilt which is jam packed with hourglass blocks which were ditch quilted. You can see her beautiful Simon quilt here. It is a simple finish that lets the fabrics be the star.

One of the blogs I follow is Amy's Free Motion Quilting Adventures. Amy has some really great videos and instructions for machine quilting on a domestic sewing machine. I left a comment on her blog because  I noticed she used different free motion feet and was wondering why she changed them. I also mentioned that my metal open toe foot gives me problems when I'm near bulky seams. She recommended the larger circular plastic foot. I gave it a go and the quilting near bulky seams was easier.  I also found that it tended to flatten and smooth the area that was going to be quilted and I quite liked that. The downside was that when I had to do any backtracking it was harder to see where I had stitched.


There were a few more pictures of Soupcon quilts on the Soupcon QAL Flickr page so I thought I would show them today. Soupcon is a French word that means "a little bi"t and in my first QAL I wanted to share a little bit of many different techniques that I enjoy. You can find the links for this QAL under the tab Quilt Alongs by Karen H at the top of this page.

Sophie (Pezze di fantasia) has two Soupcon quilts on the go. She has now added the Step 4 border and the quilts are lovely. I am particularly fond of the embroidery and the colours she has used in this one. Very summertime (will it EVER be summer?).


In her second Soupcon quilt she used my technique for foundation pieced English paper piecing to make the striking star in the center. Her choice of border fabrics frames her quilt beautifully! Well done Sophie - keep up the good work!


When I'm not quilting my Piccadilly to the Nines I'm preparing the post for Block 2 in the Value Proposition QAL.  I have to admit it is one of my favourites (just like the other seventeen). It is a very simple but effective arrangement and I hope you'll enjoy it! This time I will include a black & white picture of my block as well as a colour picture to provide guidance.

There'll be no post tomorrow because I'm sewing with friends. So until Wednesday (when hopefully I'll have made a decision about the border and maybe have another Godstone Grannies block to share) happy sewing!
Karen H

Saturday, April 26, 2014

Festival purchases, Piccadilly to the Nines and another GG block

Yesterday I went to the Creative Festival with some friends. We each came away with some lovely purchases. Some bought backings for quilts and other just bought bits and pieces of fabric. I bought a few fat quarters from one vendor.....at $2 each who could resist? Certainly not me. Before you ask what will I make with them, the answer is I don't know, I just thought they were nice! I expect I might do some fussy cutting with them!


I bought the four fabrics in the next picture for the same reason.....I just liked them. The fabric on top was $4/yard so I finished the bolt. It will be perfect for a backing! I like the striped fabric with the little waves - directional prints are so versatile and they add visual interest. I was looking for some larger wavy Smithsonian/Civil War type prints but had no success. Still I am happy with what I found! The bottom two fabrics will be great for delicate little fussy cut hexagons!


And I thought these two were pretty so I picked them up as well!


I did some more quilting on my Piccadilly to the Nines. One side is now quilted with feathers and I am on to the second. I hope to get the other three done this weekend so I can move on to the hourglass border. Here you can see two of the arrangements quilted; there are four in total on each side.


In the picture below you can see the four sets of feathers quilted in the border. It has some issues and it isn't perfect but I'm not bothered. I like how it looks, warts and all! There are a few little empty spots that may get filled in with stippling. For those who are interested I work on my domestic sewing machine.....it can be done!


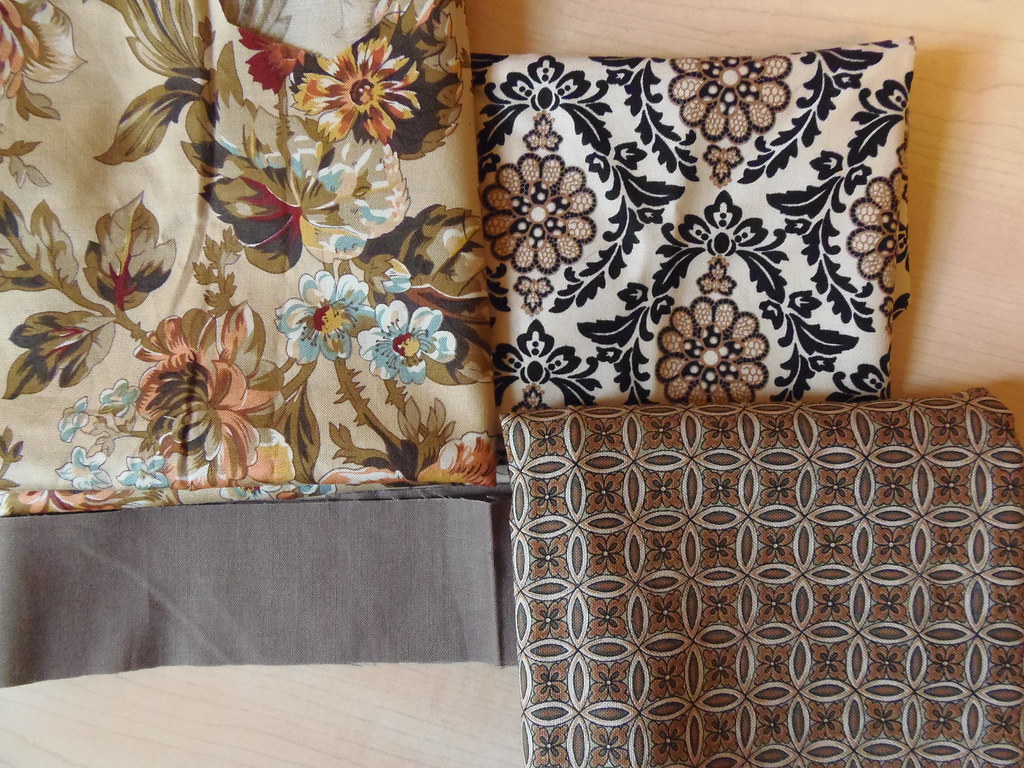
One of my readers said she liked seeing the fabric I used for my Godstone Grannies (GG) hexagon diamond blocks because she has a hard time picturing what kind of print my hexies originated from and what to look for when she shops for fabric for hexagons. One of the things I do if I am going through my stash or shopping for fabric for hexagons is to make a little window template that I keep in my wallet. I can pull it out and slide it around on fabric to see what the print would look like as a hexagon. I took one with me to the Festival today! Anyway, here are four fabrics that I pulled to make the latest GG block. The print on the upper left has all sorts of interesting bits that can be cut out. Same with the fabric on the upper right.


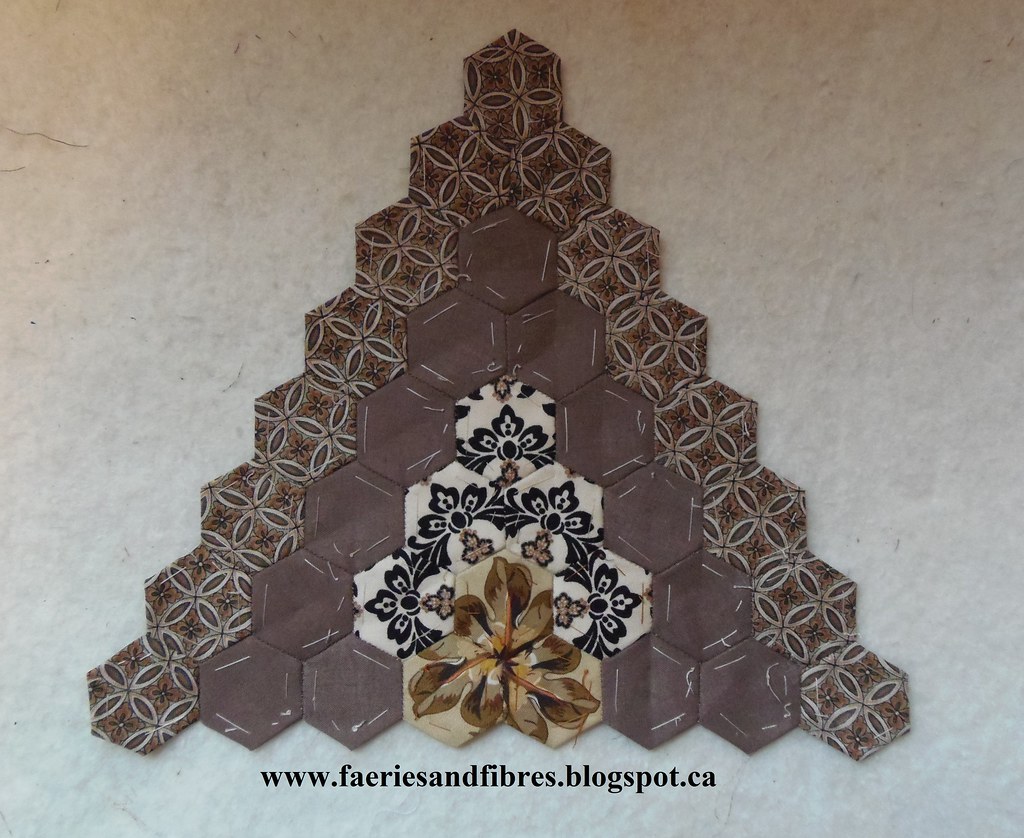
And here is the block that I made. It is one of the filler bits that go on the top and bottom of the quilt. It still has the basting threads and papers and I'll leave them in until I've got all of my blocks ready to be sewn together.


Well I think that's it for today. Tomorrow I'll be working on the second block for the Value Proposition QAL but I'll be back on Monday. I hope you enjoy your weekend and happy sewing!
Karen H

Friday, April 25, 2014

Value Proposition: Constructing the Path

The Value Proposition quilt consists of 18 full blocks and 4 partial blocks (to fill in the sides of the quilt). I designed the quilt so that the blocks are separated with a triple path. Today I will explain how to construct the triple path and I will also describe a single path.


What is the difference between the single path and the triple path?
The triple path is three rows of hexagons that separate the 18 whole blocks and 4 partial blocks. The quilt was designed with a triple path. In the diagram below the path is made up of a white strip of hexagons on either side of the pink hexagons. I used two cream fabrics that were very close in value (the fabric in the center of the triple path was a very subtle shade darker).

You might prefer a medium or dark value fabric in the center of the triple path so that it is more strongly contrasted with the outer path. If you don't know what you want to use for the center of the triple path you can leave that decision until much later on (or even until the end).

Triple path

The single path is one row of hexagons that separate the hexagon blocks. If the triple path doesn't appeal you can construct the quilt with a single path however the final quilt will be smaller. You can compensate by for this by adding a larger border and/or multiple borders.

Single path

When should I start to construct the path?
The path can be constructed at any point. When I make a hexagon quilt with a path I like to work on the path while I work on the blocks primarily because the path tends to be made with a limited selection of fabrics and basting and sewing the same thing over and over can get monotonous. However it is your choice: you can work on the path as you go or you can wait until the end to decide on your path.

How much fabric do I need for the path?
To make the triple path based on my design you will require two fabrics. For the outside edges of the path you will need 2.25 meters/yards of fabric (I've added a little bit to this measurement to allow for cutting errors). For the middle path you will require 1.25 meters/yards of fabric. Another option is to use a single fabric for the triple path in which case you will need 3.5 meters/yards of fabric. If you use a single fabric you will lose an important design element which is that each block will be framed as a result of the darker fabric in the center of the path.

To make the single path you will need 1.25 meters/yards of fabric.

Cutting the fabric
You can use any method you chose but for me the most efficient method of cutting fabric for hexagons for the path is to cut strips of fabric from which I will cut the hexagons.  For Value Proposition I cut 2 1/2" strips across the width of the fabric. You can read about how I cut strips here. In that same post I write about cutting down the strips into hexagons as well as glue basting the papers to the fabric.

Helpful Tip: Depending on the width of your fabric you may need to cut an additional strip or two of fabric to get the required number of hexagons so I recommend keeping your leftover fabric with your project in case you need another strip or two.

For the triple path you will need 27 strips for the outside edges of the path and 16 strips for the middle of the path. From the strips for the outside edges of the path you will be cutting 558 hexagons. From the fabric for the middle of the path you will be cutting 334 hexagons.

For the single path you will need 14 strips for the path. From the strips you will be cutting 292 hexagons.

IMPORTANT TIP: You don't need to count papers and hexagons. Just start cutting sewing and basting. Then you can then start assembling the path into the units that are described further down. When you run short on hexagons cut more!

Helpful Tip: Baste a hexagons whenever you have a few spare moments. If you have a short piece of thread rather than throwing it out, use it to baste a hexagon. When you do this the number of basted hexagons will increase quickly. When you have a pile of hexagons, sew them into pairs.

Sewing the triple path- outer edges
If you have decided to make the quilt as I designed it with the triple path, each of the 18 blocks will be surrounded by a round of 24 hexagons that will be the outer edges of the path.  I like to make the round of hexagons and stitch them to my block once it is made. My preferred method is to create what I call an "open donut". It simply means that I stitch the round of hexagons but don't stitch it closed. It looks like a long curvy snake. I find it is easier to attach to the block if it is left open. I sew it to the block and when I get back to the start point I just stitch the path to close it. I describe the method in my booklet Easier Than Pie - English Paper Piecing for Beginners. You will find it under the tab English Paper Piecing & Hexagon Fun at the top of this page. You can use whatever method works best for you.

HELPFUL TIP: For the 18 sets of outer edges of the path that surround each block I sew individual hexagons into pairs and the pairs into sets of four. Six sets of four can be stitched together to make the round of 24 that will surround each of the 18 whole hexagon blocks. This can be done in stages and is a good project when you only have a few minutes to sew!

In addition to the 18 rounds of 24 that surround each of the 18 whole hexagon blocks, you will also need to stitch partial units for the four partial blocks on the sides and some filler pieces for the corners and top and bottom. Assemble the hexagons into the units and quantities in the following diagram.. They can be made at any time. There is no rush to make them at the beginning. When all of the QAL blocks are completed I will explain how to attach the remaining units to complete the quilt top (minus borders).


Sewing the triple path- middle path
The triple path requires a middle path. Once your hexagons are basted they can be assembled into the units and quantities in the following diagram.  Notice that you will require 18 of the pink three sided units on the left. Each of these can be stitched to the 18 hexagon blocks after the outer path has been sewn all around the block. When all of the QAL blocks are completed I will explain how to attach the remaining units to complete the quilt top (minus borders). The colours in this diagram are a coding system that will be used at assembly time to help you place the units in your quilt; they do not represent the colours of your path fabric. I will be using a single fabric for all of my middle path hexagons.


Sewing the single path
Once your hexagons are basted you will assemble them into the units and quantities indicated in the following diagram. Notice that you will require 18 of the three sided unit in the upper left side of the diagram. Each of these can be stitched to the 18 hexagon blocks as we go along. When all of the QAL blocks are completed I will explain how to attach the remaining units to complete the quilt top (minus borders).


One final suggestion - if the use of a path doesn't appeal an alternative would be to just applique your blocks to a large background. Just some food for thought!

If you have any questions please feel free to a email me or post a comment. I send an email reply to every comment as long as you are not a no reply blogger.

Until I post again, happy sewing!
Karen H

Thursday, April 24, 2014

Piccadilly to the Nines, GG progress and a spotlight on my work and blog

I've had company for two days so there was no quilting but now that they are gone I can sew! Yahoo! I got up early this morning because I had an idea about how to quilt the first border on Piccadilly to the Nines. I had already ditch quilted the major seam lines (but not the seams inside the 3" nine patches) with Superior's Monopoly (invisible thread) on top and Superior's The Bottom Line in the bobbin. So what will I quilt? Feathers!  I left The Bottom Line in the bobbin but switched to So Fine! 50 wt on top. I had planned on using a green variegated thread (Superior's Fantastico) but the contrast was too strong against the cream background so I opted to use So Fine! that matches the background instead. I'll use the Fantastico in the green hourglass border. I started my design by drawing a fine line for the spine with my fine tip brown Frixion pen.


I quilted the left side of the spine from the top to the bottom and then quilted the plumes on the left side from the bottom to the top. When I got there I came back down to the bottom using the edge of my free motion foot as the guide to create the right side of the spine. When I got to the bottom I quilted the plumes to the right of the spine from the bottom to the top. Once I got to the top I echo quilted the outside edge of the plumes on the right.


I repeated this same process to create the feather to the the left of the nine patches. It worked up very quickly and I really think I like this look so I'll repeat it all the way around the border but will have to figure out how to manage the corners. As always, I'll think about it and something will come to me! I'll also have to decide what to do with thenine patches in the border and in the body of the quilt because their insides are not quilted..


I was thinking if someone were to ask "what is the trick to quilting feathers on my domestic sewing machine" I would say practice of course but also you need to ensure that your hands move the quilt at a consistent speed (especially on the curves where the tendency is to speed up) and that your machine is going a little faster. Try to coordinate the hand-machine speed so that it is consistent at all times. Also keep your shoulders down, breathe and try to relax as much as possible. I use to wonder how to get the plumes identical and the answer to that question is another question, namely "what makes you think the plumes have to be identical?". They don't and when you've got a large border quilted with feathers it will look wonderful and spectacular and the plumes won't be all the same nor will the feather be symmetrical. It will still work and I guarantee it will be beautiful!


I really enjoy working with Superior Threads and the company very kindly donated a gift certificate for my blog anniversary giveaway earlier this month. I was asked for permission to feature my blog and work on the Superior blog and of course I said yes! The post went up on April 22 and you can read it here. I was so honoured!

Finally I did find a little time to hand sew and got one more Godstone Grannies (GG) block stitched together. Here it is!


That's it for today! I've got some feather sewing to do today and tomorrow I'm off to a festival where there will be fabric for sale! I wonder what treasures I'll find. Come back on Saturday and I'll show you what I got! Tomorrow I'll post instructions for creating the path for your Value Proposition QAL blocks. There's no hurry to start the path but for those who want to make the path and their blocks at the same time, they will be able to get started.

 Until I post again, happy sewing!
Karen H

Tuesday, April 22, 2014

How many hexagons do I need for a quilt and what size should I use?

When I decided to make the Godstone Grannies (GG) quilt I had to decide what size of hexagon to use. I did a quick calculation of the number of hexagons in the quilt both vertically and horizontally. From there I was able to calculate the approximate size of the quilt based on different sizes of hexagons. This involved some some math and the math part isn't everyone's cup of tea. Yesterday I came across a handy online tool that allows you to calculate the number of hexagons you will need for your project. You enter the desired size of the quilt (width and length) and the size of hexagons you would like to use. The calculator will tell you the number of hexagons you will need!  The site is CD Designs and you will find the calculator here.

I was asked a question about hexagon size. A hexagon has six sides of equal length so when I talk about a 1" hexagon what is meant is that each of the sides measures 1" in length. The actual measurement from corner to corner will be larger and you may need that measurement to figure out the size of a quilt but it is not used to describe the size of the hexagon.

This is my latest GG block and I quite like this one! I think a quilt made entirely of these diamonds would be quite attractive. To speed up the process the diamond could be appliqued to a background. It wouldn't take a lot of blocks to make a quilt, especially if there was a sashing and a nice wide border! But that quilt will be for another day!


I've ditch quilted my Piccadilly to the Nines quilt so now it is time to decide what to do next. Hmmm, maybe some feathers? Not very original but they are doable! I've got company tomorrow so I won't have time to quilt or post however I can think about what to do! 


The temperatures have finally warmed up and the spring bulbs are out in full force! They all seemed to open up at once and the insects are positively delirious with all of the bounty! 


I wasn't alone out there. My sidekick Forest Gumby (or the Gump as he likes to be called) was out there with me!

He had a nice drink of pond water and every once in a while stopped to watch the fish which stayed just out of his reach!

That's it for today! Until I post again, happy sewing!
Karen H

Monday, April 21, 2014

Organizing a hexie project

It seems there is interest in knowing how I organize my hexie projects so I thought I would share my tips and how I do things. My current project is the Godstone Grannies quilt so I'll use it to show you how I got organized. Let's start of with some ground rules!

GROUND RULE #1: Relax and enjoy the rhythm of what you are doing.

GROUND RULE # 2: It isn't a race. It will be done when it is done and not a minute sooner..

GROUND RULE #3: If you get bored mix it up....baste, cut or stitch.

GROUND RULE #4: Admire our work and take pride in it. We are our own worst critics and we shouldn't be. You know how hard you worked so be your biggest cheerleader!!!

GROUND RULE #5: Fix mistakes that will drive you crazy and leave alone those that won't. I find that left long enough there isn't very much that bothers me and I expect you will find the same! This will dramatically reduce the amount of fixing that you need to do!

GROUND RULE #6:  I rarely layout my blocks to see how many I have yet to make because it can be overwhelming and disappointing to realize after hours and hours of sewing that I might not have made as much progress as I had hoped. Once a block is completed I put it in the bottom of the box and there it stays until my project is close to completion.

I like to have a nice project box to store the bits and pieces of my project. This is the cardboard suitcase I found for my Godstone Grannies (GG) quilt! I'll use it to store bits and pieces of blocks, completed blocks, cut strips and my pattern but at the beginning I just used it to hold fabrics I thought I might use to make my blocks. In this picture I pulled a bunch of fabrics that I thought I would  use. Some were used in the blocks and some were not - it was a "first draft" of fabric choices!


If my quilt is an original design the first thing I do is draft my quilt on hexagon paper. This is a design for a quilt that I saw in a magazine. I drafted it on paper first because I wanted to make some changes. I have since made the quilt top but I've not yet showed it to you. I will when I am ready to quilt it! In this quilt I used pink highlighter to identify the path that was going to be made from a particular fabric.


If the inspiration is from an antique quilt as was the case with my GG quilt I print a picture of the quilt. The arrangement of the diamonds in some of the blocks is unusual so I printed a second picture of the quilt. I cut up the second picture and the diamond I cut out is kept with the fabric patches for that diamond block.


My GG quilt is just large diamonds so I only needed to draft patterns for the few of the blocks (on the right). I also sketched a plan that shows all of the diamonds (on the left). I numbered each of the blocks so I'll know where to place the completed diamonds. I use the plan to make notes to tell me what I've cut out, what I need to cut or special fabric choices. Once an entire block is cut out I outlined it with green on the plan. If I've started cutting the block but did not cut all the patches I just make a dot at the top of the diamond. I can tell at a glance where I am with my quilt and what is done and what needs to be done.


I also cut make a window template in case I want to fussy cut some patches. I keep everything clipped together and I store it in the project box.


The first thing I do is calculate how much fabric I need for the path between the hexagons. I wrote about it here. I cut the required number of strips and then cut them down into hexagons. The papers are tacked to the back with a little bit of glue stick and they are all tossed in a bag. I wrote about how I do here. With my method I can cut and prepare hundreds of hexagons for basting in no time flat! I store the hexagons in a bag with basting thread, needles and a pair of small sewing scissor so I can grab the bag and baste any time I want.


I get bored if I am doing the same thing over and over again so I like to mix it up. Sometimes I feel like basting so that's what I'll do. Others I feel like stitching so that's what I do. I generally work in stages so there will be multiple blocks or the path in various stages of sewing. For example, when I have a bunch of path hexagons basted I'll sew them into pairs. I sew the pairs into a strip of four and the strips of four into a strip of eight. Two sets of 8 plus one will make the V part of the path and it is ready to be stitched to a hexagon diamond block. I just toss the complete Vs into the project box. I don't count how many I've made....I just make them! I'll count when I get close to finishing the quilt.


HELPFUL TIP: If I have a small piece of thread in my needle rather than toss it I'll use it to baste one hexagon. You'll be surprised how quickly the hexagons will pile up.

I like to do most of the fabric cutting at the outset for a couple of reasons. I don't particularly enjoy cutting so I want to get it out of the way so that I can sew but more importantly if I do most of the cutting at the beginning I can repeat some of the fabrics in several blocks and the gives a scrap quilt a more cohesive appearance. I love these little snack bags for storing cut patches. I use one bag per block.


I cut out my patches for each block and put them in a little bag with a tag that has the block number from my plan and I glue the picture of the diamond to the tag so I'll know how it goes together. Most of the GG blocks are duplicated so I put one block in each little bag and I pin the two bags together. The bag at the top is cut and has the papers attached but I've not started basting. In the pair of bags at the bottom I've basted but not yet stitched. I wrote about this process here.


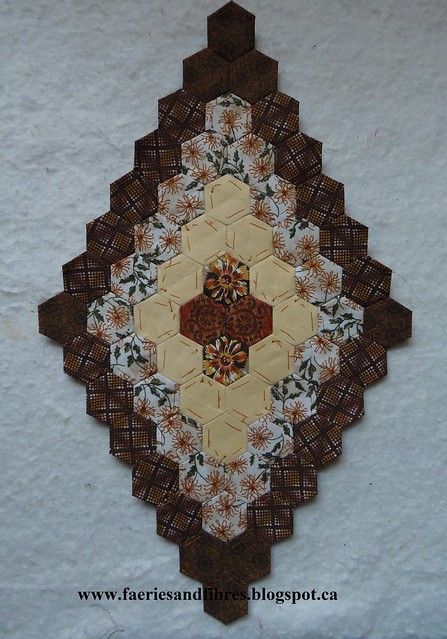
Repeating a few fabrics in different blocks gives a quilt a more controlled appearance. It will still be scrappy but not wildly so. What I do to repeat fabrics is analyze the picture of the quilt to decide which fabrics I will repeat. One such fabric was the solid pale yellow in the block shown below. For that round I needed 12 hexagons. I decided which other blocks would have that fabric and the number of patches that would be needed. I cut them all out at the same time and the patches were put in the bag with the tag that has the block number and block picture. I keep the remaining fabric in the project box so that if I need more of it I don't have to go searching.

I always have a small bag at the ready with bits of my sewing project so if I'm going out and think I might have time to sew I can grab it and toss it in my purse. What do I keep in the bag? Sewing threads that match my fabrics, basting thread (I like to buy cheap serger thread for this), scissors, a mini glue stick, some paper hexagons and my fabric hexagons. Basting is great for when out and about because you don't have to think about fabric direction or placement. I love basting when taking public transit because people are fascinated and I get a kick out of seeing how long they can keep it in before they ask "what are you doing"? When not in use my grab bag is stored in my project box.

Some of my hexagon sewing supplies for my bag

Knots are not fun so I like to sew so that I have to make as few knots as possible. In the picture below you can see one of the filler pieces that will be at the top or bottom of the quilt. I've stitched the hexagons together into rounds starting with the center three at the bottom and working out. 


If I don't feel like sewing I just pin them all together and toss them in the project box and do something else! 


When I am ready to sew them together I'll sew the three beige units at the bottom in the center to the first round. Then I'll attach the second round followed by the third.


Here is a block set out on my sandpaper board. I've sewed the middle four orange flowers together. The next round is the pale yellow and the hexies are stitched together; notice that it isn't stitched closed. This makes it easier to stitch around the center orange flowers. Ditto the next round with yellow print.  I'll stitch the yellow round to the orange center with yellow thread. Once I've got all the way around I'll then be able to stitch the opening closed. The final round is in various states of assembly. I like laying the block out this way; it ensures that the pieces go together correctly.


Once the rounds are stitched I pin them together with their identification tag and toss them in the project box. These make good portable projects for sewing when I'm out and about. When I see a block that tickles my fancy at that moment I pull it out and work on it!


Once I've stitched a block I will pin a piece of the path to it. I can sew them together at that point or later on.


Completed blocks always go to the bottom of the project box where they can pile up. In no time flat I've got a quilt!

So there you have it - a few of my tips for how I get organized! Any questions? Fire away because I'm always willing to share! I reply to every comment by email so if you don't hear back from me it is because you are a no reply blogger which means your email address isn't available to me.

Here is my latest GG block!


Hope you have a nice day and that you find time to take a few stitches.

Happy sewing!
Karen H