Sunday, June 30, 2013

New Block of the Month and Cherry Blossom Quilt

Today I've put up the next Block of the Month pattern and it was inspired by this untitled painting which hangs in my home. The Block of the Month tab needs some tidying up so that is on my to do list. I am learning as I go so please bear with me!


I love this painting which I purchased it at a garage sale for a few dollars about fifteen years ago. Taped to the back of the painting is a clipping with a picture from 1971 of Mrs. Murphy at age 89.


I have no how old Mrs. Murphy was when she painted the lovely scene. It isn’t perfect; the perspective is wrong but to me it is the happiest of paintings! Look at the man in the wagon waiving at the man cutting the grass! Doesn't it make you smile?


I can’t tell you anything about Mrs. Murphy. I wonder what inspired her to paint this scene. Was it pure imagination or a scene from her girlhood? Did she hang the painting in her home, give it as a gift or sell it? I just don’t know. And this made me think about my quilts, most of which have a label on the back with the name of the quilt, my name and the date. Sounds a lot like Mrs. Murphy’s painting! Fifty years from now will one of my quilts show up at a quilt guild meeting and the new owner will say she bought it at a garage sale for few dollars! She’ll say she loves the quilt but all she knows about the quilt is its name, my name and the date it was made! If the quilt like Mrs. Murphy’s painting gives joy and pleasure to others maybe that’s enough!

I used this painting as my inspiration for this month’s block of the month pattern. I selected a block that would have been used to make the type of quilt that one would find on a bed in a farm house like the one is the painting!


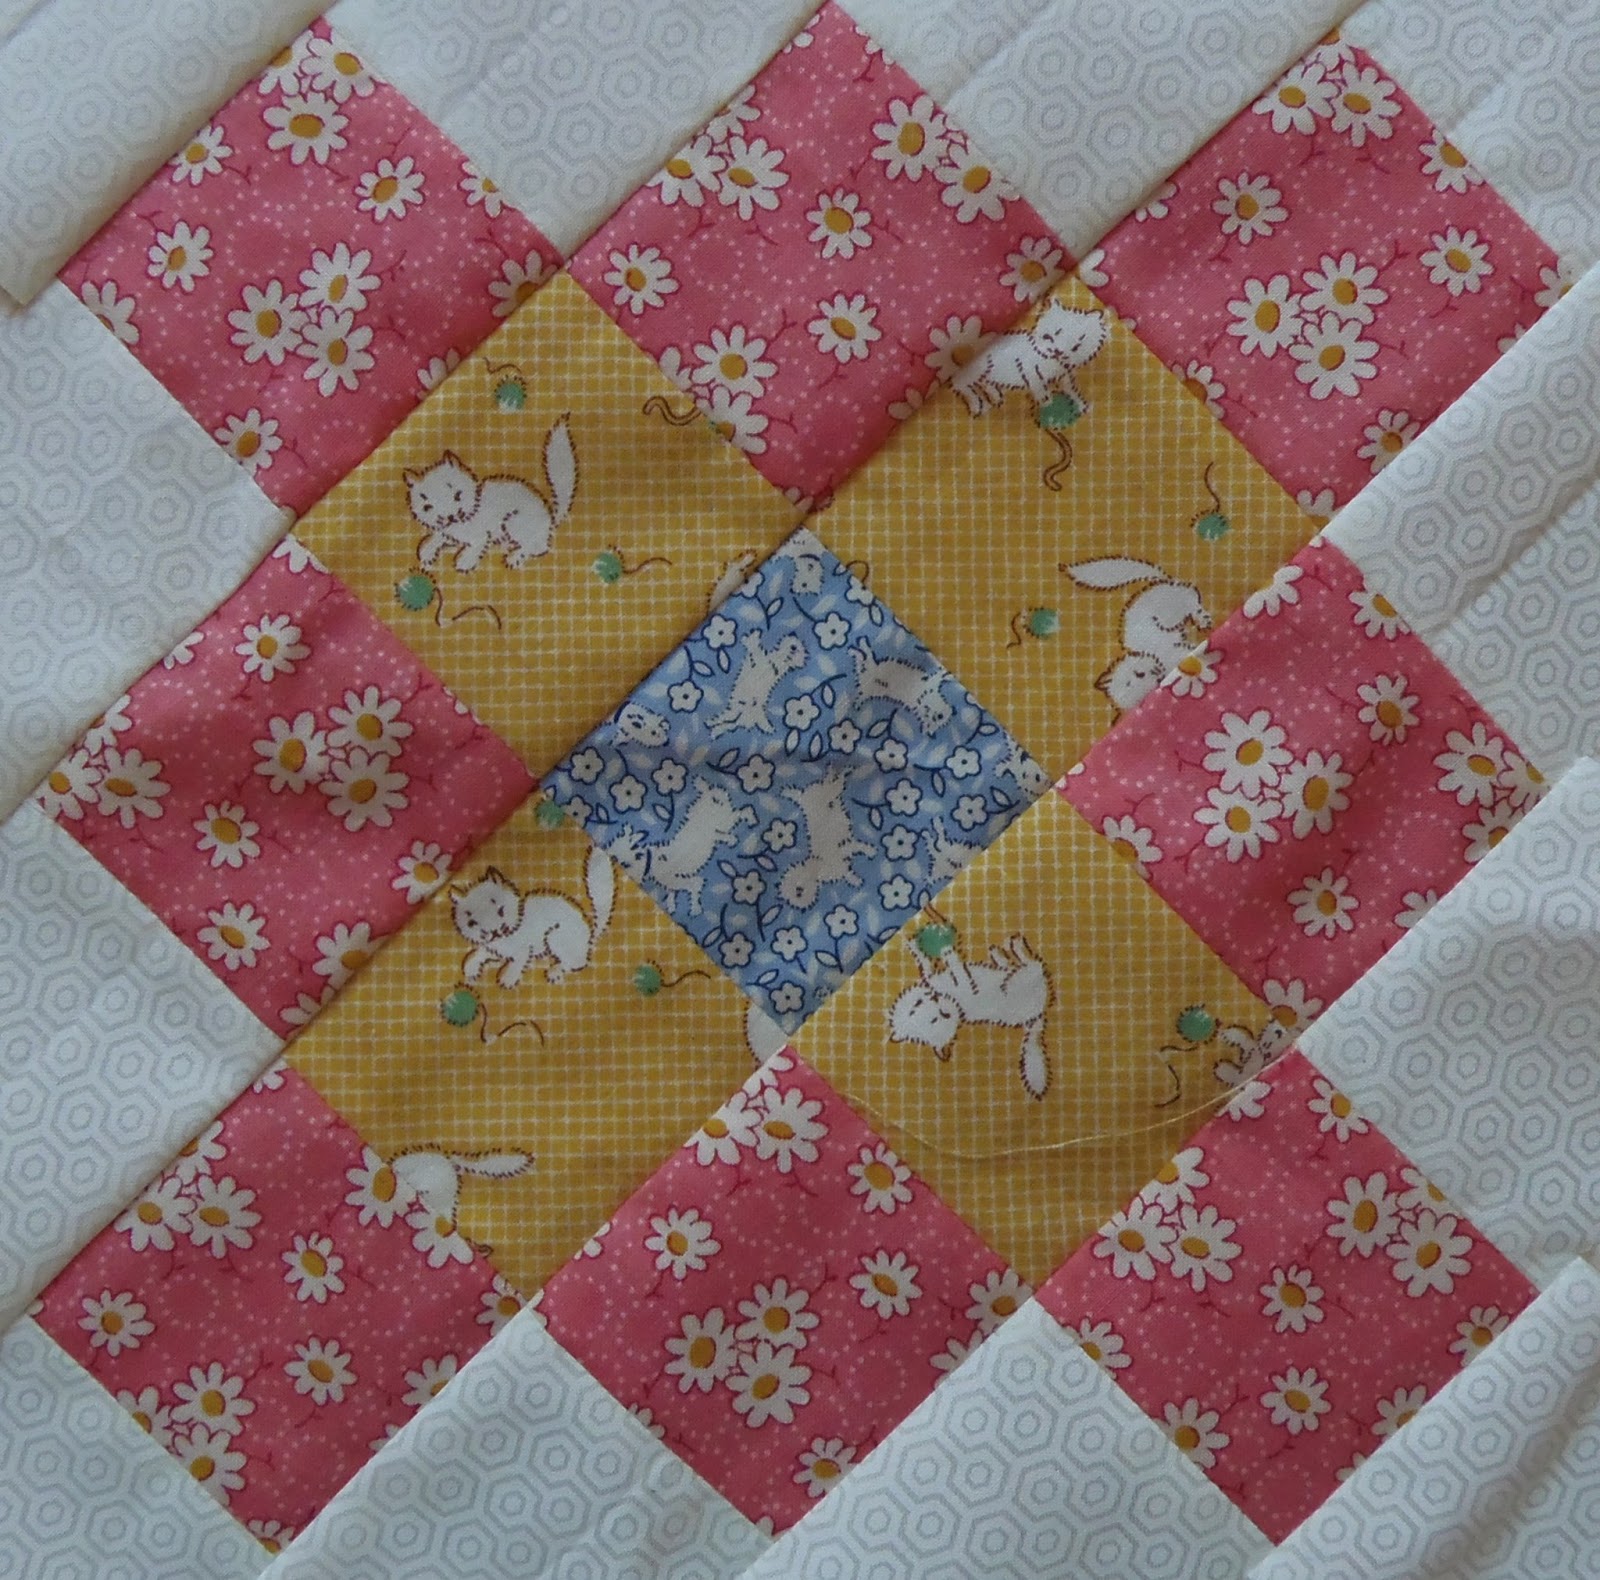
This block is fast and easy to make and it makes great use of scraps! I think it would be nice finished with a simple sashing and a nice wide border! I hope you enjoy the pattern!

Today I am going to work on a nine patch quilt that I call Cherry Blossom. It will eventually become a free pattern. I'll post pictures of my progress tomorrow. This quilt is made with 3" pink nine patch blocks and red nine patch blocks. There are a few yellows and oranges tossed in for a little sparkle. This is going to be a pretty summer quilt! Here's a little teaser.


Until I post again, happy sewing! 

Saturday, June 29, 2013

The finished tote bag and new tutorial for multiple fussy cuts

I finished the tote bag for the Secret Tote Bag Swap hosted by Lia's Handmades. It was so much fun making this bag and I must confess that for all of the sewing and quilting I've done over the years I have never made a tote bag. I am in L-O-V-E with this bag and if my secret partner isn't crazy about it I know where it can find a very good home....with me! And Lia says she would like to have it too!  I had so much fun with the applique, embroidery and beading. Check out my quick demo for making bees under the tabe Tips and Tutorials. So here it is!

Side A

Side B

Corner close-up including handle

Now for some fun fussing cutting. I'm sure you know that fussy cutting simply means cutting selected images or motifs from your fabric. Just one fussy cut patch in the centre of a block is pretty but cutting several and sewing them together can create unexpected new patterns. This block has a fussy cut border and centre.


You can fussy cut for any type of block but I am partial to hexagons and diamonds (three diamonds make a hexagon) so that's what I'll focus on. There are a number of ways to fussy cut multiple motifs but I like to do things in a way that involves the least amount of effort on my part. I've written up a new little tutorial titled Fussy Cutting Multiple Patches with Window and Clear Templates and it is a follow-up to my tutorial Making and Using Hexagon Templates for Fabulous Fussy Cuts. I hope you enjoy this simple fussy cutting method and that you'll make some spectacular blocks!

I have another fussy cutting technique that is perfect for diamonds but I'll leave that one for another day. I used it to make a quilt that I call Mom's Flower Beds. I haven't shown you the entire quilt yet but there have been a few sneak peaks! And here is one to whet your appetite!


I would love to hear what you think of these two tutorials so please feel free to comment or email! And if you see that I've done something and you are sure how I did it, post a comment or email me. I am more than happy to share what I do with others.

And now how about a quick look in the garden!

Lavender

 Foxtail Lilly

Species clematis

Columbine

Until I post again, happy sewing!

Friday, June 28, 2013

Starry Gazey Pie revealed and some how-to tips

Yesterday I wrote about a challenge quilt I made. What I didn't tell you is the name of the quilt or its story!  The name of the quilt is Starry Gazey Pie.

Corner star in Starry Gazey Pie

Starry Gazey Pie is a dish from Mousehole, Cornwall which is in southwest England. My father grew up in Penzance which is just up the coast from Mousehole (pronounced mow-zole). Both were fishing villages and one of the main species fished was pilchards. They were used to make a dish called Starry Gazey Pie. It is so named because the fish heads and tails poked up through the crust and the heads gazed heavenward!  Pilchards are rich in oil and my Dad told me that the fish were arranged in this way so that all of the rich oils would flow into the pie. The fish in the challenge fabric make me think of this Cornish dish which was my inspiration for my challenge quilt, Starry Gazey Pie!

Starry Gazey Pie, 2005 (28" x 30")

The centre star medallion is English paper pieced. I used my technique for foundation piecing on the hexagons. You can read about it herehere, here and here. Phew! That's a lot of "heres". Maybe I should put them altogether in one place as a tutorial!

 
I also fussy cut one of the fabrics for the six hexagons that make the star points. You can see that the ferny print was cut so that the orange/coral fern was centred so that the orange star point could flow from it.


Surrounding the centre star medallion are six diamonds made of fussy cut hexagons. The fussy cutting was done using the methods described in my tutorial.


These diamonds were made off the quilt and then appliqued in place! Simple but it creates the illusion of complex piecing.
 

Yesterday I posted pictures of the fish that were fussy cut. These fish stars formed the next border around the medallion. Tomorrow I'll do a quick little demo to show you how easy it was to fussy cut the fish for the stars! Really!

Finally in each corner I placed orange stars with needle like spokes. I wanted to repeat the ferny challenge fabric in the corner stars so I cut the orange/coral ferny bits from the challenge fabric and appliqued them to a hexagon; I did this before I basted the hexagon to the paper. When the applique was completed I basted the hexagon to the paper and the points were foundation pieced on the paper before English paper piecing.

 Close-up of hexagon in the centre of the star

One of the corner stars

I hand quilted and beaded the quilt to give it a little sparkle!


The zigzag pattern I quilted in the border reminds me of the crimping on pastry!

I hope you've enjoyed this little quilt. Don't be afraid to combine techniques and methods to get the results you want, even if some of them are non-traditional methods. Experiment and get creative. If it doesn't work out it will be your little secret!

I was taking pictures in my Mom's garden and look at this! I think it looks like a Kaffe Fassett fabric, potentilla maybe, but it isn't! So what is it?


It's another variety of sedum! So pretty!
 

So what else is blooming today?


So come back tomorrow for some more fussy cutting how-tos! Until then, happy sewing!

Thursday, June 27, 2013

Goldfish in the pond

I was in the garden taking pictures and when I got to the pond some of the goldfish were congregating around the yellow flag roots. The white and orange goldfish  and the various shades of green reminded me of a challenge quilt that I made.


The quilt is made of hexagons and diamonds. There were three challenge fabrics and they were all from Northcott. The first was a variegated orange from a Halloween line, the second was On Golden Pond which was goldfish on a butter background and the third was a small orange and periwinkle blue print (I don't remember the name of the line that the fabric came from). An additional five fabrics could be added to the three challenge fabrics. I chose five shades of green.

The quilt has six star blocks made from the On Golden Pond fabric. I fussy cut the goldfish to make six star blocks. In this block you can see the bodies with the tails fanned out at the points.


To make the star blocks I used window templates as discussed in my tutorial on fussy cutting. The "clear template" allowed me to select the part of the fabric I wanted to use in the block. I traced around the template and cut out the diamond patch. For the remaining five diamonds I simply positioned the cut patch on the fabric so that everything lined up, I traced around it and then cut it out. )I'll post photos of how I do this tomorrow.) I repeated the process for the remaining four diamond patches and then English paper pieced the stars in the usual method. These are the other five star blocks made from the goldfish fabric.


Tomorrow I'll show you some more close-ups of the quilt, how I made added some of the details and the name of the quilt which is related to my Cornish heritage - another quilt with a little story!

For now I'll leave you with what is in the garden today!

Jasmine
 
Mallow

Gentian

Hyssop

Silver Bells

I forget what this is

More gentian

Wild onions - love the curls!

Until I post again, happy sewing!

Wednesday, June 26, 2013

Elephants, zebras and my secret tote bag!

Ella dropped by for a visit yesterday! She lives next door and I haven't seen her for almost 18 years! I made her as a gift for the new baby! I asked the baby who is almost an adult if she still have her but she wasn't sure. There had been a flood in the house and the family lost a lot of their belongings. As it turns out she survived and is safe and sound. She is pretty cute!

 
Reunited with a couple of old friends!
 
My secret tote bag for the swap hosted by Lia's Handmades is almost finished. I have jute straps for handles that I have yet to attach to the bag and I'm not sure how I will do it but the solution will come to me. I'll have to figure it out quickly because the bag has to be finished by the weekend!


It was a lot of fun appliqueing, beading and embroidering grasshoppers, dragonflies, butterflies, bees and spiders. I have a few little goodies that I'll tuck inside the bag! It is pretty large and the reason for that is that I love the print and didn't want to cut it down. I think it would make a great beach bag as there would be plenty of room for a big towel, sunscreen and a bottle of water. I hope the recipient likes what I've made for her! She didn't give me much information about her likes and dislikes so I just had to wing it!

And what's in the garden today?

Blackberries are coming along nicely!

and the red currents will be ready for picking soon!
 
Pink sedum...
 
and yellow sedum.....
 
and a close-up  look at what was on the sedum!
 
 
Butterfly milkweed (isn't the colour spectacular?)

 
Close-up - amazing!
 
The lavender is just starting so I'll have to make some lavender bottles!
 
Ironweed
 
And Forest Gumby sprawled on a picnic table!
 
Until I post again, happy sewing!
 
Post Script: My Mom just heard that her quilt In My Garden was the voters favourite in the Quilting Gallery Show and Tell. She is thrilled to bits. It is the perfect tonic for her broken arm and she is very excited to get some new fabric and start sewing again. Hopefully she'll be able to do so before the summer is over. For those of you who voted she sends her very sincere thanks.  This is the quilt - I just love it because it is my Mom exactly!
 
In My Garden by Anne H