Saturday, May 31, 2014

Another secret tote bag swap and more Godstone Grannies

I signed up for Lia's Handmades fourth Secret Tote Bag Swap. The theme is Summertime! I chose to work with osnaburg because it looks like linen and linen is definitely a summertime fabric! I've tried to incorporate many of the things that my partner said she liked. I've been posting pictures but she hasn't left any comments so I'm hoping I'm on the right track! This is the first pull of fabrics, some of which I am using and others not!


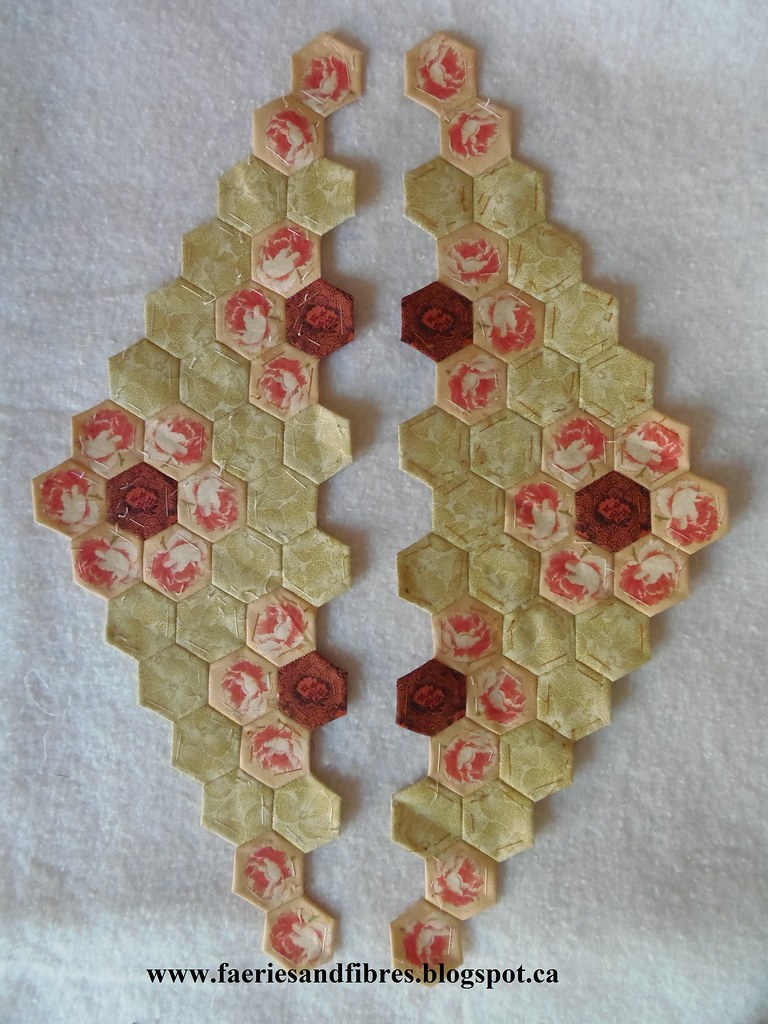
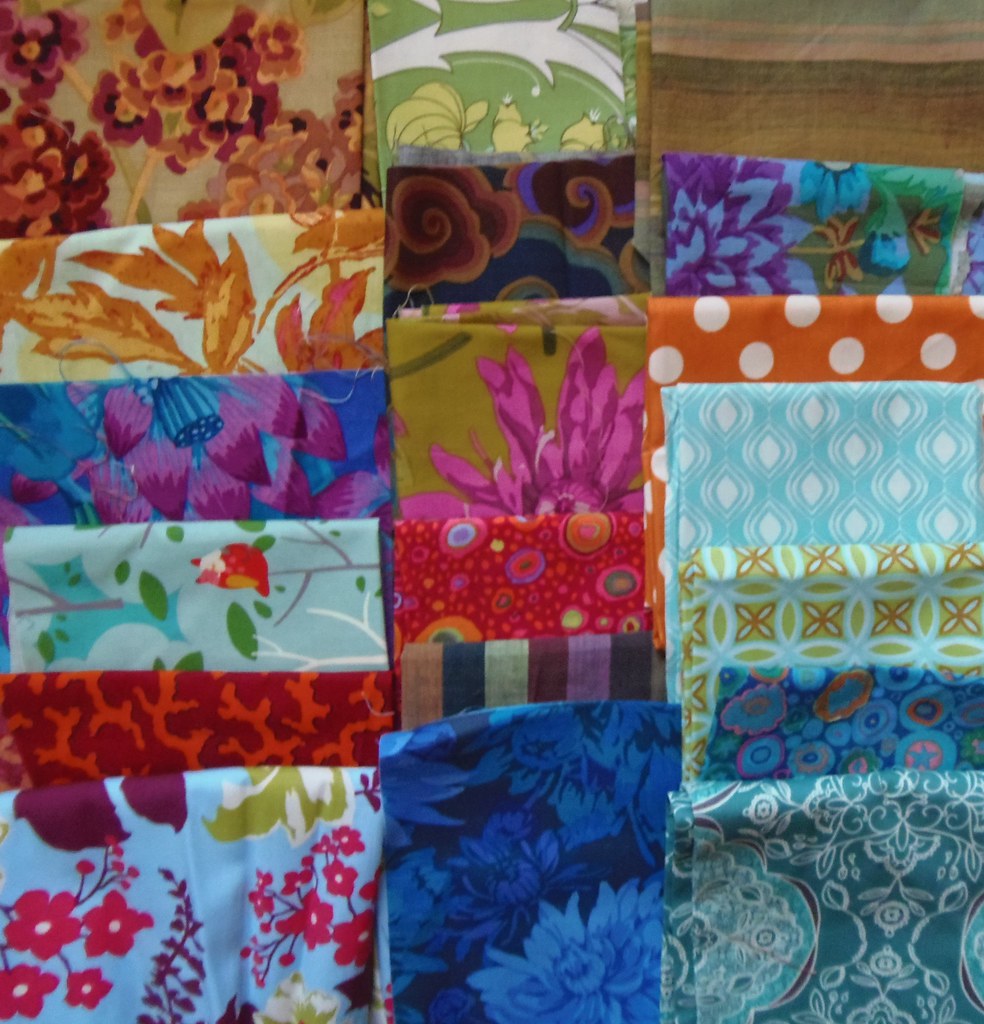
To start I tracied the pattern for the front and back of the bag on osnaburg and then I quilted it with straight lines. I made a pile of hexagons in bright summertime colours and prints and am now in the process of appliqueing them to the panel. I used the straight quilting lines to align all of the hexagons and I used my Roxanne Glue Baste-It to hold them in place before stitching them down. I have several hexagons that still need to be stitched down but once they are done the rest of the construction process should go quickly.


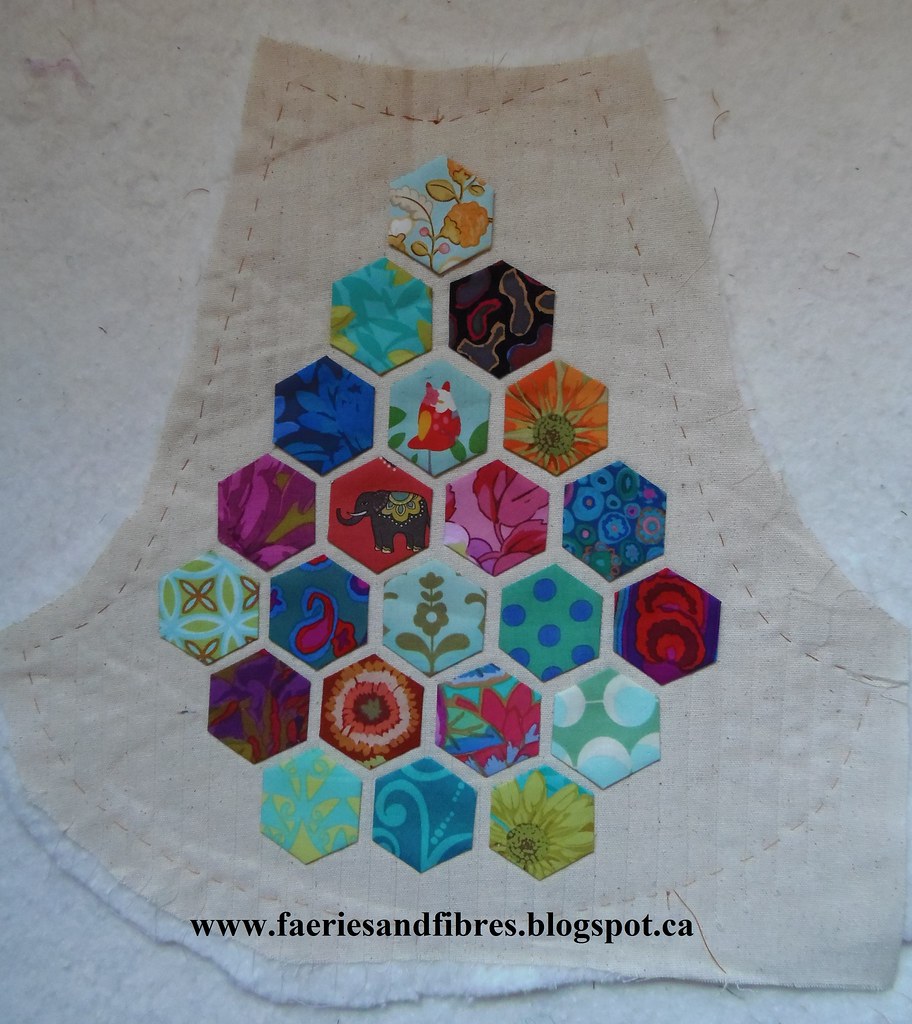
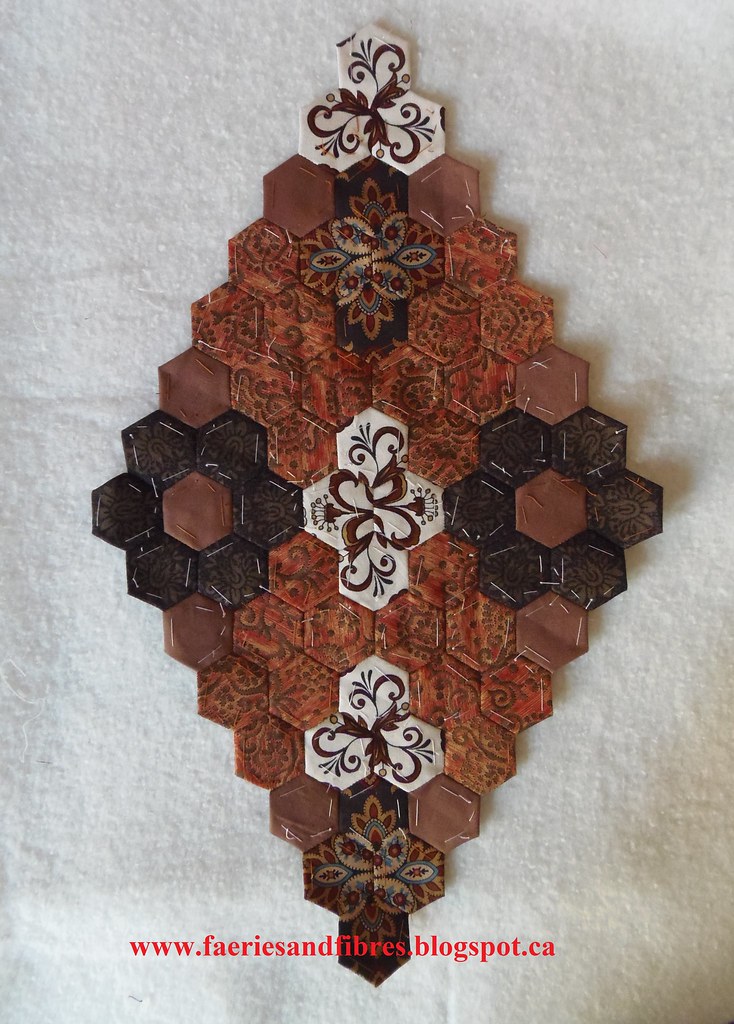
I repeated the same process for the other side of the bag. My next step will be to make the side panels and outside pockets. I'll use more osnaburg for the side panels and a nice summertime print, likely in a pretty aqua blue or turquoise, for the outside pockets. The bag is the 241 Tote by Noodlehead. It is a simple pattern with excellent instructions.


 I want to add some embellishment so there might be a grasshopper like this one tucked in there somewhere! Grasshoppers have appeared in many of my quilts and tote bags! They are a little bit of a personal signature of mine. If you would like to make your own bug I published a little tutorial for stitching these little creatures and you will find it here.

This is a grasshopper that I slipped in another tote bag

I hid this little grasshopper in my quilt  Lazy Punk

I continue to work on the Godstone Grannies (GG) blocks. Making good progress but I need more time because I've got so much to do! This block is one of two filler blocks for the top and bottom. Both are now stitched together.


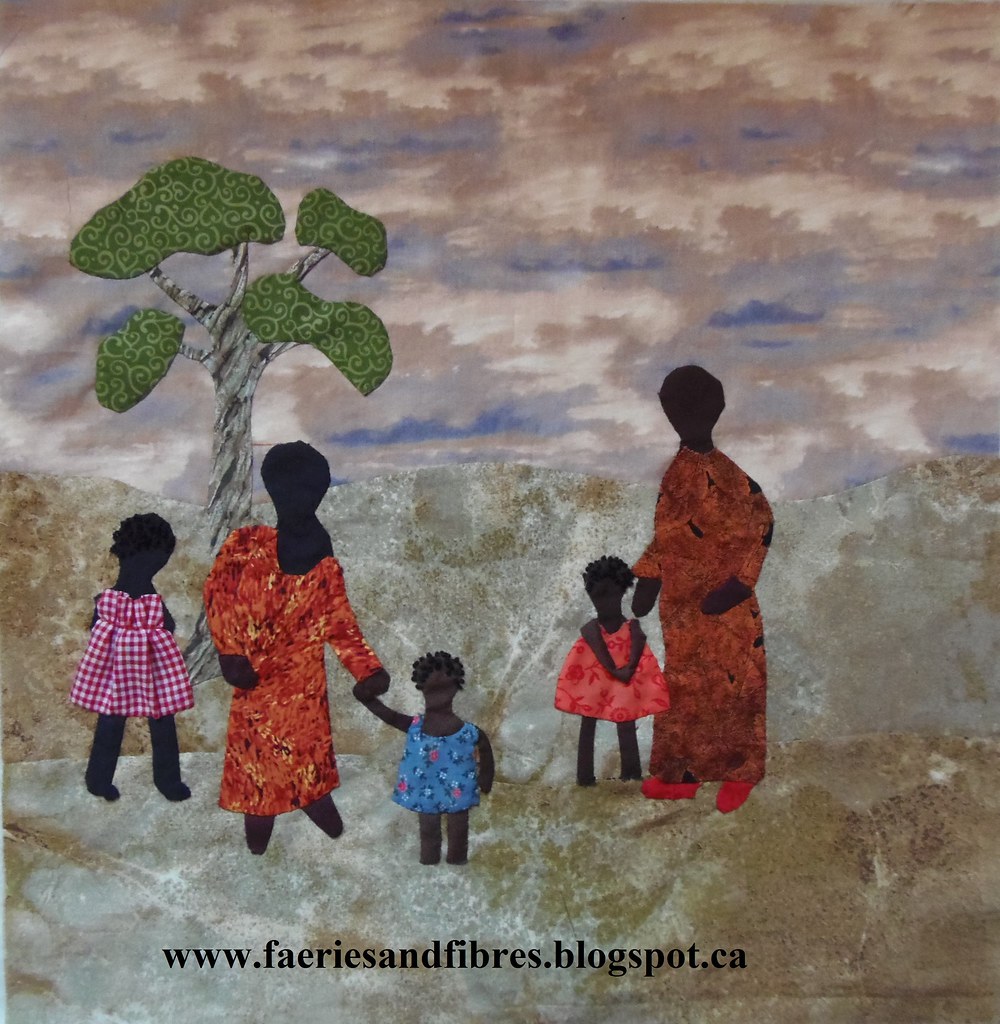
Look what happened when I tried to take a picture of the second GG block! Mr. Nosy cat (Forest Gumby) had to see what I was doing! I just don't understand what it is with cats and quilts! SCAT cat!!!!!


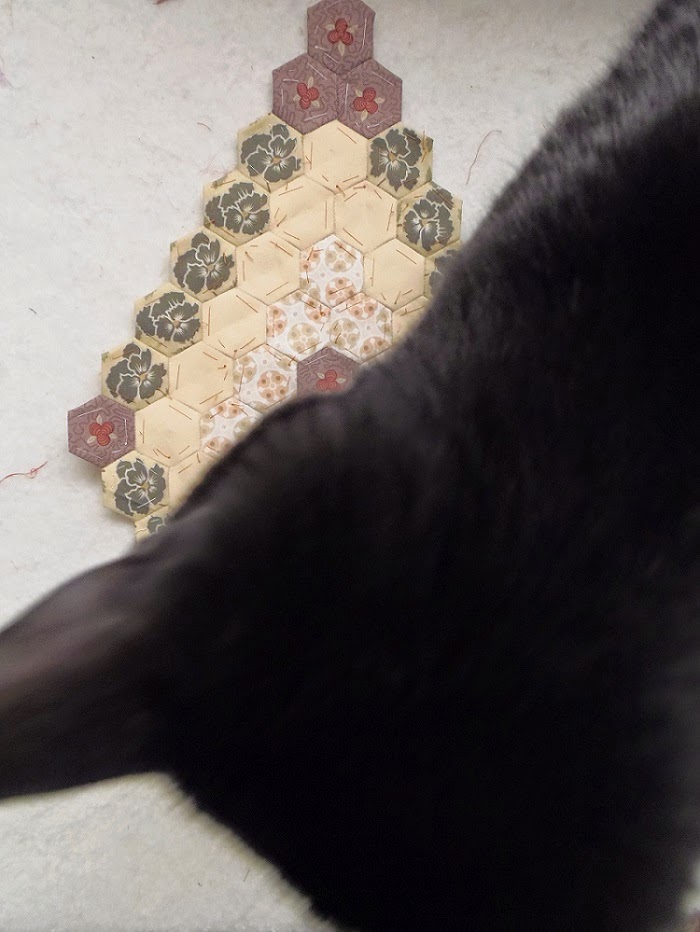
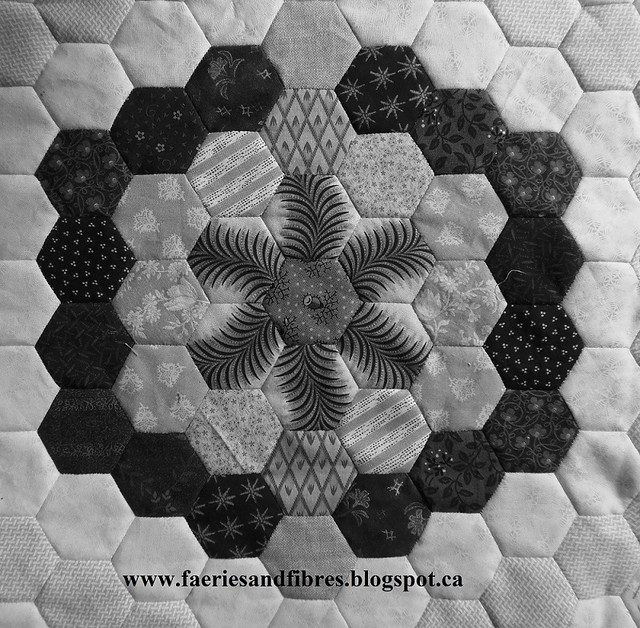
Here is the block without the Gump! This is one of two blocks and both are now stitched.


Well my tea is getting cold and I've got some sewing to do so until I post again, happy sewing!
Karen H

Friday, May 30, 2014

Value Proposition Quilt Along - Block 4

Welcome to Block 4 of my Value Proposition Quilt Along (QAL). I've told you other blocks are my favourites but this one really is one of my favourites and it will stay that way until I show you the next block which will of course be my favourite!


Before I get started I have a SPECIAL ANNOUNCEMENT! There are four half blocks in the Value Proposition Quilt and they are used to fill in the spaced on the sides. I'll share the first of the four half blocks one week from today so be sure to come back on June 6, 2014 for the first Value Proposition half block!

Value Proposition Map for Block 4


Value Proposition Recipe for Block 4
  • Cut 14 Light identified as A on Map ( 12 for Round 2 and 2 for Round 3)
  • Cut 7 Medium* identified as B on Map (1 for Center and 6 for Round 1)
  • Cut 16 Dark identified as C on Map (all for Round 3)
* You may want to fussy cut one B Medium for the Center and cut the remaining 6 hexagons from a directional print such as a stripe. This will add visual interest and it is loads of fun!

My Value Proposition Block
This is my block shown in black and white. It is very scrappy. Notice I've used a variety of dark prints and a variety of light prints. If you have leftover hexagons from other blocks this is a great time to use them provided they are the correct value. The darks I've used are very dark and they form what looks like a "C" and a mirror image "C". When selecting your fabrics you want to ensure that you have strong contrast between the lights and the darks so that the "Cs" show up! The lighter scraps I used in Round 2 (and 2 in Round 3) are on the darker side of light, especially the pair in the 12 o'clock and 6 o'clock positions (you could go lighter if you prefer). I've used the diamond fabric at the top and bottom in the same position in Round 2 to give the block balance. The same is true of the deep beige linen-look print in the same positions in Round 3. I used a directional print for Round 1 and I love the visual interest that is created with the print that I chose. In addition I fussy cut one hexagon for the Center.

 If your prefer you can make this block with only three fabrics OR you can use three fabrics but fussy cut the center hexagon! Whatever you do have fun! And why not give a directional print a try for Round 1?


So now I'll show you a colour picture of my block! The darks are navy and brown and I think that they work together perfectly because they are the same value (or very close in value).


I set up a Value Proposition QAL page on Flickr so that you can post picture of your blocks and also see what others are doing! There are many very different and exciting blocks to see so do drop by and if you have time leave a comment if you see something you like!

If you are looking for previous Block installments of my Value Proposition QAL you will find all of the links under the tab Quilt Alongs by Karen H just under the banner. I hope you enjoy making Block 4. The first half block will be available on June 6, 2014 and Block 5 will be available on June 13, 2014. If you have any questions please feel free to leave a comment or send me an email. I send an email response to every comment so if you don't hear from me it means you are a no-reply blogger.

Until I post again, happy sewing!
Karen H

Thursday, May 29, 2014

The Girl's Quilt, Godstone Grannies and Bloggers Quilt Festival

It is a day of ta dums!  To start my Mom (Anne H) has finished embellishing her latest African themed quilt. She has worked her magic with beads, embroidery and wire. I adore all of the little girls she works into her stories. She is now working on her next quilt so I'll be sure to share it with you when it is ready for quilting!


Ta dum number two! The Girl's Quilt is finished! I just love it and I am pretty sure that she will too! I love the look of the straight lines. This is a picture of it quilted but not yet bound.


Just as I finished quilting it I received an email from Craftsy offering any class for $14.99! What a great deal so I signed up for Jacquie Gering's Creative Quilting with a Walking Foot. It was a great class and there are so many great ideas for getting creative with a walking foot. Although straight line quilting tends to be monotonous I would definitely try it again! But I digress - here is The Girl's Quilt bound and ready for giving!


Here is a quick picture of the back of The Girl's Quilt. The points of the star were made with half rectangle triangles so the star stitched up in no time flat! The star measures a whopping 20"!


And finally ta dum number three! I have two more Godstone Grannies blocks stitched together! Making good progress people! This is the second of a pair of identical blocks. Both are now stitched together. The hexagons are 3/4" in size.


This is a partial block that will be used to fill the top and bottom edges of the quilt.


Today is the last day of Blogger's Quilt Festival at Amy's Creative Side. There are hundreds of wonderful quilts to be seen and you can vote for your favourites in each of the eleven categories! I entered this quilt, Flora and Fauna Parts of the Garden, in the Small category.


I also entered Stars in the Loft in the Large quilt category.


Tomorrow I'll publish Block 4 in my Value Proposition Quilt Along (QAL). It is a great block that can be made almost entirely from scraps! It is one of my favourites (just like all of the others)! If you missed any of the previous blocks you will find them under the tab Quilt Alongs by Karen H at the top of this page.

Also a quick reminder that I reply by email to every comment so if you don't hear from me it is because you are a no reply blogger so I have no way to contact you! Until I post again, happy sewing!
Karen H

Tuesday, May 27, 2014

The Girls quilt is almost done and more Grannies

I continue to work on The Girl's quilt and hope to have it quilted today. I've got three rounds to go and there are four rows of quilting in each. One thing I had meant do to but didn't do was to match the bobbin thread colour to the top but instead I just used a neutral colour to match the back. Had I used a coloured thread in the bobbin it would have added an extra design element to the quilt. Next time maybe I'll do that! I love the look of straight line quilting. It is modern and fresh but man oh man is it boring!


In my spare time I've managed to stitch two more Godstone Grannies (GG) blocks and this time they are stitched correctly so there'll be no reverse sewing needed!


This block will be a filler for the top and bottom of the GG quilt.


The warm weather has finally arrived and so has the neighbours cat Teetoo! He always surprises me when I go out back for a look because he blends in with his surroundings. Here he just looks like one of the trunks on the ginkgo tree!

Time for me to finish a quilt so until I post again, happy sewing!
Karen H

Monday, May 26, 2014

Pivoting at corners when quilting and more Godstone Grannies blocks

I've started quilting The Girl's quilt and the plan is to quilt it entirely with concentric rectangles, starting in the center and working out. I'm using the width of my walking foot to stitch the lines. This is easy when there is a seam (or a previous line of quilting) to follow but once I get beyond the corner there is no seam so how do I know where to pivot? Let me show you!


I mark a diagonal line from corner to corner with a fabric safe marking tool. I start stitching and when I hit that diagonal line I know that is the point where I am to pivot and turn my quilt to change the quilting direction.


And this is what the quilted corners look like where I pivoted! I've selected colours of thread to match the stripes so that the quilting stitches don't show. I like the texture of the concentric circles and although the rows of stitching are about 3/8" apart the quilt feels lovely and soft.


I have more Godstone Grannies to share with you but as you will see in a few moments I've got some reverse sewing to do! The first block is the second of a pair of blocks. The center four hexagons are fussy cut but the effect is very subtle.


These two blocks will be filler blocks for the sides.


This is my problem child and it is the second of a pair! I didn't realize I had made a mistake until I looked at this picture! The three white hexagons at the top are in the wrong position. How the heck did that happen? I don't know but I do know that this is a mistake I am going to fix. I've told you before that if I can live with a mistake I just leave it but if the mistake will bother me I fix it. This is one that will bother me!


Time for me to get some more quilting done and maybe a little reverse sewing! Until I post again, happy sewing!
Karen H

Saturday, May 24, 2014

A new toy and Blogger's Quilt Festival

I recently read  a post by Kerry at Simple Bird Applique. She published a tutorial about preparing points on her applique pieces and one of the tools she used was a Dritz Petite Press. You can read her post here. I was intrigued by this little iron and knew I had seen it at my local sewing store so I decided to pick one up and give it a try.


The packaging states that the Petite Press has four temperature settings, the head pivots, it has an erogonic handle and it heats up in seconds. One of the features I like is the built in rest which can fold back out of the way when the iron is in use and then it folds down when you want to set the iron down. The sole plate is small enough that you can keep your fingers out of the way but it is much larger than the sole plate on the Clover Mini Iron which I also have.


The Petite Press has a red light that blinks when the iron is heating up and when it reaches temperature there is a soft beep. While it does heat up quickly it did take a more than a few seconds! I pressed a few hexagons and it really delivered. The Petitie Press would be great for pressing open small seams and for turning applique edges. Just like the Clover Mini Iron it does take some getting used to because it doesn't have the heft or weight of a regular iron. Neither iron has steam. My Clover iron came with a carry case that is heat resistant so I can pack up the hot iron when I'm done however I found that the Petite Press cooled down very quickly once turned off so the carry case is not a big issue for me.

Here you can see the sole plates to get an idea of the size difference. The Petite Press sole plate measures a whopping 2 1/2" from tip to the base.


The Dritz Petite Press was about double the price of the Clover Mini Iron so that is a consideration however I think I will get more use out of the Petite Press. When I'm doing a lot of small piecing or applique work I'll just set up my mini wooden ironing board next to my sewing machine and I'll use my Petite Press!


Blogger's Quilt Festival is now on. There are many spectacular quilts on display and you can visit all sorts of interesting and creative blogs. To vote for your favourite quilts just click on the heart in the upper right corner. It will show as red once you've cast your vote. But before you do that be sure to visit the blogs. If you click on the picture of the quilt you will be taken to the blog where you can see better pictures of the quilt and meet the blogger. Back at the Festival you will see a green check mark to indicate that you've visited the blog. There are so many interesting and innovative blogs to visit. I'll be spending some time between now and May 29 to discover new blogs and to vote for my favourite quilts!

I've entered two quilts. In the Small Quilt Category I entered Flora and Fauna, Parts of the Garden.


In the Scrappy Quilt Category I entered Stars in the Loft.


I've linked up with Angie over at A Quilting Readers Garden for more hexagon fun! If you have a few moment do pop over for a visit!

That's it for today. Until I post again, happy sewing!
Karen H

Friday, May 23, 2014

Making the backing for The Girl's quilt

I pulled some fabric for the back of The Girl's quilt; I was pretty sure she would like it and she does! It looks like birchbark fabric is what she wants. This isn't a huge quilt so I cut a piece of fabric that is 8" longer than the length of the quilt. To bring this length to the desired size for the backing I decided I would make a big star to go on the back. I pulled two of the fabrics I used in the quilt top, the gold and one of the blues.


The blue will be the background for the star and the star will be gold! The fastest way to make the star points was to make half rectangle triangles. I started by cutting four 5" x 7" rectangles from the gold and four from the blue. I drew a line from corner to corner on the wrong side of the blue fabric. I pinned them to the gold fabric as in the picture below.Notice how the direction of the gold fabric is different on the left and right. This is to ensure that the finished triangles are mirror images. I stitched 1/4" away from both sides of the line and then cut on the line.


I pressed the units open and trimmed them down to 4 1/2" by 6 1/2". The half rectangle triangles were then stitched into pairs.

I cut 4 6 1/2" squares for the corners and one 8 1/2" square for the center. It was all stitched together to make a 20" star.


I framed the star with a narrow dark brown border.


The final step was to cut a piece of birchbark fabric to go above and below the star and then stitch the long strips of birchbark fabric to either side. The finished product!


In case you didn't see the quilt top, here it is once again! You can read about it here and find a link to the free Heather Jones pattern.


Only one more week until the next block pattern is published in my Value Proposition QAL! I can't wait to share it with you!

Until I post again, happy sewing!
Karen H

Thursday, May 22, 2014

Godstone Grannies Update and another African Quilt by Anne H

YAHOO! I've stitched all of my Godstone Grannies blocks into rounds. Here you can see them all in their storage box ready to be stitched into blocks! It looks like a bunch of hexagon noodles!


Sometimes I like to stitch my hexagons in rounds. Godstone Grannies is made of diamond blocks so four hexagons make up the center. The next round is made of 12 hexagons, the following of 20 hexagons and the final round is made up of 28 hexagons.  I sew the rounds together and pin them together. That's what you see in the box, a bunch of these.


In the picture below you can see them laid out ready for to be stitched together. I'll use a colour of thread to match the round that is being added. In this instance I'll choose an orange-gold thread to stitch the round of 12 hexagons to the 4 rusty hexagons in the center. I'll sew all the way around and then close the opening. I like doing it this way because it is much easier that starting and stopping by stitching one hexagon at a time! The next round will be an off white thread to sew the round of twenty hexagons and finally a deep gold will be used to stitch the final round of 28 hexagons.


This is my Mom's (Anne H) most recent African themed quilt. This one is very dimensional  and you get a feel of depth. I will quilt it for her and then she will add her magic touches to bring it alive! It measures roughly 19" square.


I pin basted the quilt and then started the quilting. I used Superior Monopoly on top and The Bottom Line in the bobbin. I quilted around all of the appliques. Once that was done the fun could begin! I started by quilting the foreground, mid-ground and background with a variety of threads.


I love the little girls - they are so cute! You can see that the grasses in the mid-ground were worked in a up and down zigzag type of stitch. This is a great movement for coordinating the hand machine speed when quilting. It is a smallish design so it would also be a great warm up or practice exercise before moving on to a good quilt. I always do a warm up on a practice sandwich before I start quilting. It serves several purposes: it helps me get into the groove of the quilting movement, to check my tension and to test my thread.


Once the whole thing was quilted I bound it with a facing. My Mom likes to have her quilts finished this way because she wants them to look like pages torn from a magazine. I'll return the quilt to her so she can put the final touches on her quilt. Once she has beaded and embellished to her heart's delight I'll share pictures with you!


That's it for today! Until I post again, happy sewing!
Karen H