Friday, January 30, 2015
Rosette 1 in the New Hexagon Millefiori QAL and making a ring to frame the birds
If you are visiting for the Grow Your Blog Giveaway on my blog please go here.
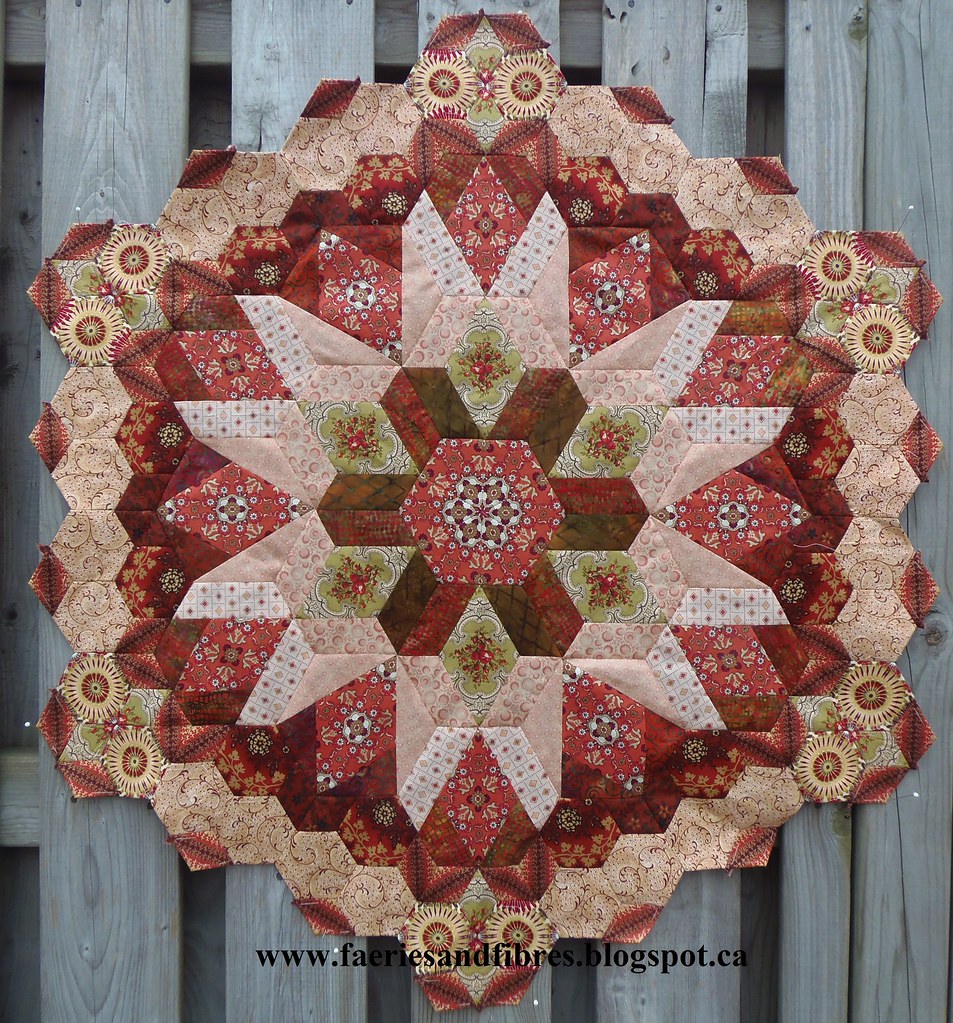
I've completed the first rosette in Katja Marek's New Hexagon Millefiori Quilt Along. It may not look like it but it is large. I think it is roughly 36" across. There will be partial rosettes that link into this piece and they will be smaller so that means less sewing than with this one. Don''t get me wrong - it wasn't difficult, it just had lots of sewing!
Katja has set up a Facebook page and a FLICKR page so you'll see lots of interesting rosettes that look very different from mine! You will find links to both along with the instructions and patterns for this QAL here.
Now it is back to working on my Birds in the Loft quilt! I've made the medallion with birds for the middle of the quilt. It took some time to find just the right fabric for the ring but I finally settled on a very deep brown with olive and grey tones.
I folded a large sheet of paper in quarters and I drafted one quarter of the ring that would surround the birds. I cut it out and glued it to two sheets of kitchen freezer paper that I had ironed together. The ring was cut out. Save the leftover bits of freezer paper because they might come in handy!
The ring was ironed to the wrong side of the fabric.
I cut out the ring leaving the inside intact because I find it keeps the ring more body. I used my Starch Brush from Traditional Primitives to paint the seam allowance on the outside edge of the ring with starch. With a hot dry iron I pressed the seam allowance over the freezer paper.
I then cut out the inside of the oval and clipped the curves up to the freezer paper. Once again the seam allowance was painted with starch and pressed over the freezer paper with a hot dry iron.
Here it is with both sides pressed over the freezer paper. It looks wonky because the heat of the iron made the paper curl slightly. I can now remove the freezer paper.
I used Roxanne Glue Baste-it to affix the ring to the fabric. I'll use Superior's The Bottom Line thread in a taupe colour to applique the inside edge of the ring to the bird fabric.
Until I post again, happy sewing.
Karen H
Subscribe to:
Post Comments (Atom)


Beautiful Karen. Those little birds are just darling. It is going to be a very striking center.
ReplyDeleteYour Millefiora rosette is beautiful and the birds are very cute. I look forward to seeing the next step.
ReplyDeleteIt's like a painting. I' m waiting for the whisle from the birds. Greetings from the Netherlands. Dientje.
ReplyDeleteLove your rosette. I purchased the book but sadly it was missing several pages and I returned it. Still waiting for the replacement but if I don't hear from the shop soon I will be ordering the book and papers online. I really want to join in on the fun!
ReplyDeleteBeautiful work Karen :-)
ReplyDeleteBoth these quilts are going to be amazing. I love the red bird fabric with the brown frame.
ReplyDeleteI had wondered how you made the lovely surrounds lol thanks for the tute Karen : )
ReplyDeleteBeautiful quilts.
ReplyDeleteI used the same process to make my surround for my LE center, but I cut out the inner part before I sewed it on. I wish I had done it your way because it was very tricky tacking it around my center. I learn so much from your work, Karen.
ReplyDeleteAs to the millifiore center, it is beautiful! It's funny how eyes can play tricks on us. I keep seeing 6 little owls with heart shaped bodies looking out at me. What an illusion.
Your two projects are awesome! Come on over and link them to WIPs Be Gone, although you don't seem to have any problem making wips go away.
Hello Karen, dropping in via GYB-party. Your millefiori-rosette is amazing!
ReplyDeleteWow your Millefiori rosette is beautiful. You make it look effortless!
ReplyDeleteYour block is just fabulous. I really love your fabrics.
ReplyDelete