Cute? Perhaps but then again perhaps not!
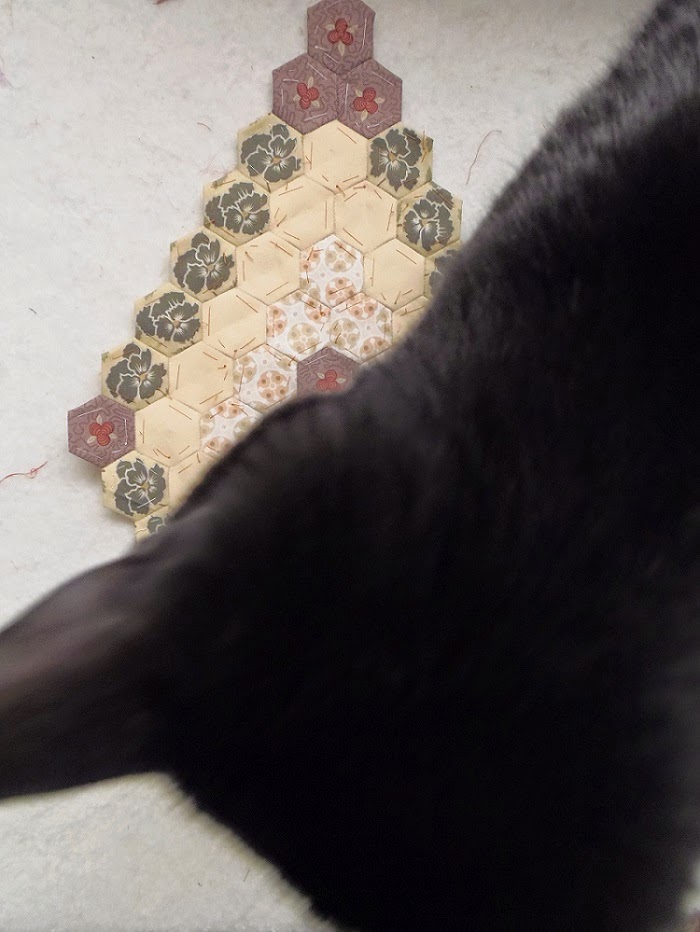
I had arranged the pieces of Birds in the Loft on the floor and then went to get the camera. When I came back this is what I saw!
When questioned Jinx about the Picasso-like rearrangement of my quilt pieces he just turned his head and made out like he had not idea what I was talking about! Clearly he isn't in the least bit sorry! He is a really nice little guy but I have to say I love him best when he is sleeping!
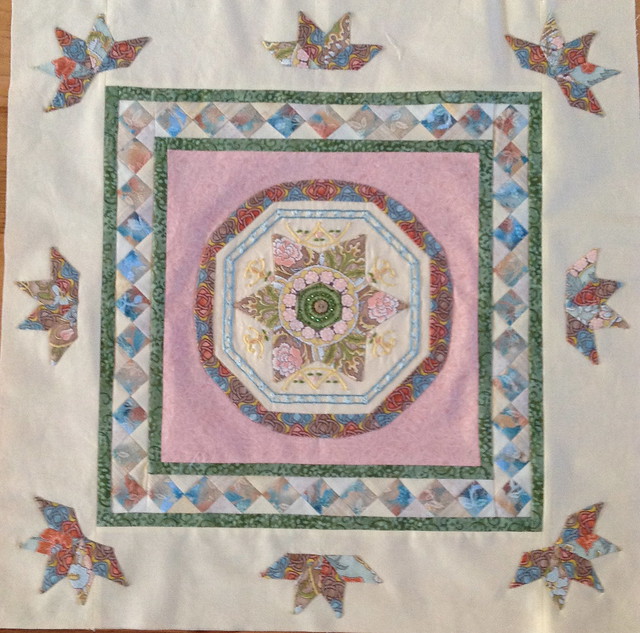
The pieces have been constructed for the centre medallion so they are ready to be stitched together. This is my diagram of the medallion for Birds in the Loft. Picture taking of my quilt doesn't appear to be an option today because Jinx is right in the thick of things!
Once stitched together the medallion will be pretty close to being done. While stitching it I'm also working on the hexagon rosettes.
This pair of rosettes are made from a striped fabric but I oriented the stripes in different directions to give the blocks a different look. I started by cutting a 2 1/2" strip across the width of the fabric. I placed the hexagon paper so that the stripe ran from point to point and cut six pieces to make the first rosette. For the second rosette I placed the paper so that the stripes ran from straight edge to straight edge making sure to centre three orange stripes on each hexagon.
I love the fabrics I used in this rosette. The gold fabric is an old fabric that I've had in my stash for years and I use it sparingly. The turquoise is a more recent addition. I think that the two together are a lovely combination!
Lia of Lia's Handmades has just launched her sixth Secret Tote Bag Swap. The theme of this one is black & white plus one colour. Sign up is open until February 27th. You will make a bag in black and white plus one colour? What will that colour be - the person who is assigned to you will give you three colours from which you will choose one. You can use multiple shades of the colour. You'll have no idea who got your name and your partner will have no idea who got her name until the bag is delivered. Most swappers include some lovely treats in the bad so it is a lovely surprise to get the bag in the mail. This sounds like a really fun swap. I've participated before and have been so happy with every tote bag I've received and I hope that my partners were equally happy with theirs. If you are interested in participating you'll find all of the information here.
That's it for today! I've got loads of hexagon rosettes to make so until I post again, happy sewing!
Karen H
Showing posts with label secret tote bag. Show all posts
Tuesday, February 17, 2015
Saturday, May 31, 2014
Another secret tote bag swap and more Godstone Grannies
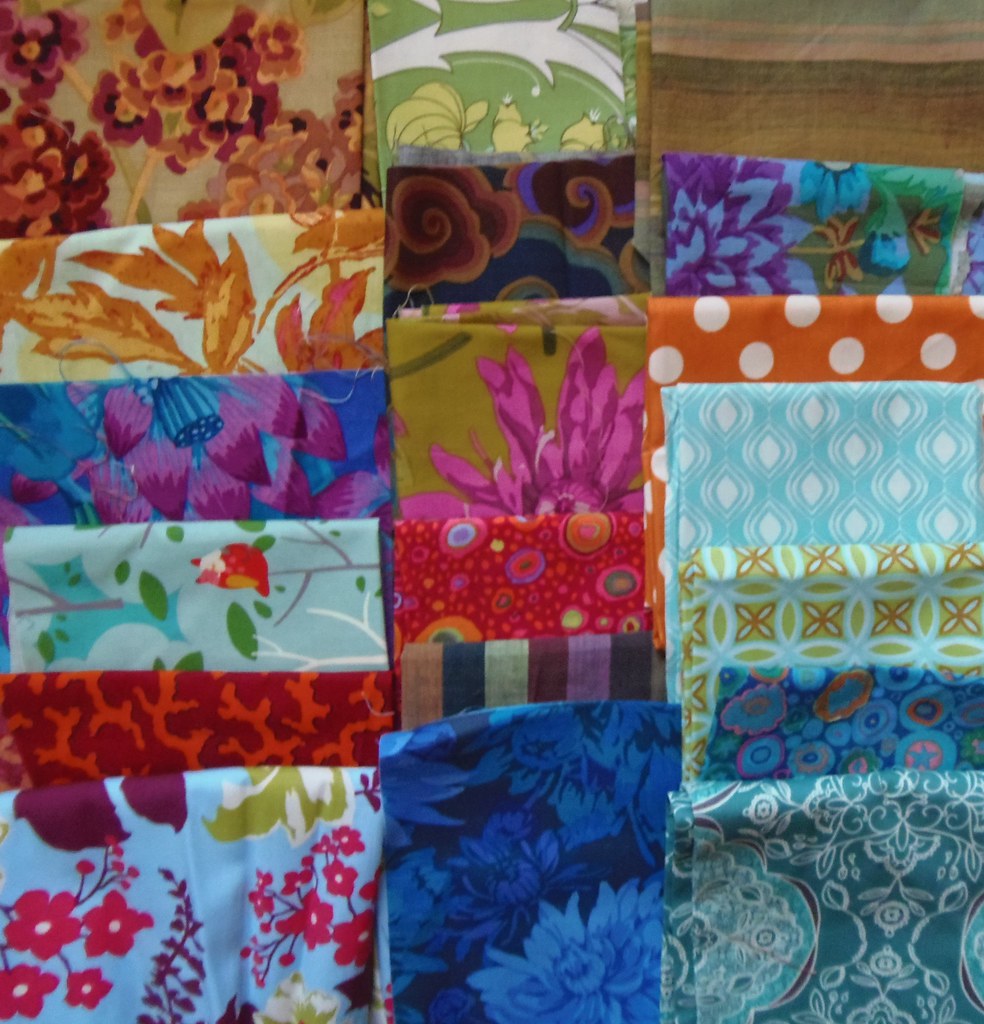
I signed up for Lia's Handmades fourth Secret Tote Bag Swap. The theme is Summertime! I chose to work with osnaburg because it looks like linen and linen is definitely a summertime fabric! I've tried to incorporate many of the things that my partner said she liked. I've been posting pictures but she hasn't left any comments so I'm hoping I'm on the right track! This is the first pull of fabrics, some of which I am using and others not!
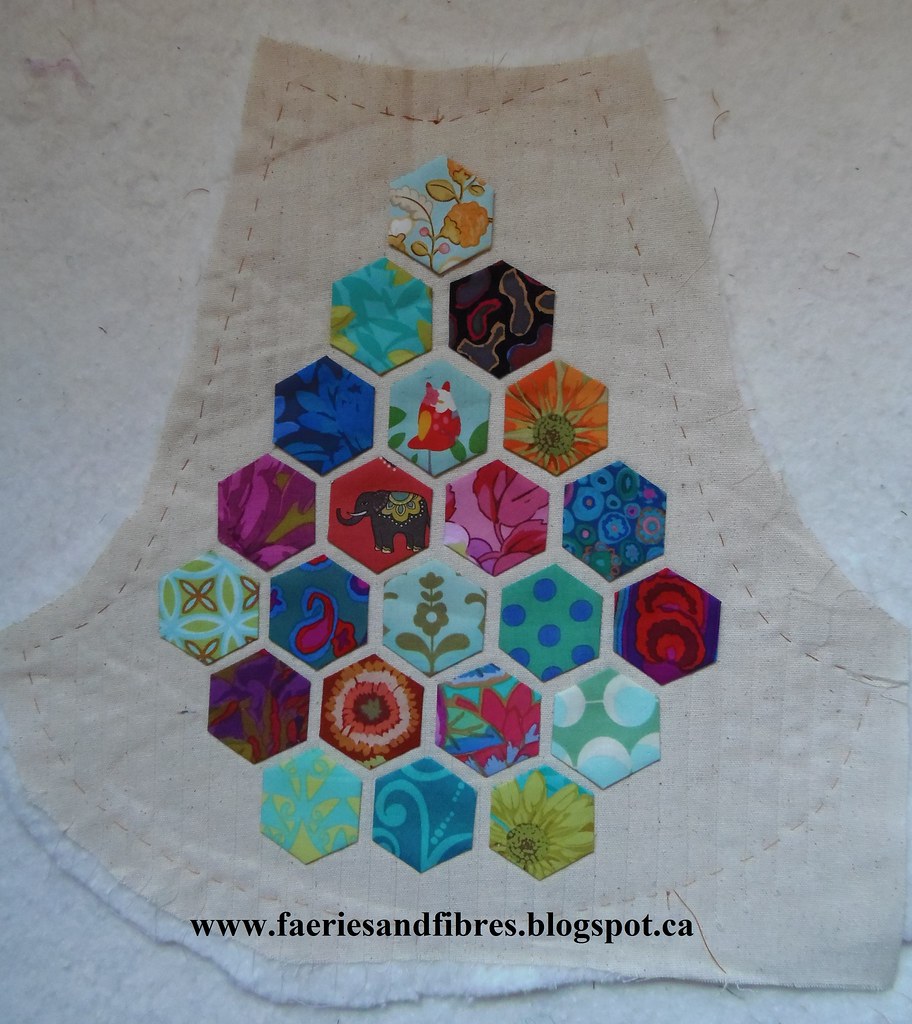
To start I tracied the pattern for the front and back of the bag on osnaburg and then I quilted it with straight lines. I made a pile of hexagons in bright summertime colours and prints and am now in the process of appliqueing them to the panel. I used the straight quilting lines to align all of the hexagons and I used my Roxanne Glue Baste-It to hold them in place before stitching them down. I have several hexagons that still need to be stitched down but once they are done the rest of the construction process should go quickly.
I repeated the same process for the other side of the bag. My next step will be to make the side panels and outside pockets. I'll use more osnaburg for the side panels and a nice summertime print, likely in a pretty aqua blue or turquoise, for the outside pockets. The bag is the 241 Tote by Noodlehead. It is a simple pattern with excellent instructions.
I want to add some embellishment so there might be a grasshopper like this one tucked in there somewhere! Grasshoppers have appeared in many of my quilts and tote bags! They are a little bit of a personal signature of mine. If you would like to make your own bug I published a little tutorial for stitching these little creatures and you will find it here.
I continue to work on the Godstone Grannies (GG) blocks. Making good progress but I need more time because I've got so much to do! This block is one of two filler blocks for the top and bottom. Both are now stitched together.
Look what happened when I tried to take a picture of the second GG block! Mr. Nosy cat (Forest Gumby) had to see what I was doing! I just don't understand what it is with cats and quilts! SCAT cat!!!!!
Here is the block without the Gump! This is one of two blocks and both are now stitched.
Well my tea is getting cold and I've got some sewing to do so until I post again, happy sewing!
Karen H
To start I tracied the pattern for the front and back of the bag on osnaburg and then I quilted it with straight lines. I made a pile of hexagons in bright summertime colours and prints and am now in the process of appliqueing them to the panel. I used the straight quilting lines to align all of the hexagons and I used my Roxanne Glue Baste-It to hold them in place before stitching them down. I have several hexagons that still need to be stitched down but once they are done the rest of the construction process should go quickly.
I repeated the same process for the other side of the bag. My next step will be to make the side panels and outside pockets. I'll use more osnaburg for the side panels and a nice summertime print, likely in a pretty aqua blue or turquoise, for the outside pockets. The bag is the 241 Tote by Noodlehead. It is a simple pattern with excellent instructions.
I want to add some embellishment so there might be a grasshopper like this one tucked in there somewhere! Grasshoppers have appeared in many of my quilts and tote bags! They are a little bit of a personal signature of mine. If you would like to make your own bug I published a little tutorial for stitching these little creatures and you will find it here.
This is a grasshopper that I slipped in another tote bag
I hid this little grasshopper in my quilt Lazy Punk
Look what happened when I tried to take a picture of the second GG block! Mr. Nosy cat (Forest Gumby) had to see what I was doing! I just don't understand what it is with cats and quilts! SCAT cat!!!!!
Here is the block without the Gump! This is one of two blocks and both are now stitched.
Well my tea is getting cold and I've got some sewing to do so until I post again, happy sewing!
Karen H
Saturday, March 15, 2014
Saturday is a mish mash
UPDATE ON SOUPCON: There was a typographical error in the measurement of the narrow border in Step 6. I have corrected the error! Many apololgies.
It's a mish mash of topics today so let's get started with "who's a lucky girl?".
I've now participated in my third Secret Tote Bag Swap organized by Lia's Handmades. I showed you the Noodlehead 241 Tote that I made for my secret partner and it is in the mail so hopefully she'll have it early next week. Yesterday I received the tote bag that was made for me by Kerry at Pennydog Patchwork. I told her I liked earth tones and muddy colours but that I also loved little pops of colour. I think she got it absolutely right! She also included two fat quarters and two spools of thread. So who's the lucky girl? Me of course!
Look at the octagons connected with little squares of turquoise. There are birds in some of the squares (I love birds)!
She liked the bag with a Westminster fabric (I believe it is called Burnt Rose) and it is one of my favourite fabrics from Kaffe.
I've started working on my Mom's Lazy Punk quilt. The first thing I do is stitch in the ditch on either side of every bit of sashing. I'm using Superior Monopoly on top an The Bottom Line in the bobbin.
I like to roll my quilt on the right side so that there is less bulk in the throat of my machine but the quilt on the left is just puddled loosely on the table. I usually have a chair on my left with the back of the chair touching the table. That way none of the quilt is hanging down creating drag. I smooth out the quilt and place my hands on either side of the area I am going to quilt (I needed my right hand to take the picture) and then I stitch in the ditch. I reposition my hands and smooth the quilt every six to eight inches.
Once I've stitched in the ditch I'll stitch around all of the Lazy Punk blocks around the edge and then I'll quilt the setting triangles. Here you can see a setting triangle pinned and ready for quilting.
I drew a line that is 1/2" from the edge. I want to quilt a feather design and don't want it to go into the seam allowance of the binding so I'll keep the quilting north of that line.
And here you can see the first free form feather quilted in the setting triangle.
Once I've quilted all of the setting triangles and the lazy punk blocks around the edges I will bind the quilt. Everything was stabilized with the stitch in the ditch. Once the quilt is bound I can go back and quilt the center. I developed this method because it allows me to reduce some of the bulk that comes from the excess batting and backing. And best of all, when I finish quilting the quilt is done! I don't have to go back and bind it!
My brother has been busy turning some seam rippers on his lathe. He has been using exotic woods, many of which are burls. Here you can see the one he is working on. He has inlaid lapis lazuli in this one which is made of buckeye burl!
Aren't these beautiful?
Here are some close-ups.
He just finished turning a knitting bowl. It is a gift for someone special. Two different woods were used, one for the bowl and one for the base.
An access opening had to be created to join the base to the bowl. He inlaid turquoise to close the access opening!
Yesterday I posted Part 6 (the final part) of my Soupcon QAL. There are a couple of new pictures of quilts at Step 5 that were posted on the Soupcon FLICKR Group so I thought I would share them with you. They are very exciting!
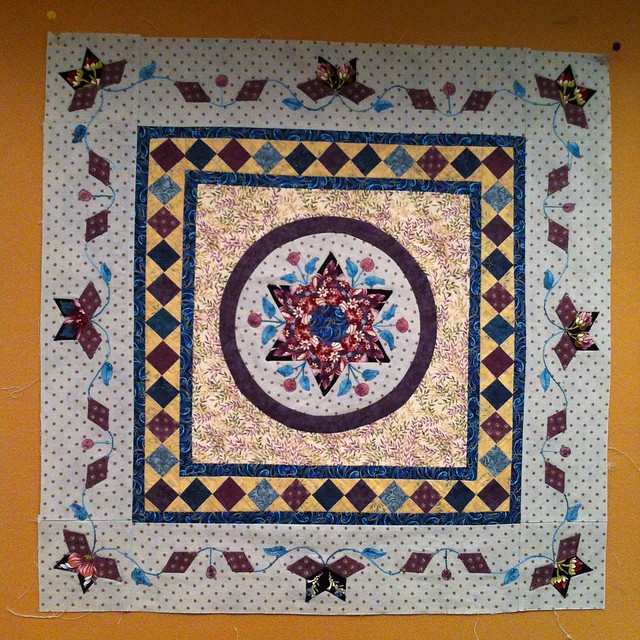
Colleen who is Skootchover created her own design for the border and she used partial stars. I think they were the perfect choice because they mirror the angular nature of the center motif giving the quilt a very cohesive look and feel. The open spaces in the light coloured background are the perfect canvas for some fabulous quilting.
Deb Sew'n'sew who is the Toothfairy Quilter has also created her own border design of partial stars but she added embroidered details that echo the details from the modified hexagon in the center. It is exquisite and I love the fussy cut diamonds in the partial stars.
That's it for me for today. Time to get quilting and working on my next QAL. Until I post again, happy sewing!
Karen H
It's a mish mash of topics today so let's get started with "who's a lucky girl?".
I've now participated in my third Secret Tote Bag Swap organized by Lia's Handmades. I showed you the Noodlehead 241 Tote that I made for my secret partner and it is in the mail so hopefully she'll have it early next week. Yesterday I received the tote bag that was made for me by Kerry at Pennydog Patchwork. I told her I liked earth tones and muddy colours but that I also loved little pops of colour. I think she got it absolutely right! She also included two fat quarters and two spools of thread. So who's the lucky girl? Me of course!
Look at the octagons connected with little squares of turquoise. There are birds in some of the squares (I love birds)!
She liked the bag with a Westminster fabric (I believe it is called Burnt Rose) and it is one of my favourite fabrics from Kaffe.
I've started working on my Mom's Lazy Punk quilt. The first thing I do is stitch in the ditch on either side of every bit of sashing. I'm using Superior Monopoly on top an The Bottom Line in the bobbin.
I like to roll my quilt on the right side so that there is less bulk in the throat of my machine but the quilt on the left is just puddled loosely on the table. I usually have a chair on my left with the back of the chair touching the table. That way none of the quilt is hanging down creating drag. I smooth out the quilt and place my hands on either side of the area I am going to quilt (I needed my right hand to take the picture) and then I stitch in the ditch. I reposition my hands and smooth the quilt every six to eight inches.
Once I've stitched in the ditch I'll stitch around all of the Lazy Punk blocks around the edge and then I'll quilt the setting triangles. Here you can see a setting triangle pinned and ready for quilting.
I drew a line that is 1/2" from the edge. I want to quilt a feather design and don't want it to go into the seam allowance of the binding so I'll keep the quilting north of that line.
And here you can see the first free form feather quilted in the setting triangle.
Once I've quilted all of the setting triangles and the lazy punk blocks around the edges I will bind the quilt. Everything was stabilized with the stitch in the ditch. Once the quilt is bound I can go back and quilt the center. I developed this method because it allows me to reduce some of the bulk that comes from the excess batting and backing. And best of all, when I finish quilting the quilt is done! I don't have to go back and bind it!
My brother has been busy turning some seam rippers on his lathe. He has been using exotic woods, many of which are burls. Here you can see the one he is working on. He has inlaid lapis lazuli in this one which is made of buckeye burl!
Aren't these beautiful?
Here are some close-ups.
He just finished turning a knitting bowl. It is a gift for someone special. Two different woods were used, one for the bowl and one for the base.
An access opening had to be created to join the base to the bowl. He inlaid turquoise to close the access opening!
Yesterday I posted Part 6 (the final part) of my Soupcon QAL. There are a couple of new pictures of quilts at Step 5 that were posted on the Soupcon FLICKR Group so I thought I would share them with you. They are very exciting!
Colleen who is Skootchover created her own design for the border and she used partial stars. I think they were the perfect choice because they mirror the angular nature of the center motif giving the quilt a very cohesive look and feel. The open spaces in the light coloured background are the perfect canvas for some fabulous quilting.
Deb Sew'n'sew who is the Toothfairy Quilter has also created her own border design of partial stars but she added embroidered details that echo the details from the modified hexagon in the center. It is exquisite and I love the fussy cut diamonds in the partial stars.
That's it for me for today. Time to get quilting and working on my next QAL. Until I post again, happy sewing!
Karen H
Monday, March 10, 2014
A new tote bag and a fabric basket
I am participating in Lia's Hnadmades Secret Tote Bag Swap- Round 3. The person I'm making the tote bag for wrote that she loves bright colours and text prints. She also likes the Noodlehead 241 Tote and since I have those fabrics in my stash and I also have the pattern, she shall get exactly what she asked for! The theme for this swap is geometrics so I decided to use simple squares and rectangles for the front panel. Here is the bag I made! It is the first time I've quilted a tote and I'm quite pleased with the result! The side panels and strap are made from osnaburg.
This is not a large tote. It is more of a hobo style purse. I just love the style and think I might make myself a summer bag from the pattern.
Here you can see the lining in the bag. I put in a magnetic closure and a little pocket edged with some of the fabric I used on the outside.
I want to send my partner some goodies so I've got a FQ of text fabric, a pink Frixion pen and this hardcover needle book that I made for her. It was made from a free pattern at The Studiolo (the embroidered leaf is my own addition). I used the scraps of osnaburg to make it and I lined it with text print.
In my travels I came across a really cute free pattern for a fabric basket on Pink Penguin. It sewed up in less than an hour. It measures about 6" in length, 4" tall and 3" wide. This is my test basket and there are a couple of minor corrections (the top stitching on the handles needs to be closer to the edges) but I'm pleased with it. I might just make one for my secret parnter too! You will find the free pattern here. These would make great little gift baskets for small things or maybe just a thread catcher. Start to finish it took less than an hour to make this little basket!
That's it for today. I've got a few chores but hope this afternoon I'll be able to find some time to finally do some quilting! Until I post again, happy sewing!
Karen H
This is not a large tote. It is more of a hobo style purse. I just love the style and think I might make myself a summer bag from the pattern.
Here you can see the lining in the bag. I put in a magnetic closure and a little pocket edged with some of the fabric I used on the outside.
I want to send my partner some goodies so I've got a FQ of text fabric, a pink Frixion pen and this hardcover needle book that I made for her. It was made from a free pattern at The Studiolo (the embroidered leaf is my own addition). I used the scraps of osnaburg to make it and I lined it with text print.
In my travels I came across a really cute free pattern for a fabric basket on Pink Penguin. It sewed up in less than an hour. It measures about 6" in length, 4" tall and 3" wide. This is my test basket and there are a couple of minor corrections (the top stitching on the handles needs to be closer to the edges) but I'm pleased with it. I might just make one for my secret parnter too! You will find the free pattern here. These would make great little gift baskets for small things or maybe just a thread catcher. Start to finish it took less than an hour to make this little basket!
That's it for today. I've got a few chores but hope this afternoon I'll be able to find some time to finally do some quilting! Until I post again, happy sewing!
Karen H
Tuesday, August 20, 2013
I've got a secret to share with you!
Lia has just launched her second Secret Tote Bag Swap and sign up is open until August 29th and you'll get your partner information by September 1st. For those who have never participated in a swap I have to admit that Lia's last swap was my first. I signed up and receive my partner information. I knew who she was but she didn't know I who got her name. She provided information about her likes and based on that information I made her a bag. Someone got my name and I posted pictures on Flickr of what I like. We were given a deadline date for mailing the bags. I made this bag for my secret partner. It is appliqued with spiders, butterflies, dragonflies, bees and grasshoppers! I hope she liked it!
These are some of the little treats I tucked inside the bag that I sent to my partner; a large hexagon pincushion that I made, scissors with a scissors tassel that I made and a cute little zip bag for sewing necessaries! There were a couple of additional treats but I didn't take pictures.
And this is the bag that I received from my secret partner! It is beautifully quilted and it has nice long straps that slip over my shoulders. It is being well used! I love the fabrics.....browns, blues and greens!
Tucked inside the bag were some lovely treats!
And there were prizes to be won for participating in the swap. Lucky me won a custom made bag from Lia! It is so beautifully made - it looks like it was made by a professional. Lia did a terrific job and the bag is being very well used!
Tucked inside were some lovely treats! I can tell you that the Toblerone chocolate did not last long! And the pattern is for a cute little pincushion - I do love my pincushions so it was the perfect gift!
If you are interested in participating in Lia's latest tote bag swap pop on over to her blog for the details. I'll be signing up as soon as I put together my mosaic!
That's it for today. Tomorrow I'll update you on my progress on Picadilly to the Nines. It is coming along nicely!
Until I post again, happy sewing!
These are some of the little treats I tucked inside the bag that I sent to my partner; a large hexagon pincushion that I made, scissors with a scissors tassel that I made and a cute little zip bag for sewing necessaries! There were a couple of additional treats but I didn't take pictures.
And this is the bag that I received from my secret partner! It is beautifully quilted and it has nice long straps that slip over my shoulders. It is being well used! I love the fabrics.....browns, blues and greens!
Tucked inside the bag were some lovely treats!
And there were prizes to be won for participating in the swap. Lucky me won a custom made bag from Lia! It is so beautifully made - it looks like it was made by a professional. Lia did a terrific job and the bag is being very well used!
Tucked inside were some lovely treats! I can tell you that the Toblerone chocolate did not last long! And the pattern is for a cute little pincushion - I do love my pincushions so it was the perfect gift!
If you are interested in participating in Lia's latest tote bag swap pop on over to her blog for the details. I'll be signing up as soon as I put together my mosaic!
That's it for today. Tomorrow I'll update you on my progress on Picadilly to the Nines. It is coming along nicely!
Until I post again, happy sewing!
Wednesday, June 26, 2013
Elephants, zebras and my secret tote bag!
Ella dropped by for a visit yesterday! She lives next door and I haven't seen her for almost 18 years! I made her as a gift for the new baby! I asked the baby who is almost an adult if she still have her but she wasn't sure. There had been a flood in the house and the family lost a lot of their belongings. As it turns out she survived and is safe and sound. She is pretty cute!
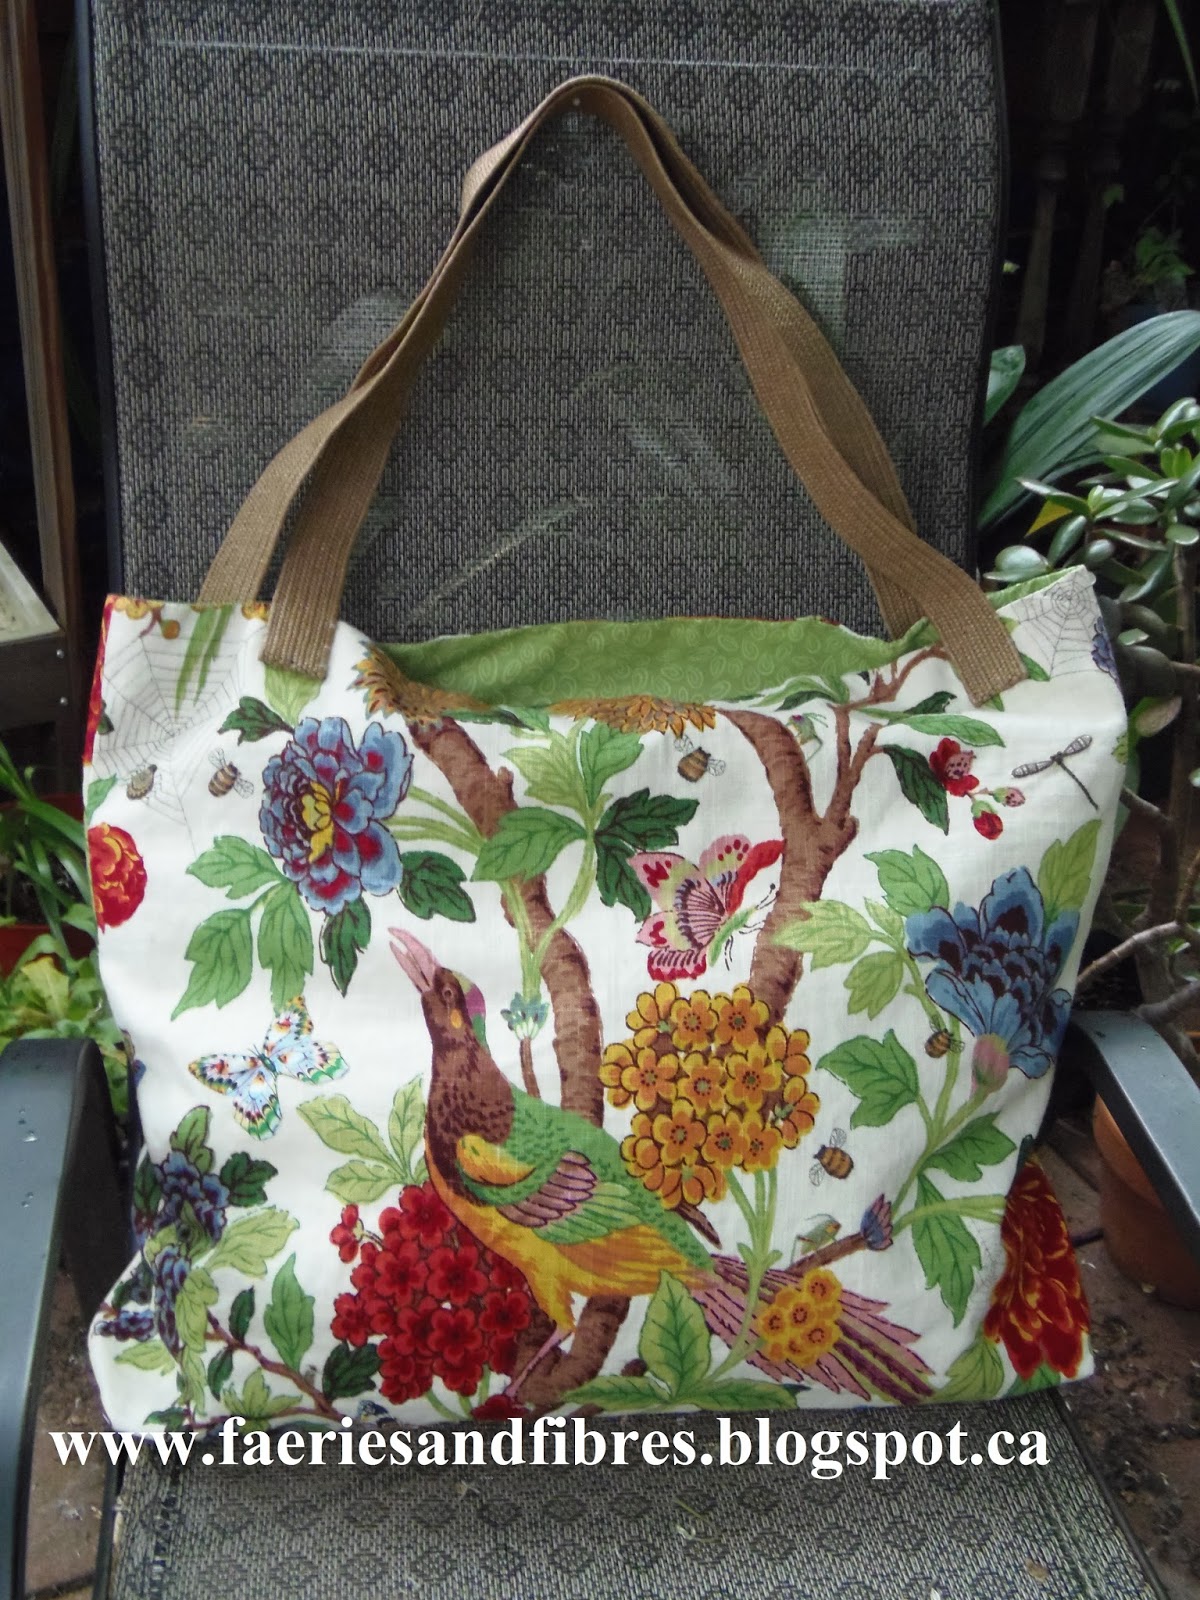
It was a lot of fun appliqueing, beading and embroidering grasshoppers, dragonflies, butterflies, bees and spiders. I have a few little goodies that I'll tuck inside the bag! It is pretty large and the reason for that is that I love the print and didn't want to cut it down. I think it would make a great beach bag as there would be plenty of room for a big towel, sunscreen and a bottle of water. I hope the recipient likes what I've made for her! She didn't give me much information about her likes and dislikes so I just had to wing it!
And what's in the garden today?
Reunited with a couple of old friends!
My secret tote bag for the swap hosted by Lia's Handmades is almost finished. I have jute straps for handles that I have yet to attach to the bag and I'm not sure how I will do it but the solution will come to me. I'll have to figure it out quickly because the bag has to be finished by the weekend!
It was a lot of fun appliqueing, beading and embroidering grasshoppers, dragonflies, butterflies, bees and spiders. I have a few little goodies that I'll tuck inside the bag! It is pretty large and the reason for that is that I love the print and didn't want to cut it down. I think it would make a great beach bag as there would be plenty of room for a big towel, sunscreen and a bottle of water. I hope the recipient likes what I've made for her! She didn't give me much information about her likes and dislikes so I just had to wing it!
And what's in the garden today?
Blackberries are coming along nicely!
and the red currents will be ready for picking soon!
Pink sedum...
and yellow sedum.....
and a close-up look at what was on the sedum!
Butterfly milkweed (isn't the colour spectacular?)
Close-up - amazing!
The lavender is just starting so I'll have to make some lavender bottles!
Ironweed
And Forest Gumby sprawled on a picnic table!
Until I post again, happy sewing!
Post Script: My Mom just heard that her quilt In My Garden was the voters favourite in the Quilting Gallery Show and Tell. She is thrilled to bits. It is the perfect tonic for her broken arm and she is very excited to get some new fabric and start sewing again. Hopefully she'll be able to do so before the summer is over. For those of you who voted she sends her very sincere thanks. This is the quilt - I just love it because it is my Mom exactly!
In My Garden by Anne H
Subscribe to:
Posts (Atom)