Friday, January 30, 2015

Rosette 1 in the New Hexagon Millefiori QAL and making a ring to frame the birds


If you are visiting for the Grow Your Blog Giveaway on my blog please go here.


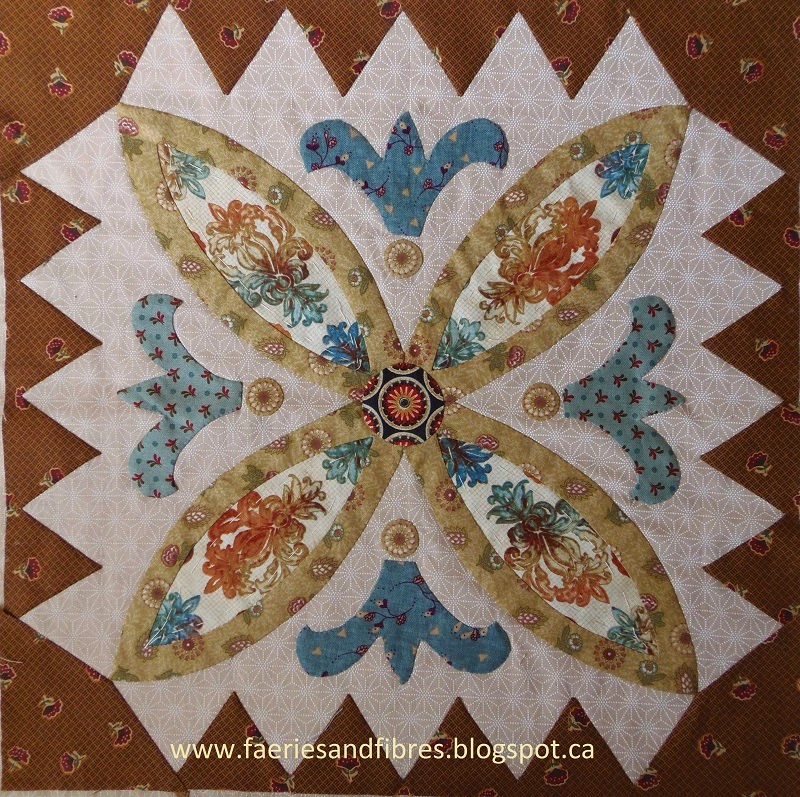
I've completed the first rosette in Katja Marek's New Hexagon Millefiori Quilt Along. It may not look like it but it is large. I think it is roughly 36" across. There will be partial rosettes that link into this piece and they will be smaller so that means less sewing than with this one. Don''t get me wrong - it wasn't difficult, it just had lots of sewing!


Katja has set up a Facebook page and a FLICKR page so you'll see lots of  interesting rosettes that look very different from mine! You will find links to both along with the instructions and patterns for this QAL here.

Now it is back to working on my Birds in the Loft quilt! I've made the medallion with birds for the middle of the quilt. It took some time to find just the right fabric for the ring but I finally settled on a very deep brown with olive and grey tones.

I folded a large sheet of paper in quarters and I drafted one quarter of the ring that would surround the birds. I cut it out and glued it to two sheets of kitchen freezer paper that I had ironed together. The ring was cut out. Save the leftover bits of freezer paper because they might come in handy!


The ring was ironed to the wrong side of the fabric.


I cut out the ring leaving the inside intact because I find it keeps the ring more body. I used my Starch Brush from Traditional Primitives to paint the seam allowance on the outside edge of the ring with starch. With a hot dry iron I pressed the seam allowance over the freezer paper.


I then cut out the inside of the oval and clipped the curves up to the freezer paper. Once again the seam allowance was painted with starch and pressed over the freezer paper with a hot dry iron.


Here it is with both sides pressed over the freezer paper. It looks wonky because the heat of the iron made the paper curl slightly. I can now remove the freezer paper.


I used Roxanne Glue Baste-it to affix the ring to the fabric. I'll use Superior's The Bottom Line thread in a taupe colour to applique the inside edge of the ring to the bird fabric.


Until I post again, happy sewing.
Karen H

Wednesday, January 28, 2015

A little show of hexagon rosettes for Birds in the Loft

The next round of Birds in the Loft will be red. I found an old tone-on-tone red print that I thought would be perfect. I like tone-on-tone prints because they add texture and are not as flat as solids. I find that if I use a little bit of solid in quilt that is otherwise made of prints that my eye is drawn to the solid.


Here it is with the red round. It looks quite bright in the picture but it is slightly more muted. Before I go any further I plan to construct the centre unit with the birds and then applique it in place.


I've been cutting and basting the odd rosette that will be used once I've constructed the medallion. Most of them will be made in pairs. I started by cutting a 2 1/2" strip across the width of the fabric and that was more than enough for two rosettes with a little leftover.

Rosette 1 looks fussy cut and I suppose in part it is however the only fussy cutting was making sure that I placed the base of each hexagon in the same position on the print and I didn't worry about the sides or how they would connect.

Rosette 1

Although it may not appear so at first glance the gold fabric is a directional print. Take a close look at the little four pointed stars with the black centre and you can see the direction of the print. I made sure that the stars radiated out from the centre.

Rosette 2

I love stripes because they make for such dramatic blocks. The centre hexagon would have been better if the flower were more centered however I only had a small piece of this fabric so I did the best that I could with what I had on hand.

Rosette 3

Rosette 4 is yet another directional print that is a chevron design. The fabric is an old one, Malvern Hill from Henry Glass. I did fussy cut to be sure that the chevrons were in the same position to create the illusion of a star. To do this I lined up my paper hexagon at the part of the print that would be the point of the star and then made sure that the bottom edge of the paper was centered between the lines base of the print. I just eyeballed it and it worked out fine!

Rosette 4

This is yet another directional print and I think it is lovely and delicate. I had a fat quarter of the fabric in the middle and once I started using it I realized it is a great print with fabulous colour that combines a muddy background with barn red and a little pop of gold-orange in the squares. I found a store that carries it and I ordered another yard! The print is called Civil War Tribute by Judie Rothermel for Marcus and it is available from Log Cabin Quilt Shop.

Rosette 5

Time for me to get sewing so I'll have more to show you in the coming days! Until I post again happy sewing!
Karen H

Monday, January 26, 2015

Work, work, work and type, type, type

I've been busy replying to comments from readers who entered my Grow Your Blog Giveaway. I will draw on the morning of February 15 so if you would like to see the prizes (there's more than one) and enter to win then go here to find out how! Please be sure to include your email address if you are a no reply blogger so that if you win I can contact you! What is a no reply blogger you ask? It simply means that you have not allowed your email address to be shared when you leave a comment on a blog so the blog owner has no way to contact you! Kathy in Ozarks wrote up an explanation about how to fix this and you can find it here. She also has a giveaway running so read her post and enter to win!

So I kind of lost my mojo when I was working on New Hexagon Millefiori Quilt Along. This is where I was when I got stuck!


I've been pulling fabrics and auditioning them but it is really difficult to know how they will work until you actually start cutting and basting. There are two hexagons that will be used for the next round and I was thinking I need to repeat the green to give the block a cohesive look and beyond that my only thought was copper tones or corals. I was in my sewing room last night and I pulled some fabrics and just started cutting and sewing. I made two blocks and I think they will work really well.

This is the first block and I'll need twelve of them. The striped fabric was so easy to fussy cut. I just tacked my paper to the wrong side of the fabric being sure to line up the points on the darkest section of the print.


This is the second block and I will need six of them. I repeated the green fabric I use earlier on and was able to cut most of the pieces I needed from my scraps so there was minimal fabric wastage.


Here's a little sneak peek at how it will look when it is done. I think it is going to be nice! For now I've got to stitch the next sixteen blocks and then sew them to the rosette!


If you would like to join in this free quilt along you can get all of the information on Katja Marek's website. She has set up a Facebook page and a FLICKR group where you'll find tons of temptation and inspiration! Links to both pages are on her website.

Lia is one of my blog world friends and she made a quilt for the Persimmon Dreams challenge. The theme was sunrise/sunset. Lia's entry is titled Morning in the Moor. You can read about her inspiration here. Voting is now open and I think her quilt is beautiful (I voted for it)! You can see all of the quilts and vote for your favourites here!

Morning in the Moor by Lia

If challenges are your thing you can read more about the challenge here. The theme for the next one will be announced on February 1.

Until I post again happy sewing (or in my case typing and sewing)!
Karen H

Saturday, January 24, 2015

GROW YOUR BLOG & a Giveaway!!!!


January 25 is GROW YOUR BLOG day. A big thanks to Vicki of 2 Bags Full (and her band of volunteers) for organizing the event. You will find a complete listing of participating blogs in Vicki's January 25 post. It is a wonderful way to meet new people and to discover new and interesting blogs many of which have giveaways. I have a giveaway so keep reading to find out more!

My name is Karen H and I am a Canadian quilt maker. I blog because I want to share what I do an how I do it. I try to keep my blog posts informative and have set up several pages that contain tutorials, instructions on English paper piecing and free patterns! One of the patterns is Cherry Blossom!


Cherry Blossom by Karen H 2013

I love all sorts of quilting styles and techniques. I've made traditional, applique,modern and improv quilts. To get an idea of what I do you can visit my Quilt Gallery to see some of my quilts. I think what makes my quilts different is that I like to add little details. For example a little bit of fussy cutting goes a long way! Take this block ....it is very pretty but it needs a little something just to spice it up a little!


I cut some circles from a print and appliqued them to the bases of the fleurs de lis and while it is a small thing I think it has a big impact!


Here's a close-up!


My quilt Flora and Fauna, Parts of The Garden is another example of what I do! I've combined broderie perse with embroidery to create one of my favourite small quilts. It was made during a Guild Challenge; I was given three fabrics and I was permitted to add another six. You can read about my quilt and see more close-ups here.

Flora and Fauna Parts of The Garden by Karen H 2008


The technique that I keep coming back to over and over again is English paper piecing and my favourite shape to work with is a hexagon. If you love hexagons you've come to the right place! You will find complete instructions under the tab English Paper Piecing Instructions and Hexagon Fun at the top of the page. You will also find tutorials for a technique I developed more than 15 years ago. It is a fast and easy way to make spectacular hexagon blocks. I've published many posts and tutorials about this technique and you will find them under the tab English Paper Piecing Instructions and Hexagon Fun.


My quilt There's a Snail in Grandma's Flower Garden combines my love of hexagons and fussy cutting with embroidered details!


There's a Snail in Grandma's Flower Garden by Karen H 2004

In the past year I've worked on and completed several projects including my Value Proposition Quilt Along. The focus was on value (the relative lightness or darkness of a fabric when compare to another). The quilt is made of 18 full blocks and 4 half blocks. You will find links to all of the free patterns under the tab Quilt Alongs by Karen H. This quilt is still needing its border so that project is on my "to do" list!


Value Proposition by Karen H 2014


I recently finished piecing my quilt Lozagons. It is a reproduction of an antique quilt that I saw on a Lorraine's blog Granny Loz. You can see the original quilt here. I ran out of turquoise fabric and that colour was discontinued so I had to use a second which is slightly different. You can see it in the middle of the top and bottom edges of the quilt. I've ordered more of the darker blue and plan to add a nice wide border all around the quilt.


Lozagons by Karen H 2015

I was asked to test a pattern for Missie Carpenter of Traditional Primitives. It is her interpretation of the King George II coverlet. Missie's pattern is called Gardens of a King and it is now available for sale on her site. It was a very interesting experience testing the pattern. This is my version of her pattern.


Gardens of a King by Karen H 2014

The 6" blocks are made using English paper piecing. It makes for perfect points on even the tiniest of pieces!


I also enjoy other techniques including traditional piecing. I've posted pictures of some of my finished quilts in my Gallery of Completed Quilts. You will also find some free patterns under the tab Patterns by Karen H. One of the free patterns is for this quilt which I call 81 The Giant Monstrosity (it turned out much bigger than I had expected)!

81 The Giant Monstrosity by Karen H 2014

And now for the giveaway! This pile of goodies will go to one lucky person. The package includes 3 fat quarters, 3 spools of cotton thread in neutral colours, marking tape and a scissor fob pincushion made by yours truly!


To enter the draw simply leave a comment. I reply to every comment so if you don't hear back from me it means you are a no-reply blogger and I cannot enter you in the draw because I have no way to contact you (unless you provide your email address in the comment). I will draw the name of the lucky winner on February 15! Good luck people!

Thanks for dropping by for a visit! Until I post again, happy sewing!
Karen H

Friday, January 23, 2015

Back in the middle again

My Birds in the Loft hexagon quilt is growing under my fingers! I've now stitched together the first couple of rounds that will form the centre panel.


I've been pondering the filling in of the opening with my bird fabric. The simplest option would simply be to cut a circle from the fabric, place it under the opening and applique it in place. Nice but it is a little bland for my taste and rather on the small side. I think that a larger piece is required for the centre.


Another option would be to make a rosette of larger hexagons and applique in on top of the centre panel. Very pretty and interesting but I want to use the birdie fabric. I'll save this rosette for another project.


At this point my plan is to work with an oval shape. I've made a paper template and pinned it to the quilt. I'll modify the shape just a little but of the three options this is by far my favourite. I think it has an elegant look and feel....like an antique mirror! It also complements the shape of my panel.


Today I'll cut the red hexagons for the next round and time permitting manipulate the centre oval until I get it just right!

This Saturday is GROW YOUR BLOG Day organized by Vicki at 2 Bags Full. There will be lots of interesting blogs to discover, many of which will have giveaways! I'll be participating and I'll have a little giveaway planned!

Until I post again, happy sewing!
Karen H

Wednesday, January 21, 2015

Birds in the Loft goes under the needle!

I've started cutting, basting (love basting) and sewing my Birds in the Loft hexagon quilt! The medallion is now started and this is how it is looking pinned to the design wall. These are 1" hexagons and the papers were recycled from my Value Proposition quilt. Although I've taken several steps forward in the making of Birds I'm going to have to take a few steps back and do some reverse sewing.


My plan is to remove the pieces marked with the red circles and replace them with fussy cut bees. I hate to have to rip out stitches and only do so when I can't live with what I've done. In this instance I think the addition of the bees will be subtle but well work the effort! Here's a little close up sneak peek at the bee! Much better, don't you agree?


I've also made two hexagon rosettes with fussy cut bees. These rosettes will be stitched to the top and bottom of the medallion. The brown print is a directional print so when cutting and sewing I paid particular attention so that the print radiates out from the centre.


Today I'll head back to my design sheet and start sketching some possibilities for what comes next! I have a few ideas but am not sure if they will translate well so I'll sketch them in pencil and if I'm not happy I'll do some reverse drawing with an eraser!

I've got some sketching and sewing to do so until I post again, happy sewing!
Karen H

Monday, January 19, 2015

Birds in the Loft - the beginning

I'm ready to get going with the making of my Birds in the Loft hexagon quilt. I have a rough idea of where I am headed with this quilt but it may change as I start cutting and sewing. There are a number of inspirations for this quilt. The first is my Stars in the Loft quilt. I love all of the rosettes in this quilt so I will have rosettes in the new quilt. I will also incorporate my foundation paper pieced English paper pieced rosettes in this new quilt.


I want to feature this beautiful print in a quilt. It is from Moda's Dominique II line. I plan on using the birds in a centre medallion and perhaps elsewhere in the quilt. The ideas are still percolating!


Medallion quilts really speak to me. Since I've already done a round medallion in Stars in the Loft I wanted to use a different shape. This one really spoke to me. The quilt is dated 1800-1820 and it is in the Quilt Museum and Gallery. You can read more about this quilt here.


There will be rosettes and lots of them. I start by pulling fabrics that I think will work with the birdie fabric. They don't have to match but they should complement the starting fabric. What I focus on is the scale of the print (the size of the print), the value (the relative lightness or darkness of the fabric compared to others) and the colour. I am using 1" hexagons for this project.


I cut 2 1/2" strips of fabric and then quick cut my hexagons in no time flat. You can read how I do this here. I am cutting 12 hexagons which is enough for two rosettes but I'll also need one more for the centre of each rosette. If I have a fabric that I like for the middle I cut it at this time and if not I'll look for something later. I tack these hexagons together with thread and toss them in a bag so if I have a few spare moments I can do some basting. I can always find a few spare moments for basting especially in my helper (the little stinker) is sleeping!


I want a light fabric for the background and did a rough calculation about the fabric requirement. I  reckon I will need five yards. There are plenty of lights in my stash but I don't have a five yard length so I've selected two fabrics, one of which will be used for most of the medallion (the middle fabric) and the other will be used for the path between the rosettes (top fabric). I pulled a third fabric and will fussy cut some bees to be used although I'm not sure where they will be used. I have several other fabrics with bees which I will likely incorporated in my quilt!


I've sketched out the middle of the quilt and am ready to get started. I'm thinking I will use fussy cut bee prints where there are dots but that could change. The red in the middle will be the birdie fabric but I want to do more than just reverse applique it in place so I'll work on that component of my design later. For now all I need to know is the size of the opening. Now I am ready to get sewing! So exciting!


Until I post again, happy sewing!
Karen H

Saturday, January 17, 2015

Lozagons Quilt Top without border

I was finally able to get outside and take a picture of my Lozagons hexagon quilt. It was made with 3/4" hexagons. I ran out of the turquoise fabric and had to add a second fabric which is slightly different. You can see it in the middle of the top and bottom edges. This is such a cheery quilt top!


The next step is to add a wide turquoise border but I haven't ordered the fabric. Maybe I'll do that today!

The inspiration for Lozagons was an antique quilt on Lorraine's blog. You can see the original and several other hexagon quilts here.

Image courtesy of Lorraine at Granny Loz

I have another hexagon project it mind and one of my inspirations is this fabric from Moda. It is an old print and the collection is Dominique II and the colour is paprika! I just love these little birdies!


I also plan to use some of the ideas and techniques from my quilt Stars in the Loft.


Some of the design ideas for my new quilt are drawn from an antique quilt which I will share in another post. If my plan works out it will be a large quilt made of 1" hexagons and I plan to call it Birds in the Loft! The first step is to start sketching on a design sheet and then pull out my scraps to see what I can use! I'll keep you posted on my progress.
\
I will be posting a template for 1 1/4" hexagons but am having difficulty getting it to scan accurately. When I've got it figured out I'll let you know!

Until I post again, happy sewing!
Karen H