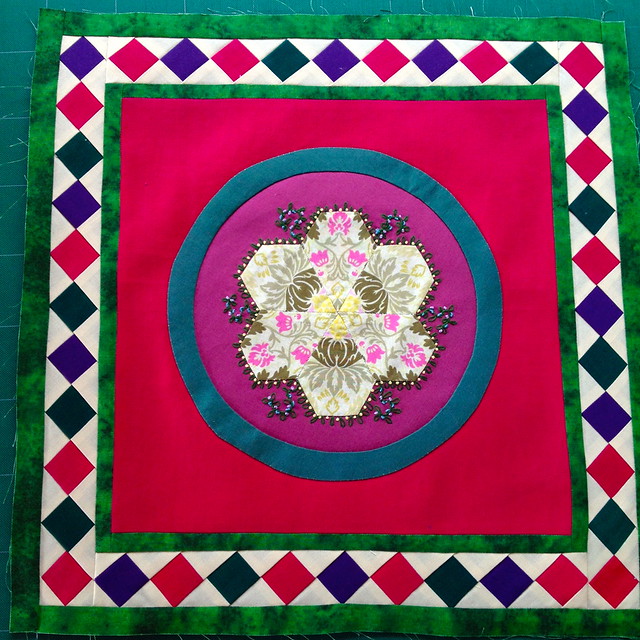
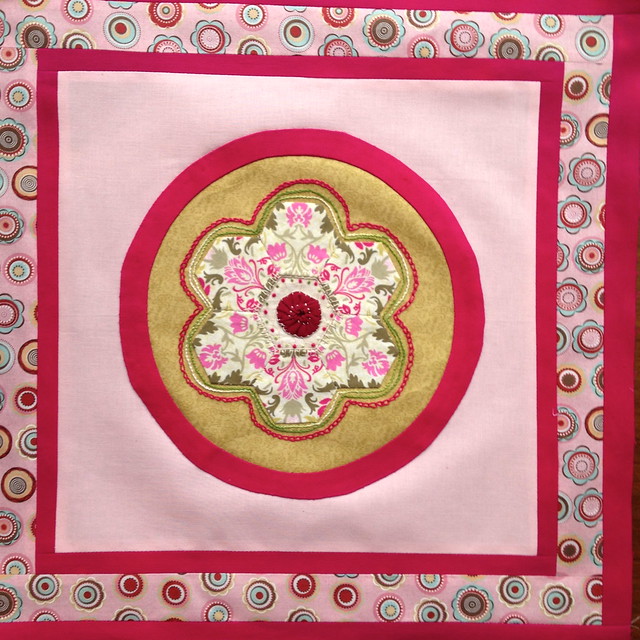
Only a few days until I post the last part of Soupcon, Step 6. I know many of you are working away on your Step 5 border. It is the step that involves the most work but it is also a great place for you to get creative and put your own personal stamp on the quilt. How about a quick little trunk show of what others hare doing? These pictures are all from the Soupcon FLICKR Group. I always like to link back to the maker's blog when I have the blog address. If I missed adding the link to your blog please let me know so that I can update my post!
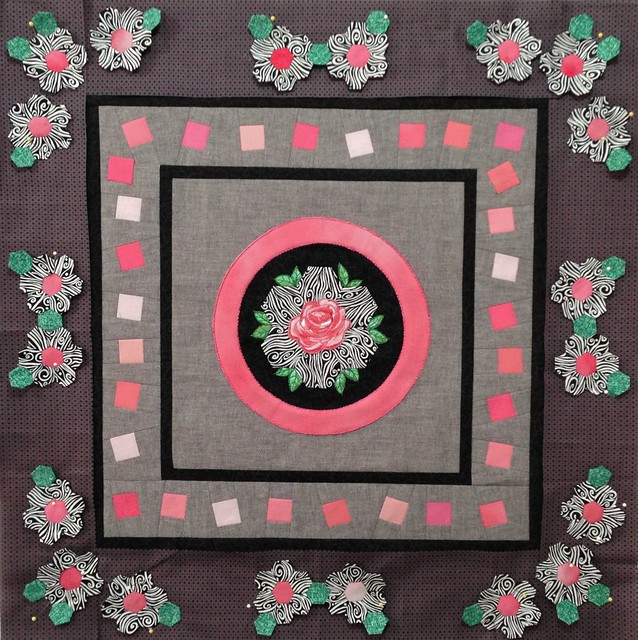
Nellie Durand has several Soupcon quilts on the go. I just love this one because it makes me thing of men's suiting and shantung silk. It really is a happy quilt! the pink in the center of the border hexagons is in fact silk that she dyed. Notice the subtle colour changes.
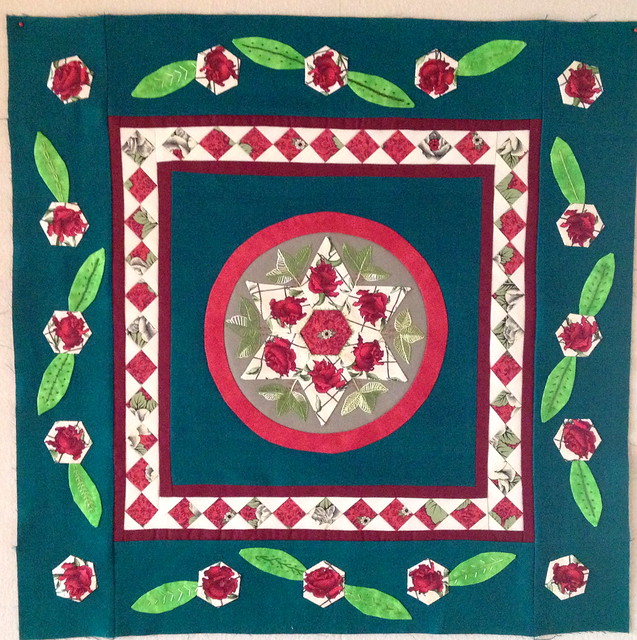
Jean Cockburn also used this opportunity to make the quilt uniquely her own. I love how she repeated the modified hexagon fabric in the Step 4 border and the Step 5 border! The leaves are beautifully embellished with embroidery. If these fabrics were sitting on a table I never would have thought to combine them but they work together beautifully to produce an wonderful quilt. It is vibrant!
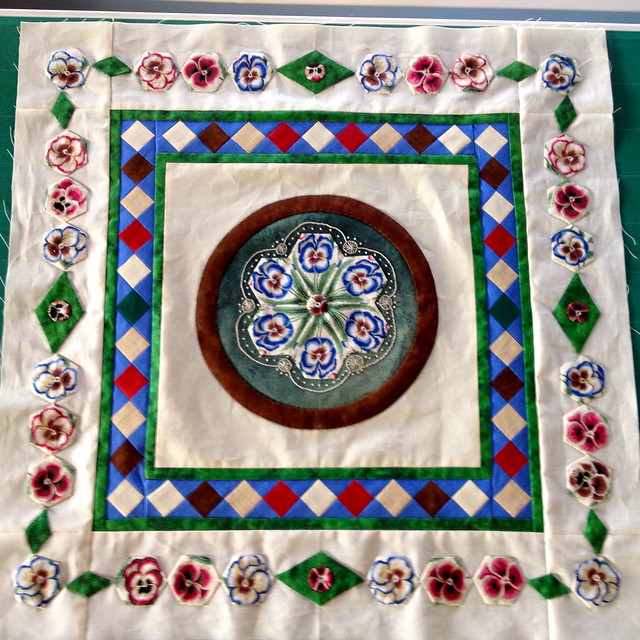
Just look at all the happy pansy faces appliqued in the border of Jean's second Soupcon. The green diamonds have appliqued circles in the centers and the blue pansy faces in hexagons really pull this quilt together in the most delightful way! I think this quilt would make a great medallion for a bed size quilt! I can just see it surrounded by hourglass blocks!
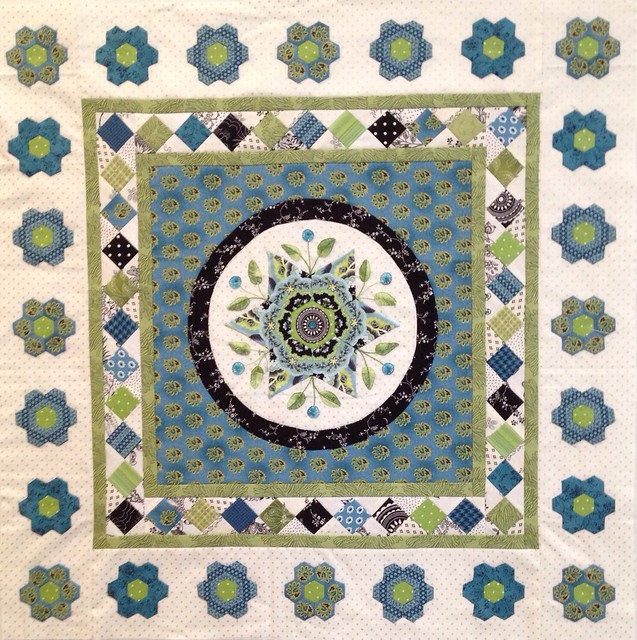
Heather who is The Happy Appliquer added little hexagon flowers all the way around in her border. Don't you just love all the little fussy cut hexagons? It is so fresh and delicate! Again she has repeated fabrics to lend a cohesive look to the quilt. There is so much attention to detail in each border but the center modified hexagon really is the star of this quilt!
Kat Lorien is making her hexagons for the border and they are ready to be appliqued. She had a bit of a hiccup making the quilt so she is going to see Step 6 before she adds the Step 5 border to her butterfly quilt. Notice how she used my foundation pieced English paper piecing method to make stars in the center of each border. So pretty! It is a little bit of effort that in my option really pays off in a big way.
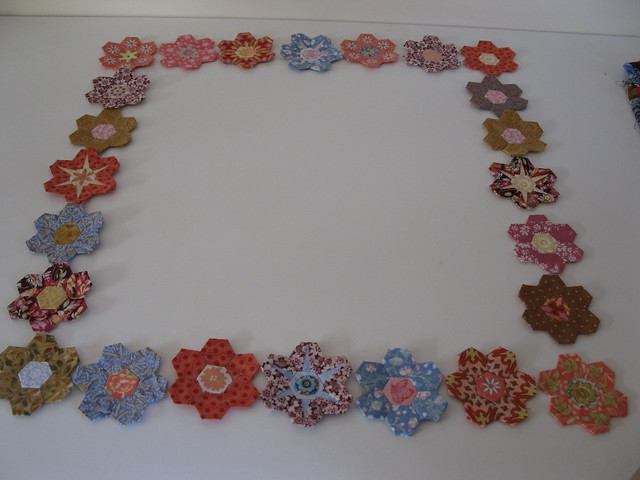
Sheila aka Quilting Gammy posted this picture of her quilt. I love her corner treatment in the Step 5 border. It echoes the center circle. When I was designing the quilt I had in fact contemplated doing just so I'm pleased to see that Sheila also thought of it and actually did it! She also tried out the tiny foundation paper pieced EPP stars and they look terrific! The red points on the blue background really make the stars twinkle.
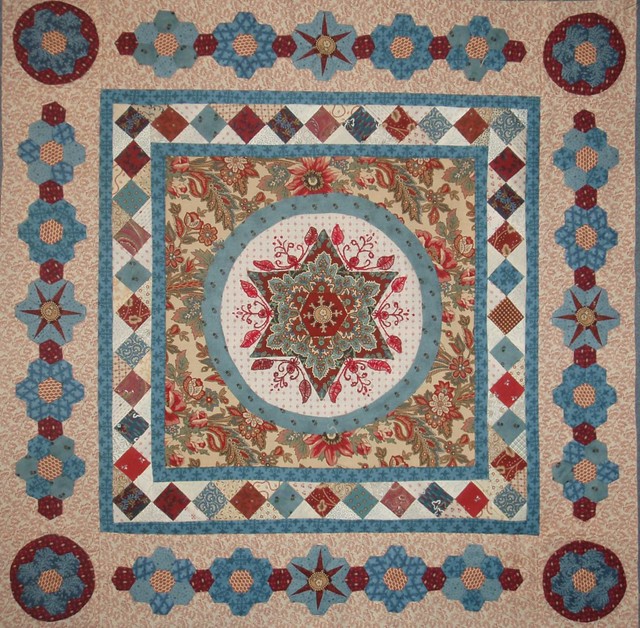
There are also a few new pictures of Soupcon quilts after Step 4 and they are gorgeous!
Jean Cockburn has three Soupcons completed up to Step 4. Jean uses colour boldly and confidently and I very much admire that talent. These three quilts are each so different and I can't wait to see how they look with the Step 5 border! What I do know is that they will be exciting!
Nancy aka n.mcnab167 posted this picture. The embroidery is fabulous - love the little embroidered berries and the pieced border is full of berry colours. The dark fabric background is very textural and it adds depth and drama!
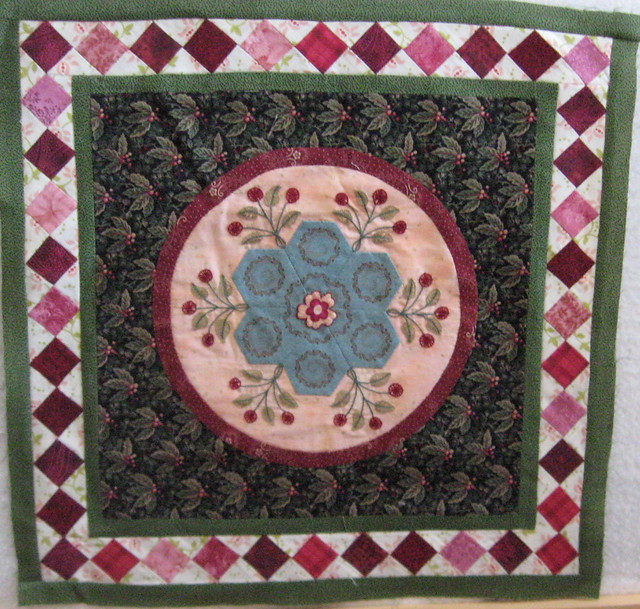
tucum58quilts posted this picture. She has embellished her block with embroidery and it is so whimsical. Check out the lovely little bees! Don't you love the watery background? The flower looks like it is floating in a pond!
Sophie aka pezze di fantasia posted pictures of two blocks she has made. I love the combination of coral, navy and aqua in the fist one. Her embroider design is an absolute delight. I hope she keeps going because she is off to a fabulous start with this one!
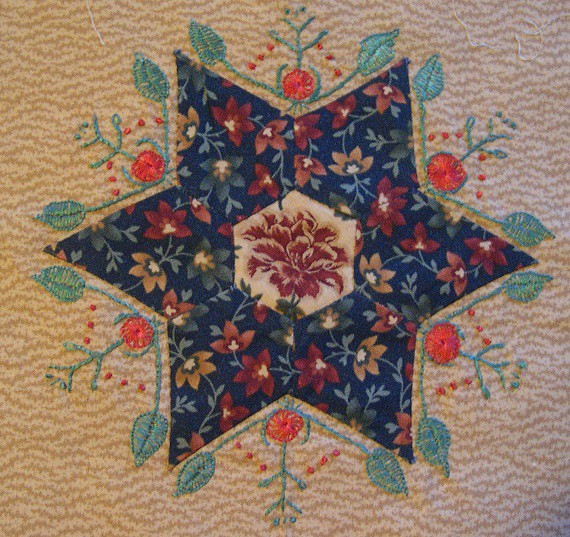
The second is equally beautiful. Rather than a modified hexagon she has tried out my foundation paper pieced English paper piecing technique and the star just pops off the coral background! That combined with the frosty blue background and the pale embroidery resulted in a block that is unique! I'm so glad she too has taken my ideas and done her own thing!
I'm busy writing up the final instructions for Step 6 of Soupcon and I'll have them posted early on Friday. In my spare time I am getting ready to quilt my Mom's Lazy Punk quilt. I'll share pictures with you soon!
Until I post again, happy sewing!
Karen H
Wednesday, March 12, 2014
Monday, March 10, 2014
A new tote bag and a fabric basket
I am participating in Lia's Hnadmades Secret Tote Bag Swap- Round 3. The person I'm making the tote bag for wrote that she loves bright colours and text prints. She also likes the Noodlehead 241 Tote and since I have those fabrics in my stash and I also have the pattern, she shall get exactly what she asked for! The theme for this swap is geometrics so I decided to use simple squares and rectangles for the front panel. Here is the bag I made! It is the first time I've quilted a tote and I'm quite pleased with the result! The side panels and strap are made from osnaburg.
This is not a large tote. It is more of a hobo style purse. I just love the style and think I might make myself a summer bag from the pattern.
Here you can see the lining in the bag. I put in a magnetic closure and a little pocket edged with some of the fabric I used on the outside.
I want to send my partner some goodies so I've got a FQ of text fabric, a pink Frixion pen and this hardcover needle book that I made for her. It was made from a free pattern at The Studiolo (the embroidered leaf is my own addition). I used the scraps of osnaburg to make it and I lined it with text print.
In my travels I came across a really cute free pattern for a fabric basket on Pink Penguin. It sewed up in less than an hour. It measures about 6" in length, 4" tall and 3" wide. This is my test basket and there are a couple of minor corrections (the top stitching on the handles needs to be closer to the edges) but I'm pleased with it. I might just make one for my secret parnter too! You will find the free pattern here. These would make great little gift baskets for small things or maybe just a thread catcher. Start to finish it took less than an hour to make this little basket!
That's it for today. I've got a few chores but hope this afternoon I'll be able to find some time to finally do some quilting! Until I post again, happy sewing!
Karen H
This is not a large tote. It is more of a hobo style purse. I just love the style and think I might make myself a summer bag from the pattern.
Here you can see the lining in the bag. I put in a magnetic closure and a little pocket edged with some of the fabric I used on the outside.
I want to send my partner some goodies so I've got a FQ of text fabric, a pink Frixion pen and this hardcover needle book that I made for her. It was made from a free pattern at The Studiolo (the embroidered leaf is my own addition). I used the scraps of osnaburg to make it and I lined it with text print.
In my travels I came across a really cute free pattern for a fabric basket on Pink Penguin. It sewed up in less than an hour. It measures about 6" in length, 4" tall and 3" wide. This is my test basket and there are a couple of minor corrections (the top stitching on the handles needs to be closer to the edges) but I'm pleased with it. I might just make one for my secret parnter too! You will find the free pattern here. These would make great little gift baskets for small things or maybe just a thread catcher. Start to finish it took less than an hour to make this little basket!
That's it for today. I've got a few chores but hope this afternoon I'll be able to find some time to finally do some quilting! Until I post again, happy sewing!
Karen H
Saturday, March 8, 2014
Hexagon Shamrock
Julia of The Hexie Blog released her March block and it is as I suspected a shamrock! I had been sorting through my fabrics looking for blue with a hint of green in the print. I couldn't find what I wanted so instead I just went with an ombred blue print and used a shamrock print fabric for the centers of the hexagon flowers. I also wanted to use my foundation pieced English paper piecing (EPP) technique so I added a darker blue to surround the shamrocks. Here is my shamrock block which is made of 1" hexagons.
Notice how the points in the center form a four pointed star. I may fill in that space with an appliqued shamrock fussy cut from the fabric. This is a free block of the month and there's plenty of room for creativity so if you are interested pop on over to The Hexie Blog for a visit. You'll also be able to join the Yahoo group Julia has set up so you can see what others are doing. January was a snowflake and February was a heart. All of my blocks will be made in shades of blue with little pops of colour that reflect the theme of the month. I wonder what she has planned for April!
This is a close-up of one of the lobes of the shamrock and the foundation pieced EPP hexies.
This is the hexagon template I used to make the lobes. Only two pieces of fabric are needed to make this versatile hexagon. My light blue fabric is directional so I had to make sure that my hexagon was placed correctly on the stripes so I drew pencil lines on my hexagons so I was sure to line them up correctly.
I used this same template to make this star in my quilt Loopers in the Sky with Diamonds. It reminds me of a ninja star!
Until I post again, happy sewing!
Karen H
Notice how the points in the center form a four pointed star. I may fill in that space with an appliqued shamrock fussy cut from the fabric. This is a free block of the month and there's plenty of room for creativity so if you are interested pop on over to The Hexie Blog for a visit. You'll also be able to join the Yahoo group Julia has set up so you can see what others are doing. January was a snowflake and February was a heart. All of my blocks will be made in shades of blue with little pops of colour that reflect the theme of the month. I wonder what she has planned for April!
This is a close-up of one of the lobes of the shamrock and the foundation pieced EPP hexies.
This is the hexagon template I used to make the lobes. Only two pieces of fabric are needed to make this versatile hexagon. My light blue fabric is directional so I had to make sure that my hexagon was placed correctly on the stripes so I drew pencil lines on my hexagons so I was sure to line them up correctly.
I used this same template to make this star in my quilt Loopers in the Sky with Diamonds. It reminds me of a ninja star!
Until I post again, happy sewing!
Karen H
Friday, March 7, 2014
Sewing a hexagon flower video
I like to find the most efficient way of making and stitching my hexagons together so today I thought I would show you how I stitch my hexagons together. When a hexagon is surrounded by six hexagons I describe this shape as a flower. I stitch the six "petals" together but do not close the circle so the shape that is left is an "open donut".
I set in the center hexagon and stitch all the way around and then close the opening, This allows me to use one length of thread. I shot a little video (I'm not a videographer so please excuse the quality) to demonstrate how I sew the hexagon together. I did it quickly with stitches that were larger and further apart than I would normally do and I used a colour of thread that didn't match. In the picture below I used a pale green thread combined with smaller stitches that were closer together the result is perfect!
I hope that my YouTube video will be helpful to you!
Sometimes a flower will have a second round of petals. I made a hexagon flower of 1" hexagons and stitched it together as shown in my video.
I stitched an open donut for the second round.
The open donut surrounds the flower. My sewing will start with the brown petal in the upper left of the open donut.
I place the right sides together and sew from the outer right edge toward the inner corner as indicated by the red circle.
Once that seam is stitched I fold the flower so that I can line up the edge of the open donut with the the next edge as indicated by the red circle. I stitch the seam.
I fold and line up the edges and sew the next seam.
I continue in this manner all around until I get to the beginning. All that is left is to close the seam of the open donut where indicated by the red circle.
I fold the pieces so I can line up the edges and stitch the seam closed.
The finished hexagon with a second round!
I plan to add another round and to be sure that the fabrics line up where I want them I make marks on the papers. The center is marked "center". I mark "1" on each hexagon that is to stack on top of the center. When stitching the open donuts together I know that the hexagons marked "1" must be on top of either the center or #1.
I always stitch my hexagons together in the same manner and there's a good reason for this. If I ever have to remove a section I know how the block was constructed so it makes the "reverse sewing" much easier!
Until I post again, happy sewing!
Karen H
I set in the center hexagon and stitch all the way around and then close the opening, This allows me to use one length of thread. I shot a little video (I'm not a videographer so please excuse the quality) to demonstrate how I sew the hexagon together. I did it quickly with stitches that were larger and further apart than I would normally do and I used a colour of thread that didn't match. In the picture below I used a pale green thread combined with smaller stitches that were closer together the result is perfect!
I hope that my YouTube video will be helpful to you!
Sometimes a flower will have a second round of petals. I made a hexagon flower of 1" hexagons and stitched it together as shown in my video.
I stitched an open donut for the second round.
The open donut surrounds the flower. My sewing will start with the brown petal in the upper left of the open donut.
I place the right sides together and sew from the outer right edge toward the inner corner as indicated by the red circle.
Once that seam is stitched I fold the flower so that I can line up the edge of the open donut with the the next edge as indicated by the red circle. I stitch the seam.
I fold and line up the edges and sew the next seam.
I continue in this manner all around until I get to the beginning. All that is left is to close the seam of the open donut where indicated by the red circle.
I fold the pieces so I can line up the edges and stitch the seam closed.
The finished hexagon with a second round!
I plan to add another round and to be sure that the fabrics line up where I want them I make marks on the papers. The center is marked "center". I mark "1" on each hexagon that is to stack on top of the center. When stitching the open donuts together I know that the hexagons marked "1" must be on top of either the center or #1.
I always stitch my hexagons together in the same manner and there's a good reason for this. If I ever have to remove a section I know how the block was constructed so it makes the "reverse sewing" much easier!
Until I post again, happy sewing!
Karen H
Thursday, March 6, 2014
To be or knot to be?
Although I love hand sewing the one thing I don't like is making knots and I've often thought that it would be so nice if there was a small device that would knot your thread. As far as I know no such device exists so until it does I'll just continue to knot by hand. I was recently doing some hand sewing at a Guild meeting and one of the members asked me to show here how I was making knots because she had never seen that method before so I figured maybe others would be interested too!
I make knots in several ways. I've got some pictures and at the end there is a little video to demonstrate two of the three knots. The knot names are how I describe them - I am sure there are proper names for them but I've no idea what they are!
Simple Knot
This is the first knot we all learned to tie as children. Simply make a loop and bring the cut end of the thread through the loop.
Pull the thread to form the knot.
Depending on the weight of the thread a second or third knot made in the same manner is often required. The needle doesn't have to be threaded in order to tie this knot.
Rolled Knot
I was taught this method when I was a girl. Make a loop and place it on the index finger of your dominant hand (for me it is my right hand).
Place your thumb on top of the loop, apply some pressure and slowly slide your thumb up so that you feel the thread rolling between your fingers.
Hold the thread taught with your opposite hand and while still pinching the twisted thread slide your fingers away from the twists. You'll feel the knot forming.
The needle doesn't have to be threaded in order to tie this knot.
Wrapped Knot
This is probably my favourite method of making knots. I place the cut end of my thread on the index finger of my non-dominant hand (my left) and place the needle on top. Hold both in place.
With my dominant hand I wrap the thread around the needle two, three or four times (depends upon the weight of the thread and size of knot I need).
I place my thumb over the wraps and push the needle up from the eye until I can grab it with my right hand.
I can slowly and evenly slide the thread through the wraps. Needless to say you need to thread the needle to make this knot.
I shot a little video to demonstrate the Rolled Knot and the Wrapped Knot. I'm not a professional so the quality isn't great but I hope that it at least gives you a clear idea of how I make my knots. When you watch the video please ignore Forest Gump meowing in the background. He wanted up on my lap but my lap was otherwise engaged at the time!
That's it for today. Until I post again hope you don't get yourself twisted in knots and as always, happy sewing!
Karen H
I make knots in several ways. I've got some pictures and at the end there is a little video to demonstrate two of the three knots. The knot names are how I describe them - I am sure there are proper names for them but I've no idea what they are!
Simple Knot
This is the first knot we all learned to tie as children. Simply make a loop and bring the cut end of the thread through the loop.
Pull the thread to form the knot.
Depending on the weight of the thread a second or third knot made in the same manner is often required. The needle doesn't have to be threaded in order to tie this knot.
Rolled Knot
I was taught this method when I was a girl. Make a loop and place it on the index finger of your dominant hand (for me it is my right hand).
Hold the thread taught with your opposite hand and while still pinching the twisted thread slide your fingers away from the twists. You'll feel the knot forming.
The needle doesn't have to be threaded in order to tie this knot.
Wrapped Knot
This is probably my favourite method of making knots. I place the cut end of my thread on the index finger of my non-dominant hand (my left) and place the needle on top. Hold both in place.
I place my thumb over the wraps and push the needle up from the eye until I can grab it with my right hand.
I can slowly and evenly slide the thread through the wraps. Needless to say you need to thread the needle to make this knot.
I shot a little video to demonstrate the Rolled Knot and the Wrapped Knot. I'm not a professional so the quality isn't great but I hope that it at least gives you a clear idea of how I make my knots. When you watch the video please ignore Forest Gump meowing in the background. He wanted up on my lap but my lap was otherwise engaged at the time!
That's it for today. Until I post again hope you don't get yourself twisted in knots and as always, happy sewing!
Karen H
Tuesday, March 4, 2014
How much fabric do I need for a path?
Thank you for all the get well wishes. I'm feeling a little better but feeling terribly guilty about my silence so I thought I would do a quick post.
A reader asked me how much fabric she would need if she wanted to add single path between her hexagons. The answer of course depends upon a number of factors such as the size of the hexagons and the size of the quilt.
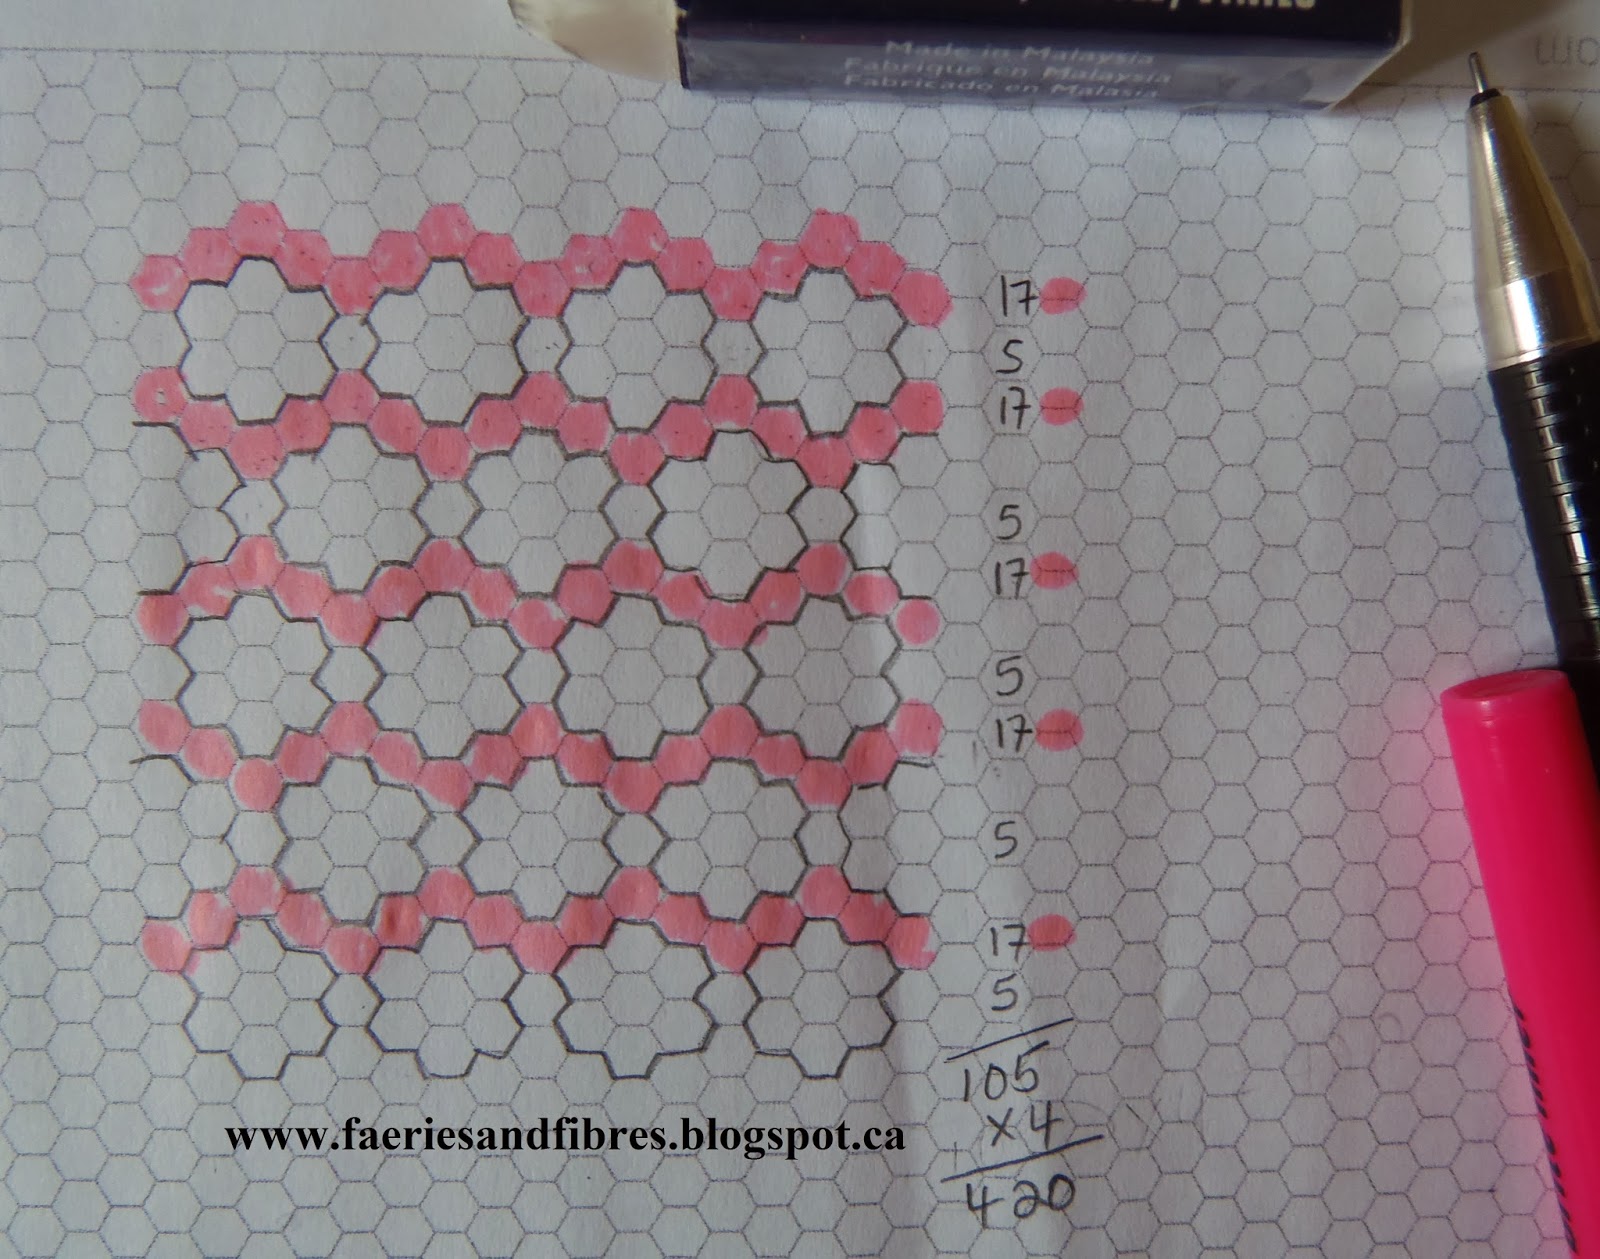
To figure out how much fabric is required you would need to know the number of hexagons form the path. You don't need an exact number; and approximate number is good enough. The simplest way to do this calculation is to diagram one quarter of your quilt on design paper. Hexagon design sheets can be downloaded for free from Print Free Graph Paper and also from Paper Pieces. In the picture shown below I've sketched out one quarter of a quilt. The "flowers" are made of a single round of 1" hexagons around a center hexagon. I coloured the horizontal rows above and below each set of hexagons.
I count the number of hexagons in each of these rows and the number is 17. There are 5 hexagons (shown as white) that connect the rosettes. I note these numbers down the side of my diagram.
The sum is 105 hexagons for the path. Since the diagram is one quarter of the quilt I multiply this number by four for a total of 420 hexagons. I might need a few more or few less but this number is close enough to calculate fabric requirements.
The hexagons will be cut from strips of fabric. For 1" hexagons I cut strips that are 2 1/2 inches. You can read more about cutting hexagons from strips of fabric in my post on February 25, 2014. If you cut 2 1/2" squares from your strip you will end up with 16 to 18 hexagons depending on the width of your fabric. So measure your strip and divide it by 2 1/2" to determine the number of hexagons each strip will yield. Let's assume that we will get 18 hexagons per strip. We know we need 420 hexagons for the path. To determine the number of strips to cut we simply divide 420 by 18. The answer is 23.33333 so we just round that up to 24 strips. The last step to calculate the amount of fabric require is to multiply the number of strips, 24, by the width of the strips 2 1/2". The result is 60" which is 1.7 yards or 1.6 meters! I like to have a little extra just in case so I would round it up to 2 yards/meters. It is that simple!
To recap the formula is:
Do I always calculate the amount of fabric I will need for a path? Usually I don't. If I run out of fabric I simply add a similar fabric to the mix and I think it makes for a more interesting quilt.
Until I post again, stay healthy and happy sewing!
Karen H
A reader asked me how much fabric she would need if she wanted to add single path between her hexagons. The answer of course depends upon a number of factors such as the size of the hexagons and the size of the quilt.
To figure out how much fabric is required you would need to know the number of hexagons form the path. You don't need an exact number; and approximate number is good enough. The simplest way to do this calculation is to diagram one quarter of your quilt on design paper. Hexagon design sheets can be downloaded for free from Print Free Graph Paper and also from Paper Pieces. In the picture shown below I've sketched out one quarter of a quilt. The "flowers" are made of a single round of 1" hexagons around a center hexagon. I coloured the horizontal rows above and below each set of hexagons.
I count the number of hexagons in each of these rows and the number is 17. There are 5 hexagons (shown as white) that connect the rosettes. I note these numbers down the side of my diagram.
The sum is 105 hexagons for the path. Since the diagram is one quarter of the quilt I multiply this number by four for a total of 420 hexagons. I might need a few more or few less but this number is close enough to calculate fabric requirements.
The hexagons will be cut from strips of fabric. For 1" hexagons I cut strips that are 2 1/2 inches. You can read more about cutting hexagons from strips of fabric in my post on February 25, 2014. If you cut 2 1/2" squares from your strip you will end up with 16 to 18 hexagons depending on the width of your fabric. So measure your strip and divide it by 2 1/2" to determine the number of hexagons each strip will yield. Let's assume that we will get 18 hexagons per strip. We know we need 420 hexagons for the path. To determine the number of strips to cut we simply divide 420 by 18. The answer is 23.33333 so we just round that up to 24 strips. The last step to calculate the amount of fabric require is to multiply the number of strips, 24, by the width of the strips 2 1/2". The result is 60" which is 1.7 yards or 1.6 meters! I like to have a little extra just in case so I would round it up to 2 yards/meters. It is that simple!
To recap the formula is:
(Number of Hexagons/Number of Hexagons per strip)*size of strip = number of inches required
so for 1" hexagons in my example the formula is
(420/18)*2.5" = 60"
Do I always calculate the amount of fabric I will need for a path? Usually I don't. If I run out of fabric I simply add a similar fabric to the mix and I think it makes for a more interesting quilt.
Until I post again, stay healthy and happy sewing!
Karen H
Saturday, March 1, 2014
A sewing day with friends
I've got a cold and I don't feel particularly creative so I thought I would share some pictures I took when I had a day of sewing some friends.
Babs wanted to pin baste a quilt top that she made for her future daughter-in-law who is a purple girl. There was a tutorial on Buttontree Lane Stitchery for stitchy flippy half square triangles. I shared it with Babs and she decided it was the perfect quilt design for a young person! We all shared purple fabrics with her and in no time flat she had this wonderful quilt top!
This quilt is a great way to use up scraps and the resultant shapes are fun and interesting. They remind me of prisms! It is now pin basted and ready for quilting.
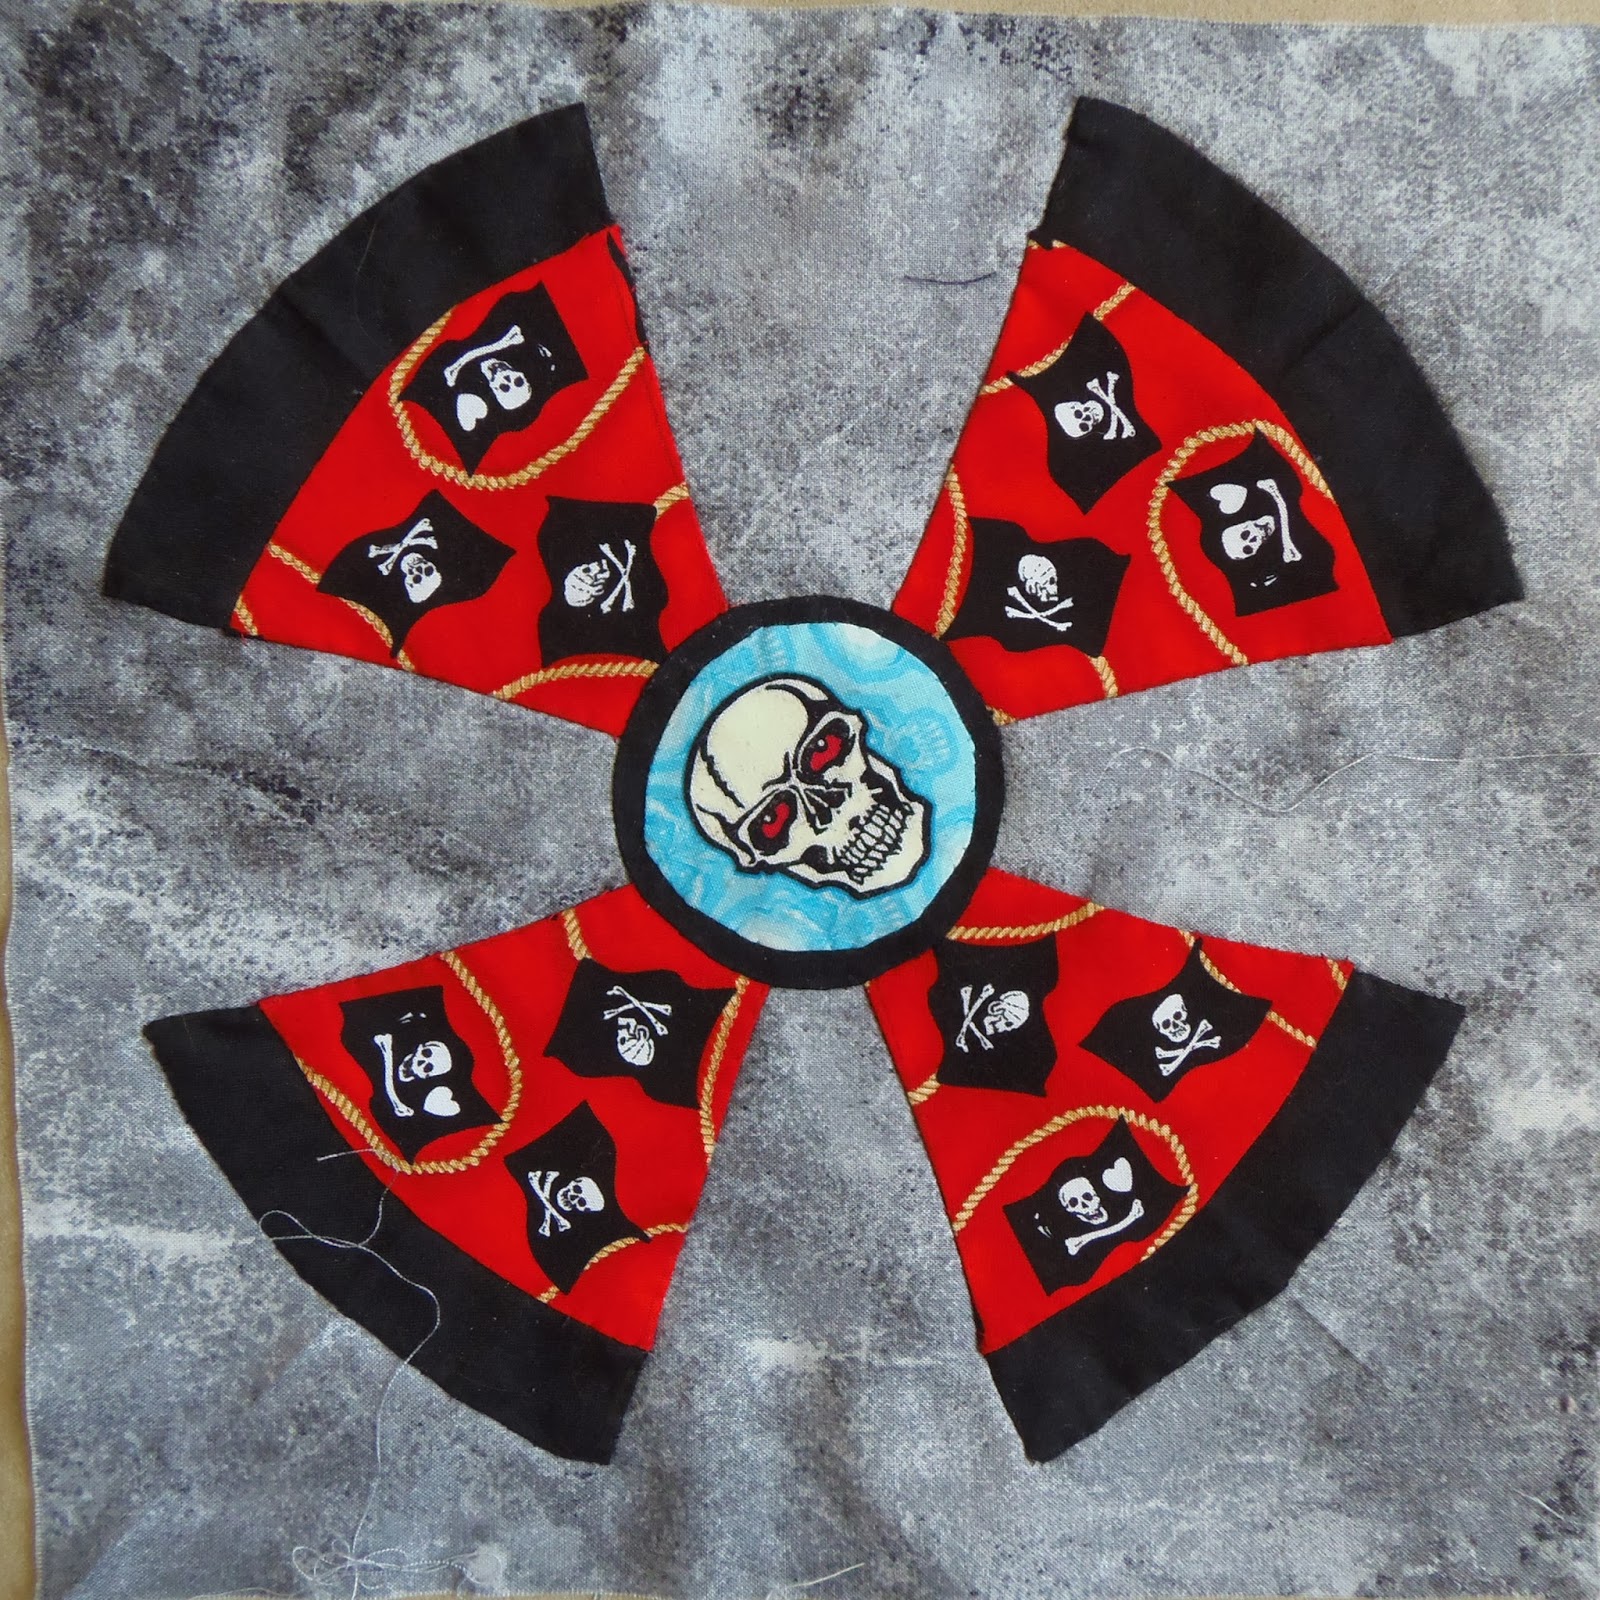
The second project I am going to show is Char's quilt blocks in the making. She liked my Lazy Punk quilt and decided she would like to try out my method. She has a collection of skeleton fabrics that she wanted to feature in her blocks. She used a Northcott Stonehenge fabric for the background and then she matched the outer arcs to the wedges in her blocks. I suggested that she call her quilt Lazy Bones and I think that's what she is going to go with! The skulls in the middle of each block glow in the dark! What fun!
That's it for today - my cold is making me feel like a real lazy bones so I don't think I'll be doing anything productive today! Until I post again, happy sewing!
Karen H
Babs wanted to pin baste a quilt top that she made for her future daughter-in-law who is a purple girl. There was a tutorial on Buttontree Lane Stitchery for stitchy flippy half square triangles. I shared it with Babs and she decided it was the perfect quilt design for a young person! We all shared purple fabrics with her and in no time flat she had this wonderful quilt top!
This quilt is a great way to use up scraps and the resultant shapes are fun and interesting. They remind me of prisms! It is now pin basted and ready for quilting.
The second project I am going to show is Char's quilt blocks in the making. She liked my Lazy Punk quilt and decided she would like to try out my method. She has a collection of skeleton fabrics that she wanted to feature in her blocks. She used a Northcott Stonehenge fabric for the background and then she matched the outer arcs to the wedges in her blocks. I suggested that she call her quilt Lazy Bones and I think that's what she is going to go with! The skulls in the middle of each block glow in the dark! What fun!
That's it for today - my cold is making me feel like a real lazy bones so I don't think I'll be doing anything productive today! Until I post again, happy sewing!
Karen H
Subscribe to:
Posts (Atom)