

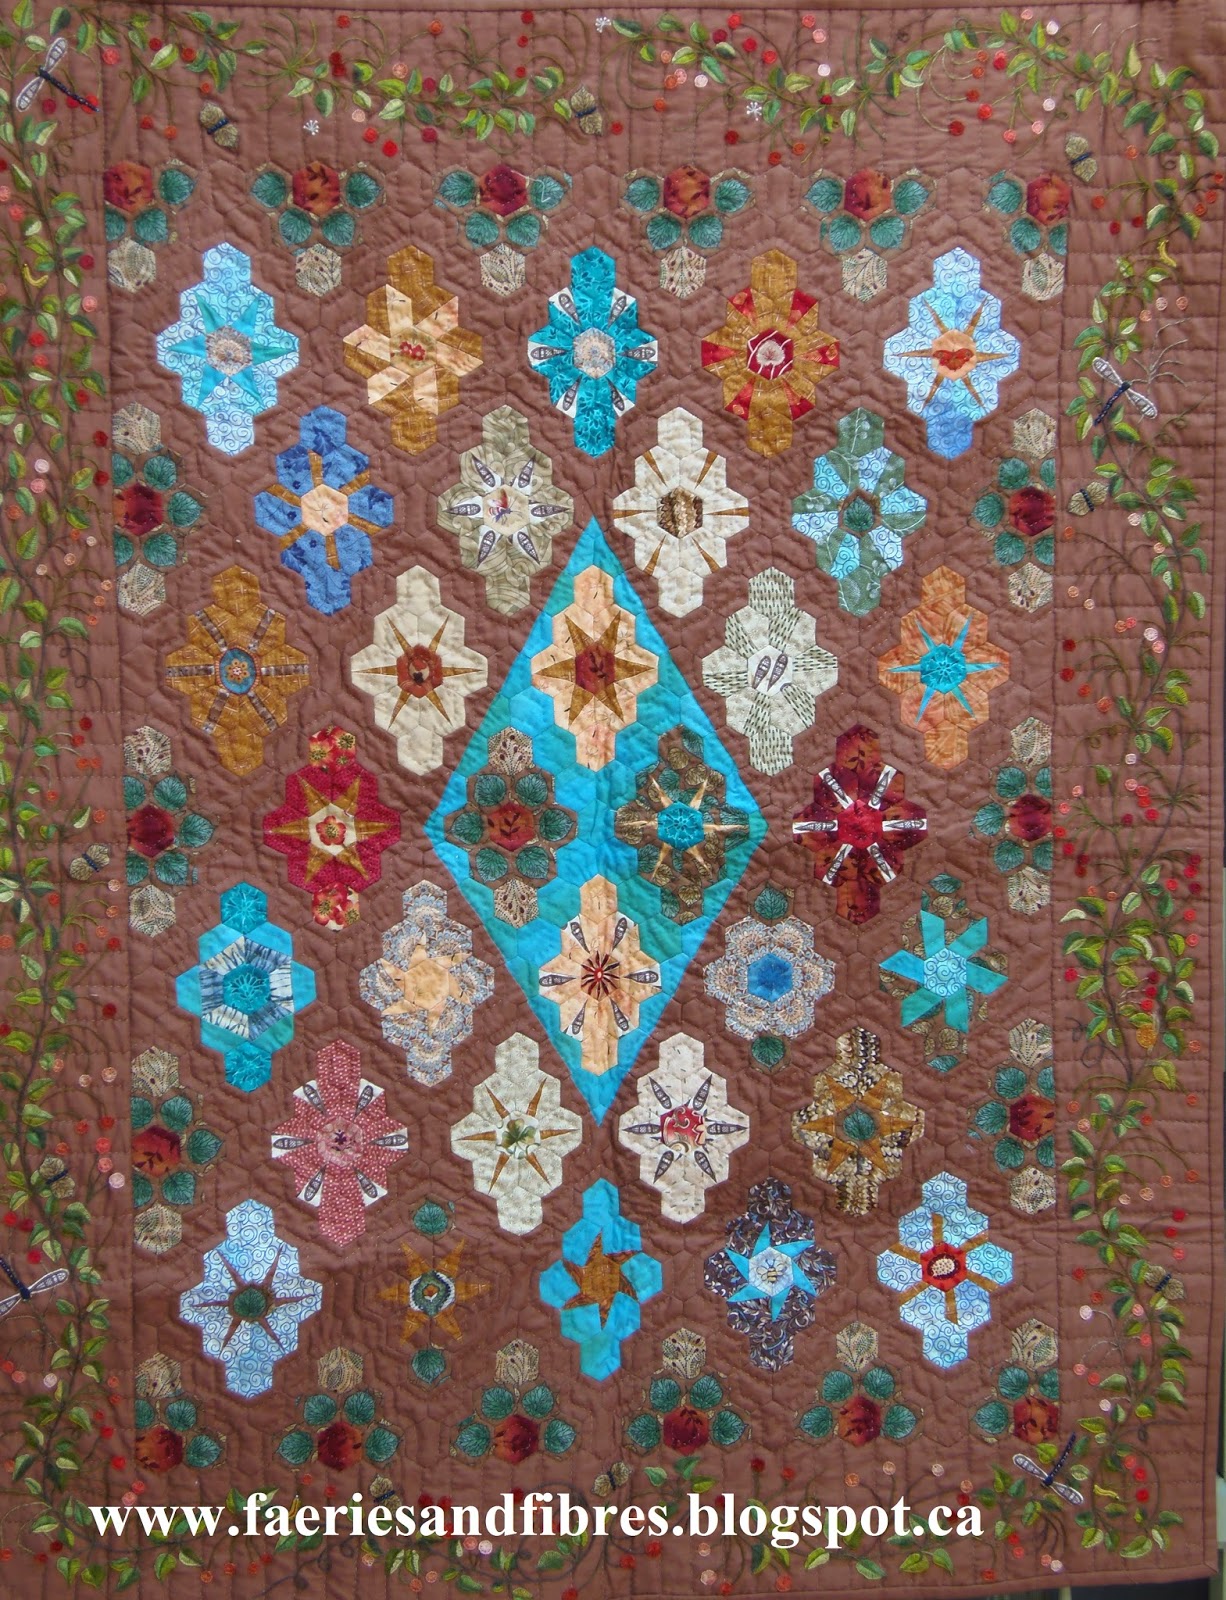
Welcome back to REWIND! Every now and then I "rewind" and republish one of my older posts that you may have missed! Today I'm going to share a post from February 2014 in which I write about making REALLY small hexagon stars! I made stars with 1" hexagons for the border of my Birds in the Loft hexagon quilt.

The quilt is turning out to be larger than I expected and I wrote that I probably could have got away with 3/4" hexagons. Eloidastiches asked if I could have made the stars with 3/4" hexagons and the answer is yes! I've made stars of all different sizes, the smallest being about 1/2". In fact I did a little tutorial on making small stars. I used one in the middle of my hexagon heart which had a large open space just begging for something to be tucked inside! Making small stars is the subject of this edition of REWIND!

There are also lots of small stars (and other motifs) in my quilt There's a Snail in Grandma's Flower Garden.
There's a Snail in Grandma's Flower Garden by Karen H 2004
So without further ado here is the tutorial. I hope you enjoy it and if there are any questions please do not hesitate to ask!
* * * * *
Tutorial: Twinkle, twinkle little star!
I thought today I would demonstrate how I made a little star using my technique for foundation pieced English paper pieced hexagons. I worked with 1/2" hexagons! You can find a master template for the hexagons here.
The first step is to draft the star points. I make marks at the top and bottom edge of a pair of hexagons. These marks will be the width of the base of the star point. You can make the base of the star points as wide or narrow as you want however I would not make it as wide as the hexagon itself because there is just too much seam allowance for a little piece. It is much easier to baste with a narrower base.
The first step is to draft the star points. I make marks at the top and bottom edge of a pair of hexagons. These marks will be the width of the base of the star point. You can make the base of the star points as wide or narrow as you want however I would not make it as wide as the hexagon itself because there is just too much seam allowance for a little piece. It is much easier to baste with a narrower base.

I connect the marks on the diagonal.

I repeat on the other diagonal.

I make two more pairs and then cut them out.

If you are new here my foundation piecing method is explained in my January 19, 2014 post. It is really important to shorten your stitch length! The basting is explained in my January 20, 2014 post.
Here you see a foundation pieced star point on the hexagon. When trimming the excess be sure to leave at least 1/4" seam allowance but 3/8" is even better. I just trim with my scissors. If the seam allowance is too large when I come to baste it I can trim a little bit.
Here you see a foundation pieced star point on the hexagon. When trimming the excess be sure to leave at least 1/4" seam allowance but 3/8" is even better. I just trim with my scissors. If the seam allowance is too large when I come to baste it I can trim a little bit.
NOTE: This was not in the original post but I suggest that you use the blunt end of a darning needle or a toothpick to break the bond between the paper and the fabric before you baste the hexagon. This will make the removal of the paper much easier! You can see how I did it with a larger star point here.
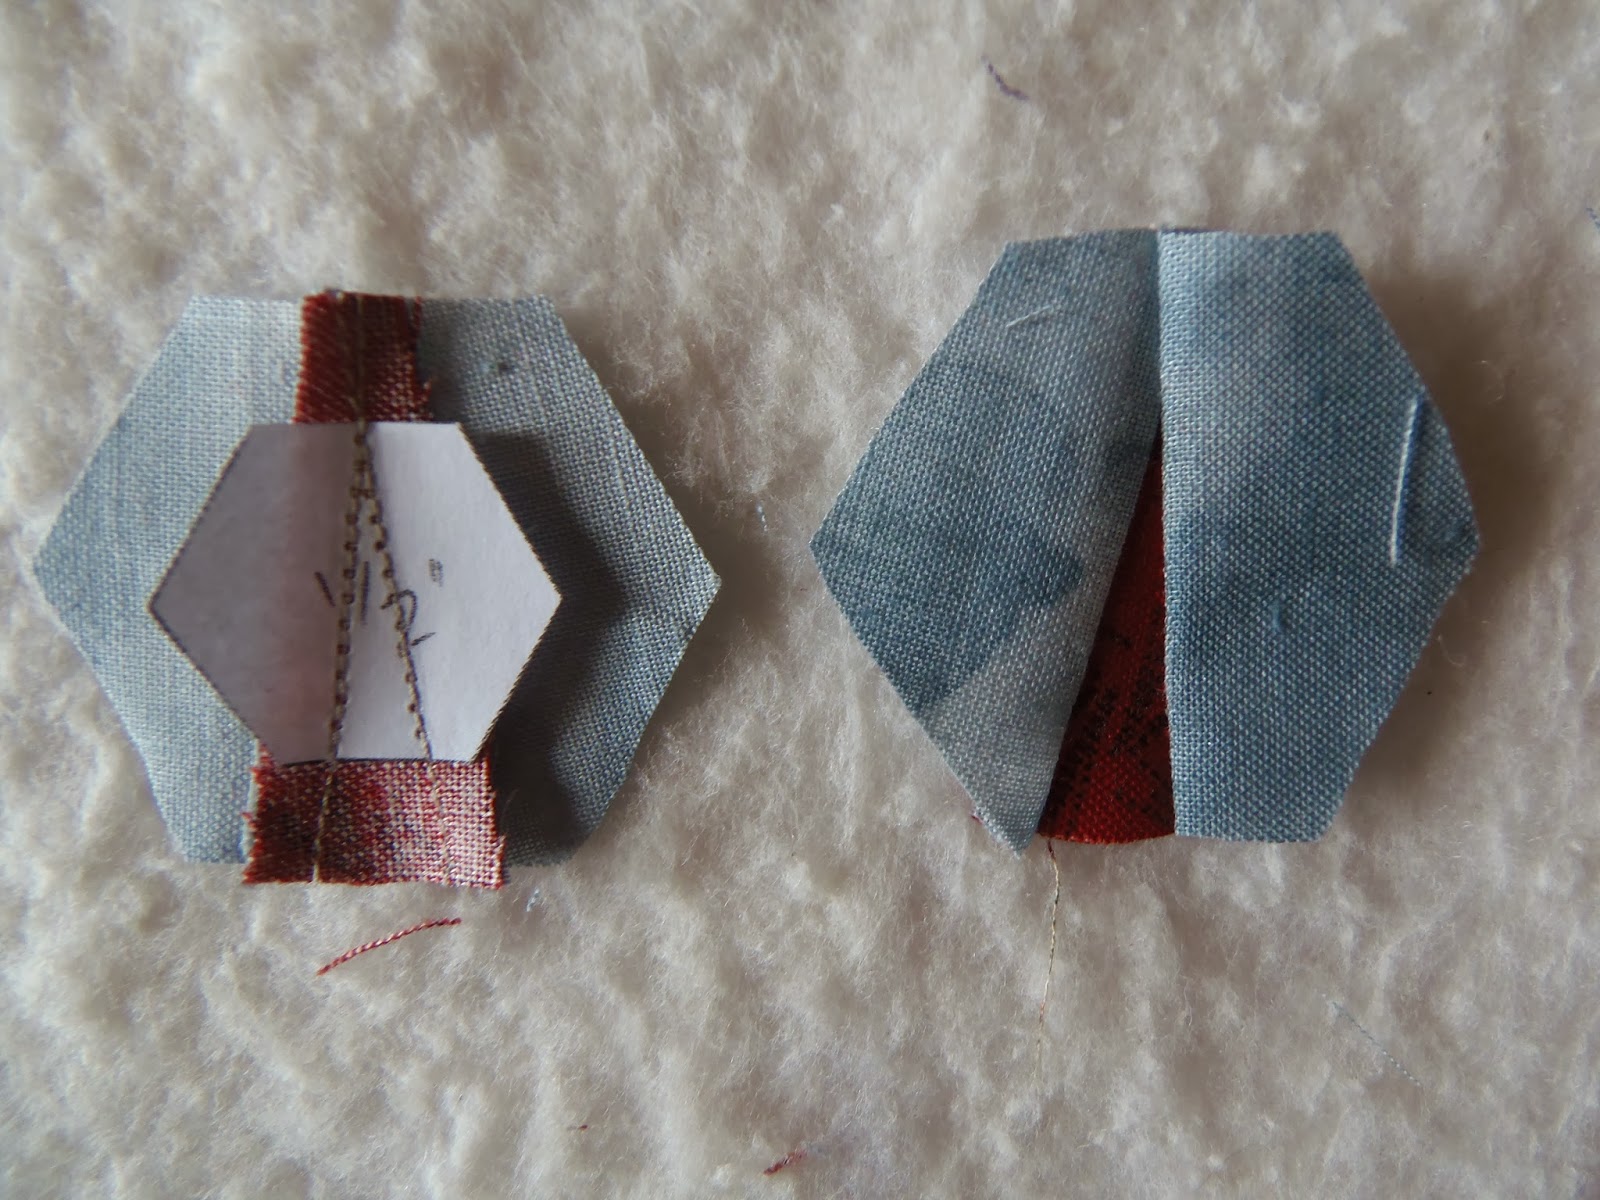
Here you can see a basted hexagon from the front and the back. The paper is still in place. Notice how the fabric is folded and basted at the base of the star point. Normally the folds would all be in the same direction but in this instance the fold in the lower right corner has changed direction. It makes for a sharp corner.

The basted hexagons are arranged and ready to be stitched together.

Once basted they can be stitched together and a center is added. I'll do a little video in the near future to show you how I set in the center hexagon.
The little star is complete and it measures a dainty 2 1/2" square.
The little star is complete and it measures a dainty 2 1/2" square.

I used one of these stars to make my miniature quilt Bony Fingers.

Bony Fingers by Karen H 2009
I plan to use the star I made in this tutorial as an embellishment on another quilt so it will be appliqued in place. I gave the star a good press with a hot iron and spray starch. I pressed the front and the back. The basting threads were removed and then the paper was removed. To remove the papers I gently opened the seam allowances that were basted under.

I remove the papers from the sides of the star point. My stitch length was shorted so the paper comes out effortlessly.

The last step is to remove the paper that was the star point from the center. I neatly folded the seam allowances back into place.

And here you see the finished star ready to be appliqued to my quilt!

While this small star looks difficult it is actually quite easy. Just take your time and have fun! If it doesn't turn out it doesn't take much fabric so it isn't a huge loss! If you do make a little star I would love to hear how you made out!
* * * * *
That's it for REWIND today! I hope you enjoyed seeing how I made my little stars. All you need to do is make one and use it as an embellishment. It won't take long and your friends will be amazed by your work!
Until I post again, happy sewing!
Karen H
Until I post again, happy sewing!
Karen H
Great post, Karen - I'm going to try one for my Hexie Garden.
ReplyDeleteyour work is so amazing and beautiful-hugs
ReplyDeleteI love these little stars, of all your different hexie combinations, this star is my favourite.
ReplyDelete