I've started to quilt the hexagon diamond block that is in the middle of the quilt. This is the block before it was stitched into my quilt Good Golly Miss Mollie which is my version of the Godstone Grannies coverlet. Each hexagon is 3/4" and I'm doing the quilting on my domestic sewing machine, a Juki TL2010Q.
I've quilted the pale yellow round with feathers and I'll show that to you but first I want to talk about the dark rust outer round of hexagons. I used my darning foot and free motion quilted straight lines. I didn't need to use the walking foot because the distance to quilt on each hexagon was short. The trick was to find spots to stop so that I could reposition my hands and that point was the inner point where two hexagons join.
I left this for several days before deciding what next. Because this is the centre of the quilt I want the quilting to be interesting. I finally decided on a simple feather motif. I started at the lower left and worked my way to the top. I them moved to the lower right and worked my way to the top. You can also see some quilting in the pale yellow hexagons. Notice that I again used the fiddlehead motif at the top.
Here you can see the difference this bit of quilting made to the rust round of hexagons. The left side is filled in with the feathers and the right side is not.
I quilted some feather motifs in the pale yellow. I haven't decided how I will quilt the taupe hexagons or the four in the centre. For now I'll just move on and quilt another area. Eventually the quilting solution will come to me!
Here is the block with the feathers quilted all the way around on the rust hexagons.
I hope I've given you some ideas for quilting hexagons! Until I post again, happy sewing!
Karen H
Showing posts with label machine quilting. Show all posts
Saturday, August 30, 2014
Tuesday, August 26, 2014
Quilting melon wedges in my Good Golly Miss Mollie hexagon quilt
Time to answer reader questions! Thanks to everyone who takes the time to leave a comment and ask questions; I'm always happy to share what I do and how I do it! Skootchover wrote "Can you illustrate your quilting in the path in a future post? I see the pattern that was created but don't really understand what you did in each hexagon". Angie asked if there is backtracking (sewing on previously quilted lines). There is no backtracking involved!
I am quilting Good Golly Miss Mollie (my version of the Godstone Grannies coverlet) on my domestic sewing machine. The first thing I normally do when I begin to quilt is ditch quilt but that might not be the best approach for a hand stitched hexagon quilt. I decided to stitch melon wedges (little crescents) in the path because I can work continuously from the top of the quilt to the bottom with no stops. When all these little melon wedges are stitched the result is a little star in each path hexagon. You can see the melon wedge stars on the path. The best part of all is that it serves the same function as ditch quilting which is that it stabilizes the quilt so nothing will shift. Once I've ditch quilted I can go back and quilt inside the blocks which are diamonds shapes made up of hexagons.
To quilt the melon wedges on Good Golly Miss Mollie I used a polyester 50wt thread on top in a colour that matches the path fabric. This helps the quilting disappear and all that is left is the texture and image of the little star. In the bobbin I used Superior's The Bottom Line in a neutral colour. My needle is a Superior Titanium Topstich 90/14. The machine that I'm using is a Juki TL2010Q mechanical (not computerized) sewing machine. I begin at the top of the path and quilt a little melon wedge or crescent in the first hexagon. You can see my start point in the red circle. Once I've quilted the wedge I quilt the next one to the right.
The next wedge is stitched in the same hexagon where it touches the next path hexagon.
I move to the next hexagon and quilt a wedge on the other side of the wedge I just quilted and this creates sort of an elliptical shape. Then I'm on to the top side of the same hexagon. I continue quilting in this way until I reach the point where I need to change direction. I stopped at the red circle because I want to continue quilting in a downward direction. The path will be quilted in a zigzag direction.
I continue quilting the melon wedges until I get to the bottom of the path.
I continue all the way to the bottom of the quilt
and then I come back up and quilt melon wedges on the other side of the hexagons.
I am quilting Good Golly Miss Mollie (my version of the Godstone Grannies coverlet) on my domestic sewing machine. The first thing I normally do when I begin to quilt is ditch quilt but that might not be the best approach for a hand stitched hexagon quilt. I decided to stitch melon wedges (little crescents) in the path because I can work continuously from the top of the quilt to the bottom with no stops. When all these little melon wedges are stitched the result is a little star in each path hexagon. You can see the melon wedge stars on the path. The best part of all is that it serves the same function as ditch quilting which is that it stabilizes the quilt so nothing will shift. Once I've ditch quilted I can go back and quilt inside the blocks which are diamonds shapes made up of hexagons.
To quilt the melon wedges on Good Golly Miss Mollie I used a polyester 50wt thread on top in a colour that matches the path fabric. This helps the quilting disappear and all that is left is the texture and image of the little star. In the bobbin I used Superior's The Bottom Line in a neutral colour. My needle is a Superior Titanium Topstich 90/14. The machine that I'm using is a Juki TL2010Q mechanical (not computerized) sewing machine. I begin at the top of the path and quilt a little melon wedge or crescent in the first hexagon. You can see my start point in the red circle. Once I've quilted the wedge I quilt the next one to the right.
The next wedge is stitched in the same hexagon where it touches the next path hexagon.
I move to the next hexagon and quilt a wedge on the other side of the wedge I just quilted and this creates sort of an elliptical shape. Then I'm on to the top side of the same hexagon. I continue quilting in this way until I reach the point where I need to change direction. I stopped at the red circle because I want to continue quilting in a downward direction. The path will be quilted in a zigzag direction.
I continue quilting the melon wedges until I get to the bottom of the path.
Now I want to quilt up the other side of the path that I just quilted.
I continue until I get all the way back to my starting point.
I go back to the top of my quilt and begin to quilt melon wedges (marked in green) in the next part of the path.
I continue all the way to the bottom of the quilt
and then I come back up and quilt melon wedges on the other side of the hexagons.
So there you have it - melon wedges. These little shapes are a great way to stabilize a hexagon quilt path and it is a shape that is easy to manage on a domestic sewing machine. The hexagons in Good Golly Miss Mollie are 3/4" so the wedge is relatively small and easy to quilt. The wedges don't have to be perfect or identical. Similar is good enough because when the quilting is done what you will see is the overall texture. This melon wedge shape also works well in other blocks. When I made my Baskets and Nine Patches quilt I stitched them in the little 3" nine patches. I like a flat quilt and the melon wedges produce that look and feel.
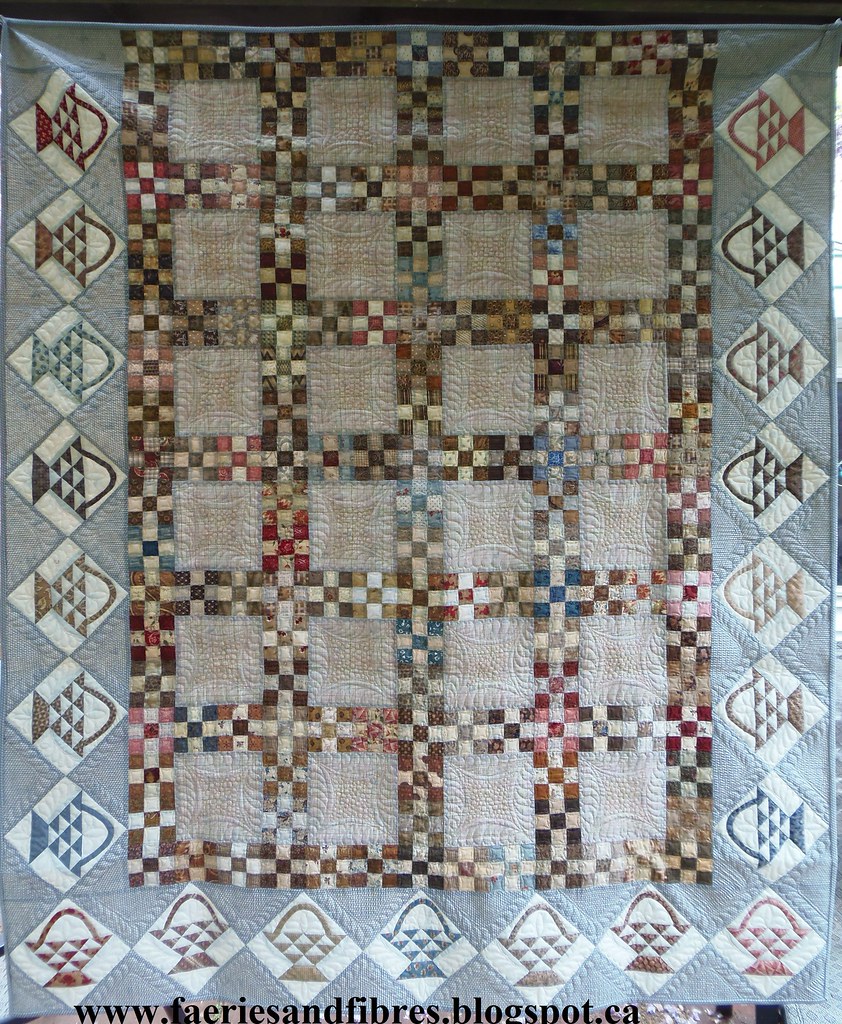
This is the finished quilt Baskets and Nine Patches. You will find a free pattern for this quilt under the tab Patterns by Karen H.
Until I post again, happy quilting on your domestic sewing machine!
Karen H
Wednesday, July 9, 2014
Binding a quilt before the quilting is finished - why?
RoseMary left a comment in which she said she had never heard of binding a quilt before the quilting is finished. She wanted to know how and why this is done so I thought I would answer her question in today's post. I first wrote about how I quilt my quilts on April 23, 2013. I called it machine quilting on a domestic machine my way!
I’m a great believer in doing what works for you. When it comes to machine quilting what I usually do is a little different from how others do it but it works really well for me. Once my quilt top is ready to be quilted I have two goals. First, I want to get rid of the excess batting and backing as soon as possible because they just get in my way AND second when I am finished quilting I want to be done! So here's what I do!
Step 1: You need a well prepared quilt sandwich (quilt top, batting and backing). I pin baste my quilt sandwich making sure everything is smooth and flat. I like to lightly spray starch and press both the top and the back before pin basting. To baste my quilt I clamp the quilt back to a table making sure it is flat, taut and smooth. In the picture below you can see I use office clips to clamp it to the table. You can read more about clamping and sandwiching the quit here. I pin baste making sure my pins are spaced roughly every 4". I also try to ensure that the pins are not on the major seam lines because I will stitch in the ditch and if the pins are on those seams they will be in my way and slow down the quilting.
Step 4: I now go back and quilt the rest of the quilt. Most of the pin basting is still in place because I don’t remove the pins until I am ready to quilt in that area so between the stitch in the ditch and the pins everything is stabilized. In the following picture you can see the ditch quilting (horizontal and vertical) on the back of the quilt.
My current quilt 81 has a large center panel with stars and hexagon flowers appliqued. There are no seams lines so instead what I did was quilt around each of the appliques starting in the center and working out to the edges of the first border. The quilt sandwich is layered so that it is flat and smooth and it was well pinned. There was no shifting and I'll be able to go back and quilt the background later.
Until I post again, happy sewing!
I’m a great believer in doing what works for you. When it comes to machine quilting what I usually do is a little different from how others do it but it works really well for me. Once my quilt top is ready to be quilted I have two goals. First, I want to get rid of the excess batting and backing as soon as possible because they just get in my way AND second when I am finished quilting I want to be done! So here's what I do!
Step 1: You need a well prepared quilt sandwich (quilt top, batting and backing). I pin baste my quilt sandwich making sure everything is smooth and flat. I like to lightly spray starch and press both the top and the back before pin basting. To baste my quilt I clamp the quilt back to a table making sure it is flat, taut and smooth. In the picture below you can see I use office clips to clamp it to the table. You can read more about clamping and sandwiching the quit here. I pin baste making sure my pins are spaced roughly every 4". I also try to ensure that the pins are not on the major seam lines because I will stitch in the ditch and if the pins are on those seams they will be in my way and slow down the quilting.
Step 2: Once this is done I like to use a technique described in Harriet Hargrave’s book “Heirloom Machine Quilting”. I stitch in the ditch on all the major seams.
While Harriet uses her walking foot I prefer to use my darning foot (free motion quilting foot) and I anchor all the major seam lines vertical and horizontal excluding the border.If there is sashing I stitch both sides of the sashing, vertically and horizontally. If the blocks are pieced without sashing then I just stitch the seams. I generally use Bottom Line thread in a colour that blends well with the colours in the quilt top or I use invisible thread. I don't use a walking foot because it doesn't give me freedom of motion.
When I make a quilt if something isn't perfect AND I can't live with it I fix it. If something isn't perfect and I CAN live with it I leave it. This means there are sometimes little wobbles in the quilt top. If I use a darning foot to stitch in the ditch I can work around them because I am free to move in any direction. This picture is a little wobble and I'll be able to stitch in the ditch around the wobble rather than through the wobble.
Once I've quilted the seam lines, if there are borders I ditch quilt the border seams. My last step is to quilt the borders.
Step 3: Once the border is quilted I can bind the quilt. I've never seen anyone else do it this way but once everything is anchored with stitch in the ditch the quilt is stabilized I can quilt the border and bind the quilt. Importantly I never bind the quilt before the border is quilted.
Step 4: I now go back and quilt the rest of the quilt. Most of the pin basting is still in place because I don’t remove the pins until I am ready to quilt in that area so between the stitch in the ditch and the pins everything is stabilized. In the following picture you can see the ditch quilting (horizontal and vertical) on the back of the quilt.
My current quilt 81 has a large center panel with stars and hexagon flowers appliqued. There are no seams lines so instead what I did was quilt around each of the appliques starting in the center and working out to the edges of the first border. The quilt sandwich is layered so that it is flat and smooth and it was well pinned. There was no shifting and I'll be able to go back and quilt the background later.
I quilted around the inner edge of the striped border and then the outer edge. From there I again quilted around the stars and the hexagon flowers and the applique baskets in the four corners.
The diamonds in the outer border were quilted and now I am quilting the outside edges of the quilt so that the quilt can be bound. I'm almost ready to bind this quilt!
This method works well for me because I get to quilt the border earlier which means I can remove the excess batting and backing. This makes the quilt a little smaller and lighter which means it is easier to move under the sewing machine. Also I don’t get the extra batting or backing caught in the quilting! I hate when that happens and I have to remove the quilting in order to free the excess fabric! So there you have it - machine quilting my way on a domestic sewing machine!
Until I post again, happy sewing!
Karen H
Monday, October 28, 2013
More thread art
I am a huge fan of challenges because they force one to work with "challenging" fabrics. My Guild held a fabric challenge in 2009. The kit included three fat quarters from Northcott, a black ground with huge blue and mauve hydrangeas, a blue/mauve Stonehenge print and a black and white patchwork. The rules permitted the addition of six fabrics. The theme for the challenge was "Earth's Blessings" and were asked to provide the inspiration for our piece and an artist's statement.
On my own I would never have purchased any of these fabrics because I didn't like the prints and they weren't in my preferred colours. In addition I had difficulty with the them "blessings". All of this made for a true challenge. The piece I entered is titled "Renewal" and it measures 19" x 17".
My artist's statement read "Forest fires are destructive events that damage huge swaths of land but the genetic material that makes up our planet is indomitable and after a fire the forest immediately begins to renew itself. My piece "Renewal" depicts the event of a forest fire, the ensuing enrichment of the soil and the regrowth of plant life. As an atheist I had difficulty with the religious connotation of the theme "Earth's Blessings" and opted instead to interpret blessings to mean a fortunate state of affairs. In my opinion the Earth's ability to renew itself is indeed a fortunate state of affairs".
Each of the six fabrics I added were selected for a specific reason.
I started off with a large piece of slate coloured Northcott Stonehenge fabric as the base (the fabric on the left). I chopped up the hydrangeas and the blue/mauve Stonehenge challenge fabrics and layered them on my base. I also added bits of the black and white patchwork challenge fabric. They formed the sky. To this I added little patches of teal silk (fourth from the left) and bits of two drapery sheers. One had a gold sheen to it (third from the left) and a second drapery sheer that had squares embroidered on it (second from the left).
The Northcott fabrics were cool colours and I needed warm colours for the fire. My last two additional fabrics were Elaine Quehl's hand-dyed fabrics, an orange/red/yellow cotton and a red/burgundy velveteen. They are the two swatches on the right in the picture of the swatches. I used them to make the fire. I added lots of red and orange threads, plus a little blue, to make the forest fire flames.
I didn't like the challenge fabrics and wanted to change or disguise them as much as possible. I accomplished this with non-traditional fabrics, lots of different threads and Sakura Pigma pens. While it is not my favourite quilt, I learned a great deal about machine quilting, experimenting with threads adding non-traditional fabrics to good effect.
Until I post again, happy experimenting!
On my own I would never have purchased any of these fabrics because I didn't like the prints and they weren't in my preferred colours. In addition I had difficulty with the them "blessings". All of this made for a true challenge. The piece I entered is titled "Renewal" and it measures 19" x 17".
Renewal, 2009 19" x 17"
My artist's statement read "Forest fires are destructive events that damage huge swaths of land but the genetic material that makes up our planet is indomitable and after a fire the forest immediately begins to renew itself. My piece "Renewal" depicts the event of a forest fire, the ensuing enrichment of the soil and the regrowth of plant life. As an atheist I had difficulty with the religious connotation of the theme "Earth's Blessings" and opted instead to interpret blessings to mean a fortunate state of affairs. In my opinion the Earth's ability to renew itself is indeed a fortunate state of affairs".
Each of the six fabrics I added were selected for a specific reason.
Swatches of six fabrics added to challenge fabrics
I started off with a large piece of slate coloured Northcott Stonehenge fabric as the base (the fabric on the left). I chopped up the hydrangeas and the blue/mauve Stonehenge challenge fabrics and layered them on my base. I also added bits of the black and white patchwork challenge fabric. They formed the sky. To this I added little patches of teal silk (fourth from the left) and bits of two drapery sheers. One had a gold sheen to it (third from the left) and a second drapery sheer that had squares embroidered on it (second from the left).
Close-up of sky
The Northcott fabrics were cool colours and I needed warm colours for the fire. My last two additional fabrics were Elaine Quehl's hand-dyed fabrics, an orange/red/yellow cotton and a red/burgundy velveteen. They are the two swatches on the right in the picture of the swatches. I used them to make the fire. I added lots of red and orange threads, plus a little blue, to make the forest fire flames.
I used a long strip of the black and white patchwork challenge print across the centre of the quilt to separate the earth from the sky. I layered bits of this fabric with the drapery sheers to create the earth. The drapery sheer with the embroidered squares is terrific for filing in with different threads to create depth.
For a little interest I quilted a fossil fish in the earth!
From the hydrangea fabric I cut out the green leaves and placed them so that they appeared to be growing from the earth. I fussy cut some of the black and white patchwork fabrics and used them as flowers in the new growth.
I used my Sakura pens to shade different parts of the piece including the flower below. I started out with a piece of the black and white patchwork. I layered a piece of drapery sheer over it and quilted. Once the quilting was completed I shaded the flower with a Sakura Pigma pen to give it the rosy colour.
Notice the quilted roots in the enriched soil.
I didn't like the challenge fabrics and wanted to change or disguise them as much as possible. I accomplished this with non-traditional fabrics, lots of different threads and Sakura Pigma pens. While it is not my favourite quilt, I learned a great deal about machine quilting, experimenting with threads adding non-traditional fabrics to good effect.
Until I post again, happy experimenting!
Sunday, October 27, 2013
Fun with thread and scraps
When I was a beginner machine quilter I was very nervous. A quilt is a big project to tackle when you have little or no skills, aren't familiar with how your machine sounds and feels when doing free motion and you don't know what kinds of effects you will get with different threads. And sorting out tension is just one more issue to contend with! Creating a small piece of thread art is a great way to overcome these obstacles. I guarantee that they will help you get comfortable with your machine!
About five years ago the members of my Guild were asked to make small pieces of quilt art that could fit in a shadow box. The plan was to auction these pieces and the funds would go to charity. The shadow boxes were from IKEA and they measured 10" square. Once could make a piece that was that size and it would fill the frame. However there is also a matt in the shadow box and the opening measured 5" square so that was a second option. Time was getting short and I hadn't made anything. I decided I would try doing a little piece of thread art that would fit inside the matt. I was nervous and hadn't much in the way of free motion quilting so my first stitches were a little uneven and the circles looked like deflating balloons! They looked very much like the white stitches in the picture below.
I gained a little confidence and turned the deflating balloons into leaves and flowers. Still not beautiful but they were very small so the imperfections were of no great concern. You can see some of the vines and flowers winding across the top of the picture shown below. I then tried little vines with offshoots and circles at the ends of the offshoots. You can see some of them on the right side.
A square spiral filled a large open space and the offshoots with circles made it even more interesting. I tried any kind of thread I could get my hands on....quilting cotton, variegated polyester, metallic, silk and invisible threads.
So what does the finished piece look like? It measures roughly 6" square. Here it is!
Here is another example of my experimentation with threads and scraps.
When framed these little pieces look complex. People look at them and are amazed at the detail! And all the time I was playing around trying to get comfortable with threads, tension, shapes, moving my fabric and getting to know the sound and feel of my machine when free motion quilting.
If you are wondering how I made these pieces it is really quite simple. I cut a piece of scrap batting. If you want to give it a go just know that in all likelihood you will have to trim down the finished piece so start with a piece of batting that is a little larger. I place the batting on top of a piece of backing fabric that is slightly larger that the backing. Finally I layering scraps of fabric on the batting until I am happy with the arrangement. There are two options available at this point: use a little glue to tack the scraps in place OR lay a piece of fine tulle netting over the entire surface. When I use tulle I like to pin the outside edge with straight pins until everything is stabilized. Here are three examples of pieces in progress.
I start off by quilting over the raw edges of the pieces of fabric and then just start filling in the spaces. When there are no more spaces, I'm done! This pieces measures 3" and it has lots of areas left where I can have fun experiment with threads!
When I sit down to quilt I like to warm up on these little thread art pieces. I've used all sorts of fabrics including drapery sheers, silks, cottons and polyester lining. If I use tulle I've even tossed leftover thread down before the tulle goes over the piece. Creates a very interesting effect!
So if you are nervous about getting started machine quilting why not give little thread art pieces a try. There's no right or wrong way to do it and you can experiment in all sorts of ways with all sorts of materials. If the piece doesn't work out, no great loss. But if it does turn out, put it in a frame and give it a wacky name like "Amoeba Quiche" and amaze everyone with your talent and originality!
Until I post again, happy thread painting!
About five years ago the members of my Guild were asked to make small pieces of quilt art that could fit in a shadow box. The plan was to auction these pieces and the funds would go to charity. The shadow boxes were from IKEA and they measured 10" square. Once could make a piece that was that size and it would fill the frame. However there is also a matt in the shadow box and the opening measured 5" square so that was a second option. Time was getting short and I hadn't made anything. I decided I would try doing a little piece of thread art that would fit inside the matt. I was nervous and hadn't much in the way of free motion quilting so my first stitches were a little uneven and the circles looked like deflating balloons! They looked very much like the white stitches in the picture below.
I gained a little confidence and turned the deflating balloons into leaves and flowers. Still not beautiful but they were very small so the imperfections were of no great concern. You can see some of the vines and flowers winding across the top of the picture shown below. I then tried little vines with offshoots and circles at the ends of the offshoots. You can see some of them on the right side.
A square spiral filled a large open space and the offshoots with circles made it even more interesting. I tried any kind of thread I could get my hands on....quilting cotton, variegated polyester, metallic, silk and invisible threads.
So what does the finished piece look like? It measures roughly 6" square. Here it is!
Here is another example of my experimentation with threads and scraps.
When framed these little pieces look complex. People look at them and are amazed at the detail! And all the time I was playing around trying to get comfortable with threads, tension, shapes, moving my fabric and getting to know the sound and feel of my machine when free motion quilting.
If you are wondering how I made these pieces it is really quite simple. I cut a piece of scrap batting. If you want to give it a go just know that in all likelihood you will have to trim down the finished piece so start with a piece of batting that is a little larger. I place the batting on top of a piece of backing fabric that is slightly larger that the backing. Finally I layering scraps of fabric on the batting until I am happy with the arrangement. There are two options available at this point: use a little glue to tack the scraps in place OR lay a piece of fine tulle netting over the entire surface. When I use tulle I like to pin the outside edge with straight pins until everything is stabilized. Here are three examples of pieces in progress.
I start off by quilting over the raw edges of the pieces of fabric and then just start filling in the spaces. When there are no more spaces, I'm done! This pieces measures 3" and it has lots of areas left where I can have fun experiment with threads!
When I sit down to quilt I like to warm up on these little thread art pieces. I've used all sorts of fabrics including drapery sheers, silks, cottons and polyester lining. If I use tulle I've even tossed leftover thread down before the tulle goes over the piece. Creates a very interesting effect!
So if you are nervous about getting started machine quilting why not give little thread art pieces a try. There's no right or wrong way to do it and you can experiment in all sorts of ways with all sorts of materials. If the piece doesn't work out, no great loss. But if it does turn out, put it in a frame and give it a wacky name like "Amoeba Quiche" and amaze everyone with your talent and originality!
Until I post again, happy thread painting!
Monday, October 14, 2013
A couple of things that have been on my mind
Today it is glorious outside. The sky is a rich azure blue, the temperature is mild and the trees are starting to change into their Autumn colours. And it is Canadian Thanksgiving!
There are a couple of things that have been on my mind lately. They are quilting (hand vs. machine) and pressing seam allowances.
Do you press your seam allowances open or closed. More and more I am thinking that open is the way to go and this is why. Pressing to one side results in very bulky seam intersections which are difficult to quilt through. When seam allowances are pressed open the intersections are less bulky. Lately I've begun pressing seam allowances open. I like to machine quilt and since I tend to quilt rather densely those seam allowances are well secured. With Lazy Punk I didn't press my seam allowances open and so the quilting is more challenging in those areas, especially around the cornerstones, and therefore it is less fun. This means I dread quilting those areas and so I put off the quilting which is why it isn't finished!
And speaking of quilting there appear to be different points of view and some hand quilters look down on machine quilters. I've quilted many quilts by hand and by machine but my poor hands find the hand quilting makes the joints hurt.
I want to protect my hands so I've shifted to machine quilting. Like hand quilting the basic method is straight forward and also like hand quilting it is a skill that takes a lot of practice to master. My machine quilting is not there yet but I'm working on it!
Hand quilting is beautiful and amazing but I can say the same of machine quilting. Just take a look at the quilts made by the likes of Harriet Hargrave and Diane Gaudynski. It is definitely heirloom quilting.
My lovely Grandma, pictured below, homesteaded in northern Alberta, Canada.
In addition to clothing, she made quilts and comforters. When she had a machine she sewed by machine and when she didn't have a machine, she used her hands. I once asked her about quilts and hand quilting and she told me this: when she sewed by hand because she had no other option but if she had a machine it would all have been done by machine. Her quilts and clothing were made to be used. Those that we consider heirlooms are heirlooms because she made them. The fact that some stitches are hand done and others machine done doesn't our appreciation of her quilts and comforters.
On this Canadian Thanksgiving Monday I am thankful that you read my blog and I my hope is that I inspire you to do your own thing in your own way. Don't worry about what anyone else thinks - just find the joy and happiness in every stitch you take whether it is by hand or by machine!
Until I post again, happy sewing!
There are a couple of things that have been on my mind lately. They are quilting (hand vs. machine) and pressing seam allowances.
Do you press your seam allowances open or closed. More and more I am thinking that open is the way to go and this is why. Pressing to one side results in very bulky seam intersections which are difficult to quilt through. When seam allowances are pressed open the intersections are less bulky. Lately I've begun pressing seam allowances open. I like to machine quilt and since I tend to quilt rather densely those seam allowances are well secured. With Lazy Punk I didn't press my seam allowances open and so the quilting is more challenging in those areas, especially around the cornerstones, and therefore it is less fun. This means I dread quilting those areas and so I put off the quilting which is why it isn't finished!
Quilting the cornerstones in Lazy Punk
And speaking of quilting there appear to be different points of view and some hand quilters look down on machine quilters. I've quilted many quilts by hand and by machine but my poor hands find the hand quilting makes the joints hurt.
Hand quilting from the back (I made this in the mid-1980s)
Hand quilting from the front
I want to protect my hands so I've shifted to machine quilting. Like hand quilting the basic method is straight forward and also like hand quilting it is a skill that takes a lot of practice to master. My machine quilting is not there yet but I'm working on it!
Lazy Punk quilting today
Hand quilting is beautiful and amazing but I can say the same of machine quilting. Just take a look at the quilts made by the likes of Harriet Hargrave and Diane Gaudynski. It is definitely heirloom quilting.
Diane Gaudynski's book - one of my two favourite books on machine quilting
Harriet Hargrave's book - my other favourite book on machine quilting
Close-up of Harriet's machine quilting
Close-up of Diane's machine quilting
My lovely Grandma, pictured below, homesteaded in northern Alberta, Canada.
In addition to clothing, she made quilts and comforters. When she had a machine she sewed by machine and when she didn't have a machine, she used her hands. I once asked her about quilts and hand quilting and she told me this: when she sewed by hand because she had no other option but if she had a machine it would all have been done by machine. Her quilts and clothing were made to be used. Those that we consider heirlooms are heirlooms because she made them. The fact that some stitches are hand done and others machine done doesn't our appreciation of her quilts and comforters.
What is most important to me is to find happiness, joy and satisfaction in whatever I do and that means a little hand quilting when I can but lots of machine quilting. And the other thing that is important to me is to share knowledge, ideas, methods and techniques with others and to inspire them to create. My blog is the vehicle I use to fulfill that objective and machine quilting allows me to make more quilts so that I can give them to the people who are important to me.
On this Canadian Thanksgiving Monday I am thankful that you read my blog and I my hope is that I inspire you to do your own thing in your own way. Don't worry about what anyone else thinks - just find the joy and happiness in every stitch you take whether it is by hand or by machine!
Until I post again, happy sewing!
Subscribe to:
Posts (Atom)
.jpg)
.jpg)
.jpg)
.jpg)
.jpg)