Saturday, February 22, 2014

Lovely mail and a trunk show

I recently participated in the Grow Your Blog Event hosted by Vicki at 2BagsFull. I found lots of interesting blogs and entered a few draws. I was very lucky and won two of them! Yesterday the first package arrived from Sheryl of Sewing After Seven. In it was the mermaid scissor pouch. But that wasn't all - Sheryl included the most beautiful scissor fob plus three skeins of floss.


The scissor pouch is perfect for embroidery scissors. It measures a very petite 2" by 4 1/2". Sheryl's work is exquisite. The pouch is embellished with unbelievable applique, embroidery and beading. The same is true for the scissor fob which is 1 1/2" square. I just have to share some pictures of these little treasures!

Front of mermaid scissor pouch
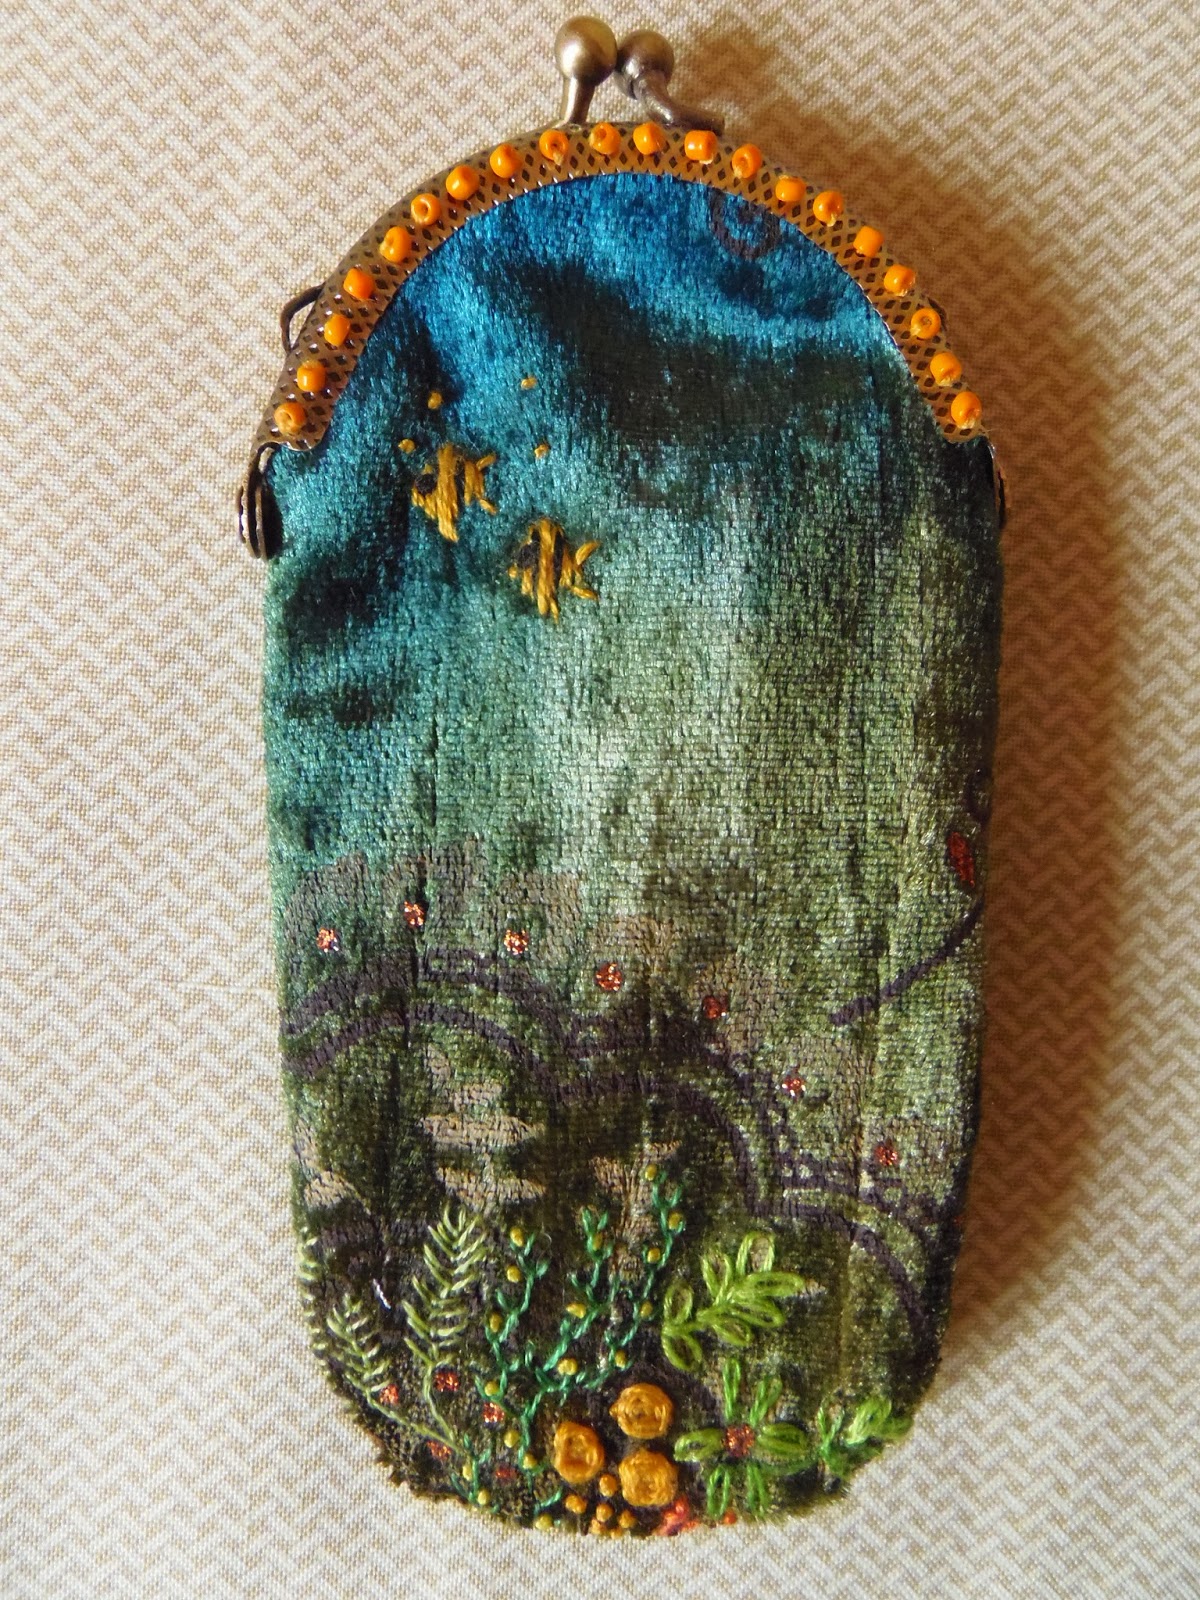
Back of mermaid scissor pouch

Scissor fob side A

Scissor fob side B

I was going to display these little works of art in my sewing room curio cabinet but Sheryl encouraged me to use them. She suggested putting a little plastic tube on the tip of my scissors to protect the pouch which is intended to be used!  I am very fortunate to have won and the pouch and fob will be treasured! If you would like to see some more of Sheryl's amazing pouches go here! They are amazing!

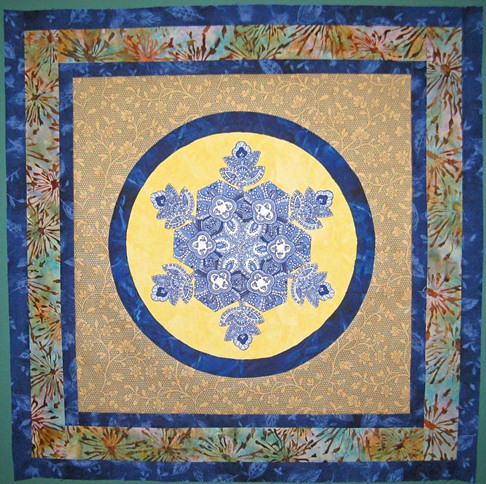
Angie in SoCal now has the border on her quilt! The batik fabric just glows! Isn't is amazing how something so simple can be so effective?

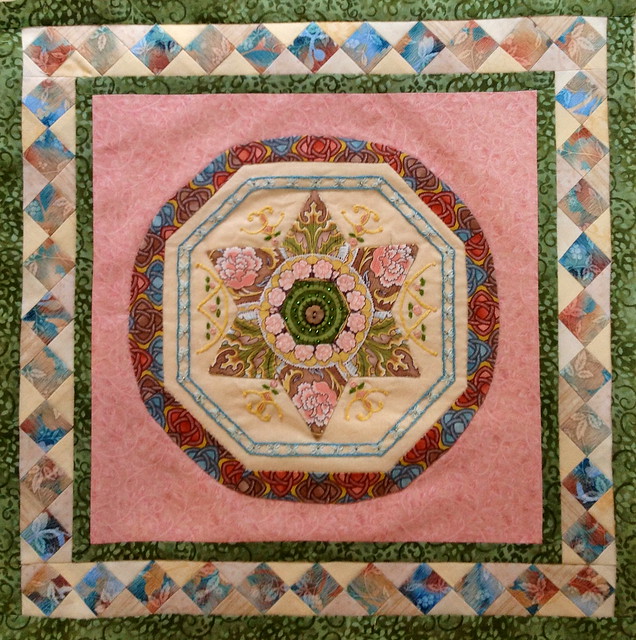
Skootchover embroidered an octagon around her centre modified hexagons and she echoed that shape in the ring. She used only two fabrics for the pieced border but they are used to very good effect!

Talb9999 used a directional print for her border. I am a huge fan of directional prints. You can add a lot of pizzazz to a quilt border or to a block with directional prints.
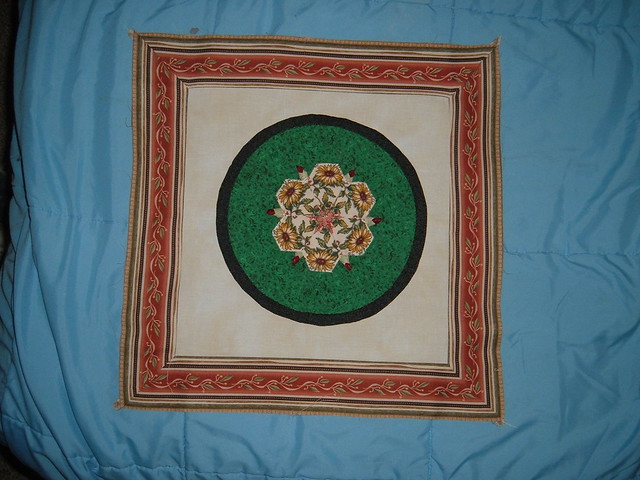

My heart is aflutter with Kat Lorien's butterfly quilt. The colours are so soft and spring-like. I think she plans to hang this in her sewing room when it is finished! We all owe a big thanks to Kat because she is the one who suggested that I do a QAL!
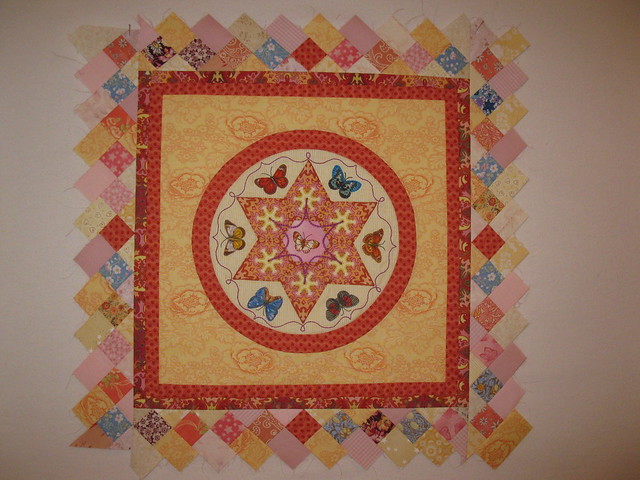

Deb Sew'n Sew's quilt is really coming along nicely. I love the teal - mauve combination. Again this is something I would never have thought of but it works wonderfully!
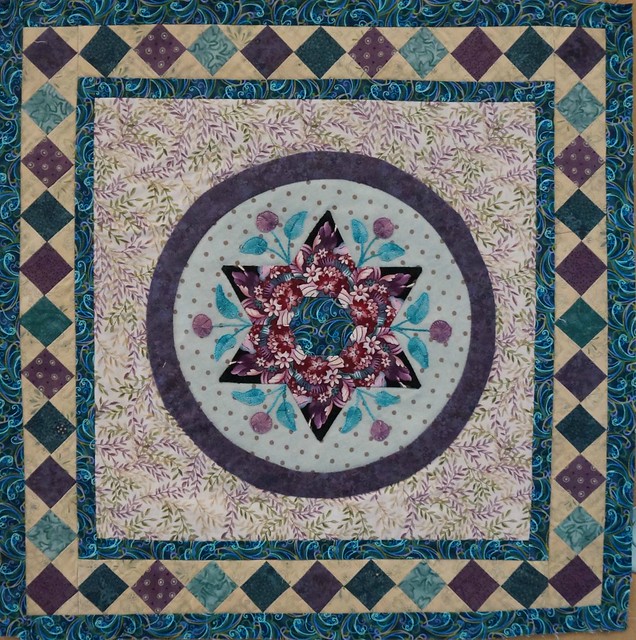

This one was posted by Kel at Always Applique. If you didn't love purple before I'll bet that you do now!


Mary Huey has created something special. I would never have thought of using a large scale print like this but I LOVE it! It reminds me of the curtains at a movie theatre! She posted a tutorial on her blog and she demonstrates making the pieced border with templates. You'll find it here.
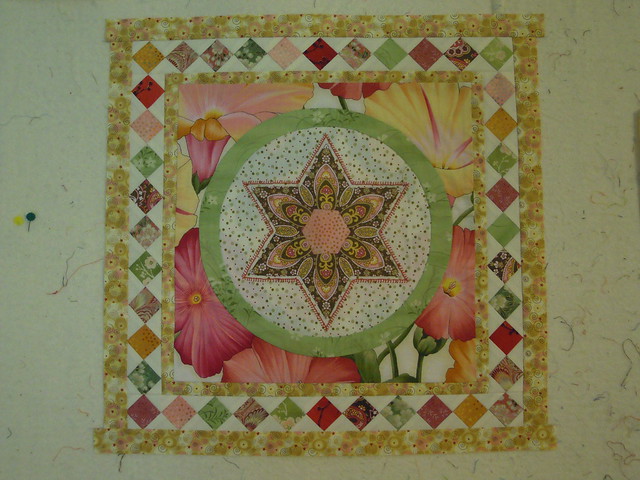

Clare Clovis has created something very special here. Instead of piecing the border she appliqued the squares. She wrote that she intentionally overlapped the squares into the border fabric to create a unique effect.
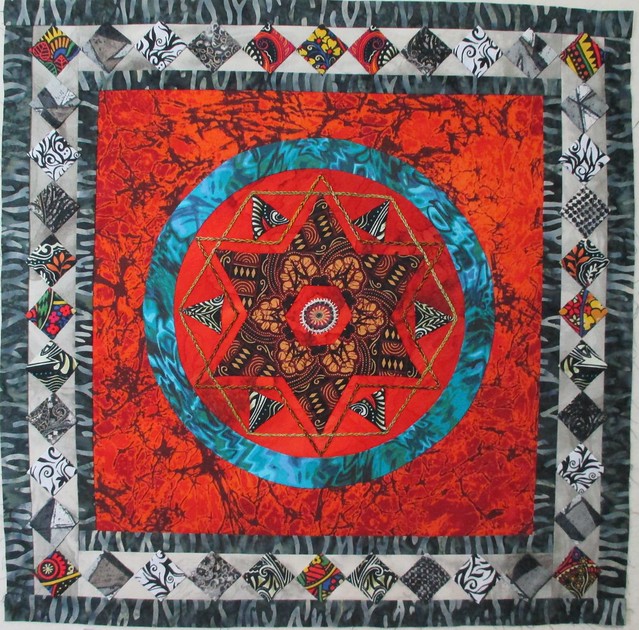

Susan (Stitchin' Witch) has created a very soft looking block. Blue and soft gold is a wonderful combination. I love all of the Civil War type prints that she has used.
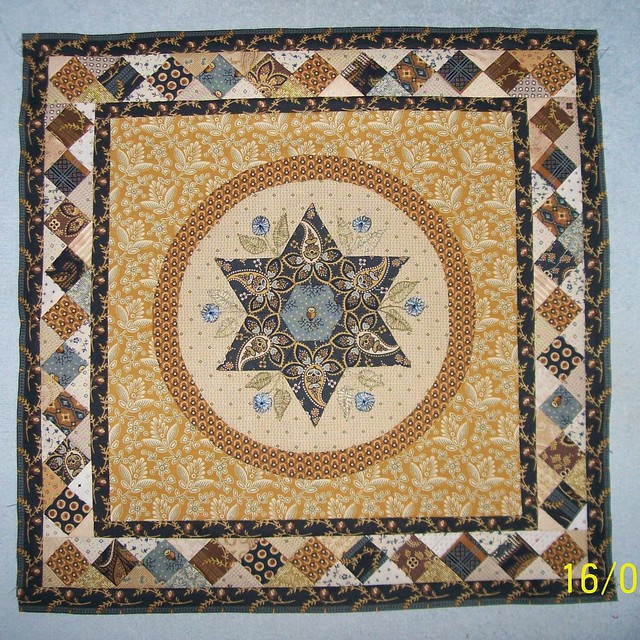

Heather the Happy Appliquer's sister-in-law is sewing along and this is her block. I love how it is evolving. I love these romantic prints. And doesn't her little bee just pop! Now where is Heather's quilt I wonder? UPDATE: Silly me! Heather was the first to post her quilt after I published Step 4! You can see her quilt here!
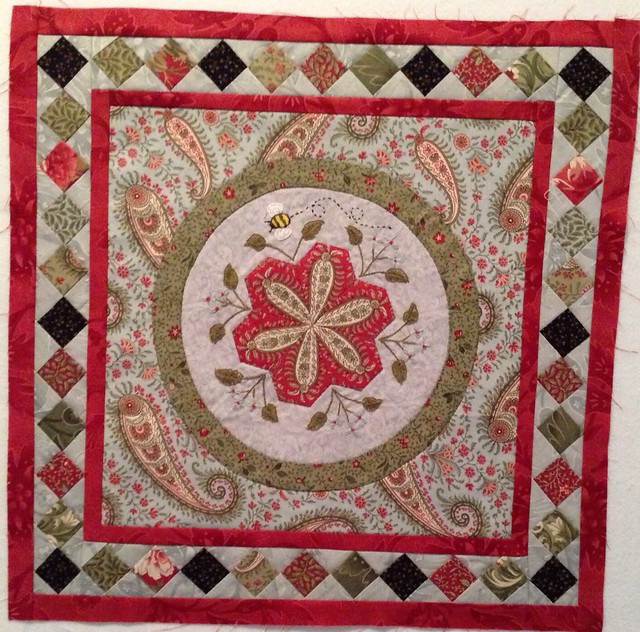

Nellie Durand's block is amazing! I love the subtleness of the pieced border against the dramatic striped border. Stripes add drama - good drama!
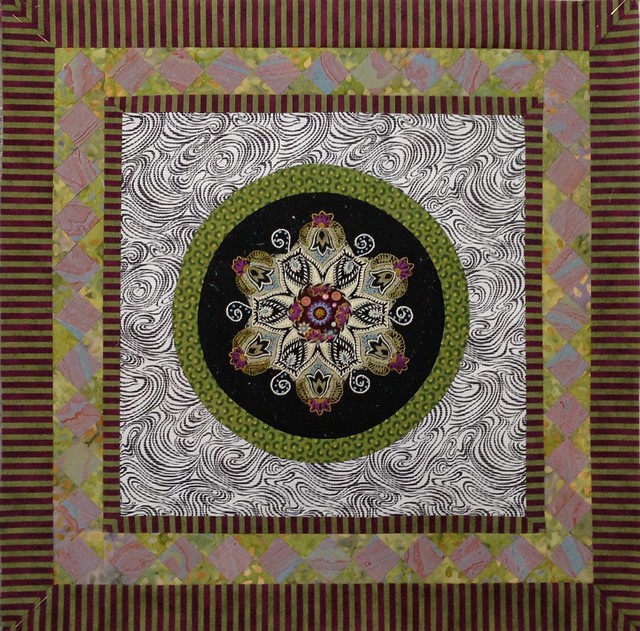

Nellie has a second quilt and she added a border of  "dancing squares". What a nice fresh quilt. I love the colour combination and the pieced border. If you would like to know how to add your own dancing squares border you are in luck because Nellie published a tutorial which you will find here. In fact she demonstrated the entire process including an alternate method of adding the ring.


GracieEr is taking her time making her quilts. Both have a bird theme and I love them. One will be a gift for her sister (lucky sister)! Can't wait to see them with the border.


Jean Cockburn has made several blocks and here are two of them at Step 3. Both blocks were beautiful before but with the addition of the rings and the background they are even better! I like the solid background - very effective and a great canvas for some nice quilting!
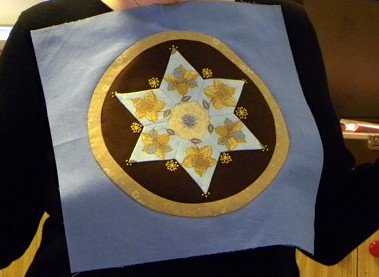
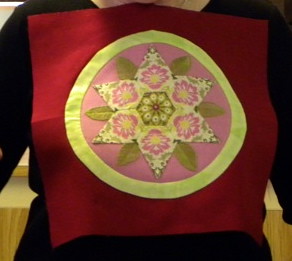

You can see all of these quilts and more at the Soupcon FLICKR Group! And it is less than a week until Step 5 of Soupcon will be published! Can't wait to see what you all do with it!

Also today is the last day for the Sew and Sow Farm Giveaway. It is a five day event and each day you can receive up to five chances to win. Today it is a veritable cornucopia of sewing treats! There are some fabulous prizes to be won so pop on over and be sure to enter. You could end up a lucky girl like me!

That's it for me for today! Until I post again happy sewing!

Karen H

Friday, February 21, 2014

Messing around with hexagons

I'm busy sewing together the blocks for my Mom's Lazy Punk quilt and hopefully it will be a quilt top today. Fingers crossed.

In the meanwhile I thought it is time for more hexagon fun using my foundation pieced English paper piecing (EPP) technique. I've posted on this topic many times but if you are new to my blog I most recently wrote about this method on January 19 and January 20, 2014.

So today I'll show you a fast fun star and then I'll mix things up a little!

This is the basic shape for the individual hexagons. I drafted six of them plus a blank for the center. I am working with 1" hexagons and you will find a master template that you can use under my tab English Paper Piecing and Hexagon Fun.


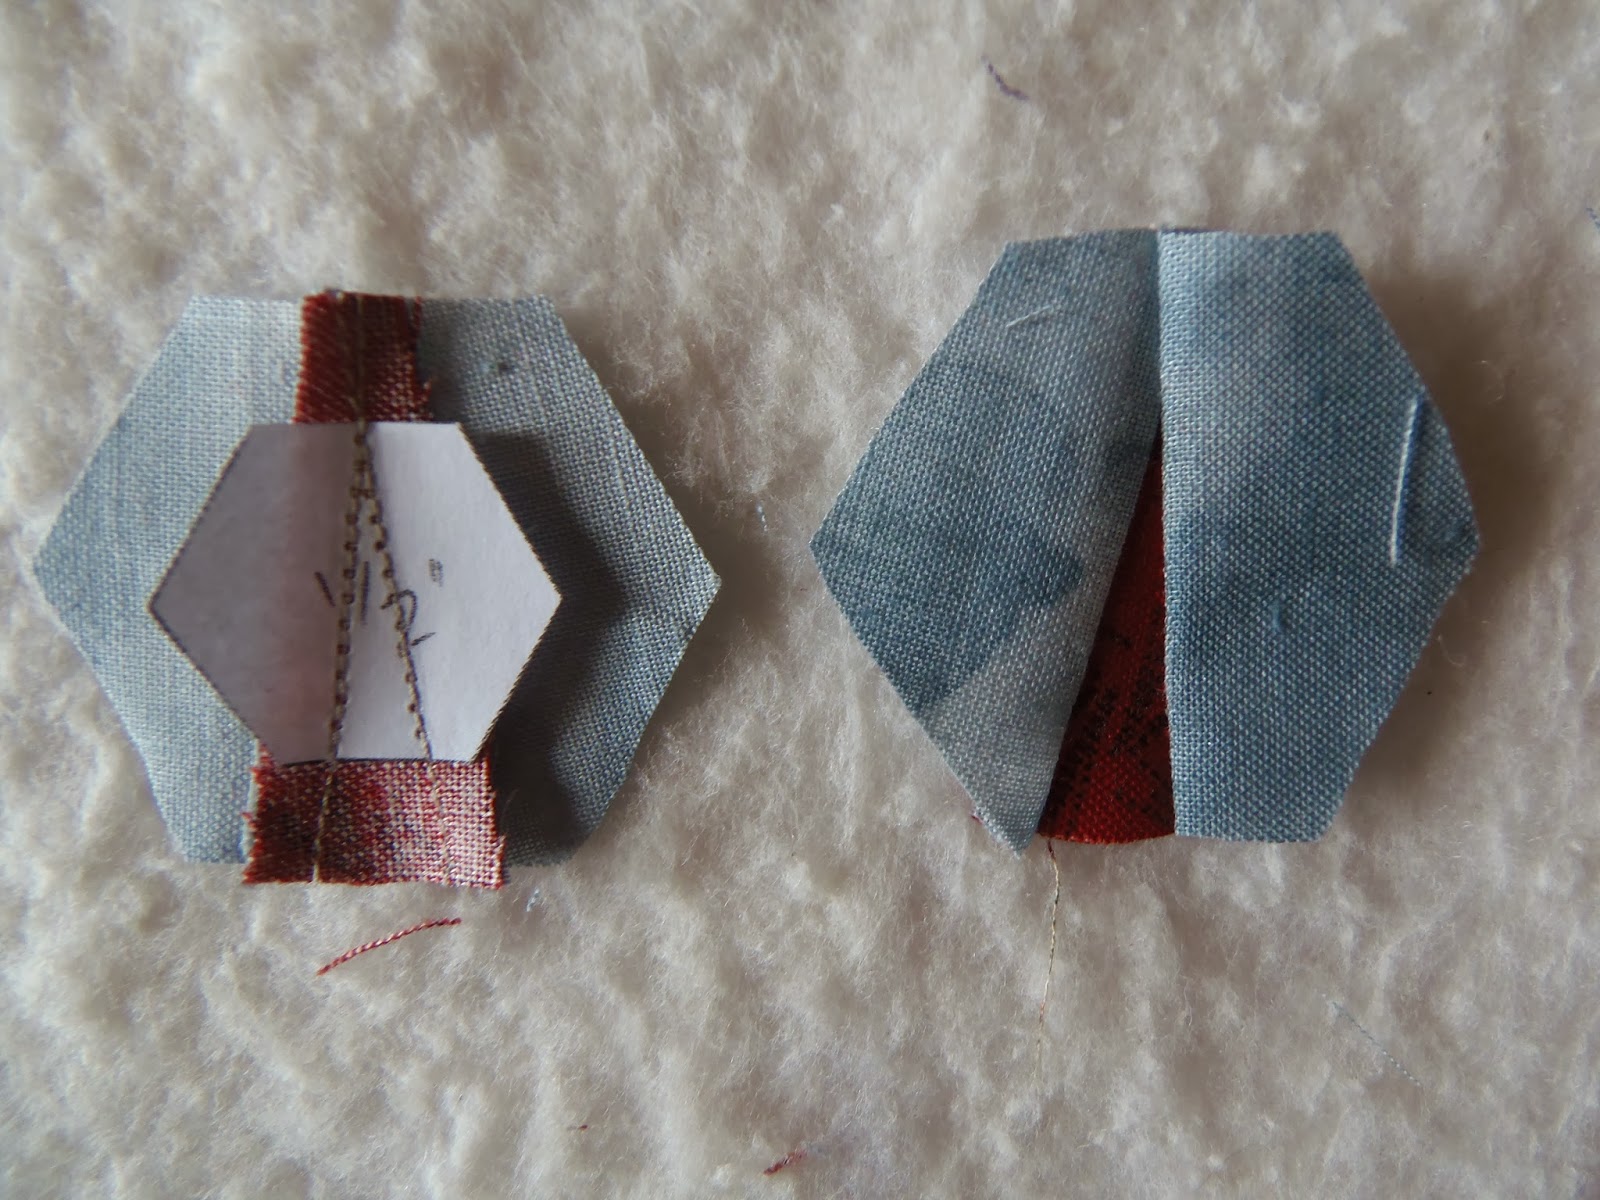
This is the foundation pieced hexagon ready to be basted. Notice that the seam allowances are trimmed so that they just clear the corners. I like to have a generous seam allowance of roughly 3/8". It makes basting much easier. I just use my scissors to trim the hexagon.

I like to take an extra stitch at the top because there is extra fabric from the seams and this extra stitch will keep everything nice and flat.


When I get to the base I make sure that the sides are folded in an d then the base of the star point is folded down. This keeps the bulky seam allowances away from the corner making the piecing of the basted hexagons very easy.

Six hexies are basted and the star points facing out.


They can also be turned so that the points are facing in. Play around with them and have fun!


All six hexagons need not be the same. What if you took these two hexagons and combined three of each to make a star?


You might come up with something likes these interesting arrangements!


I'm linking up with A Quilting Reader's Garden for hexie Friday where you'll be able to find some hexie inspiration! Check back regularly as others add links to their blogs and projects.

While you are out and about don't forget to visit Jan's Sew and Sow Farm. Today is day 4 of her giveaway and the prize today is honeycomb papers (elongated hexagons) and a honeycomb template. You can get up to five chances to win. Just go here to read more and enter!

Until I post again, happy sewing!

Wednesday, February 19, 2014

The design wall and free fabric

I just read that Keepsake Quilting has a contest. You could win fabric for life! Who doesn't need fabric for life. Well maybe need isn't the right word....but want? Definitely! You can enter once a day here. The contest is open to Canada and the US only and it closed at the end of February.

Jan from  Sew and Sow Farm has five giveaways for five days. Yesterday was day one and the prize is Aurifiil thread; you can enter here. Today is lovely Moda Mirabelle from The Fat Quarter Shop and you can enter here. There are three more days to go and I wonder what prizes will be on offer! There are lots of ways to enter so good luck!

So what's on my design wall? My Mom was really taken with the Lazy Punk quilt I made and she wanted to make one of her own. The blocks are made so I'll help her out by stitching them together and then quilt it.


She frequently asked "does this go with this" and I told her not to worry. It will all work out in the end so she relaxed and just had fun with her fabrics. When she looked at the individual blocks some of them seemed really wild but when they are put together they calm down. A neutral sashing and cornerstones will also help. She has selected a small neutral print for the side setting triangles to finish the quilt. Hopefully I can get the top together in the next couple of days!

This quilt is entirely appliqued and there's no needle turn involved. I loved this block but didn't want to piece all of those curves so I thought about how I could make it quickly and easily.  In September 2013 I drafted my pattern, cut my fabric and glued under the seam allowances and made the blocks which finish at 9". If you are interested here are the links to the different steps:

This is the Lazy Punk quilt that I made. The blocks were set on point.


My friend Babs was so inspired that she made one of her own. Rather than set her blocks on point she used a straight set. In addition she top stitched the propeller blades down so it was super fast, fabulous and fun!


That's it for today. Until I post again, happy sewing!


Karen H

Tuesday, February 18, 2014

Hexagon Heart


Are you sewing along with me in the Soupcon QAL? If you are more comfortable making a pieced with templates, Mary of Through Rose-colored Trifocals just posted an excellent tutorial! Mary provides detailed instructions and photographs for making the pieced border. You'll also get to see her Soupcon quilt with the pieced border. If you've already made your border and the finished the measurement is not spot on don't worry! I've built in wiggle room so that adjustments can be made without affecting the design of the quilt!


I've been sewing along with Julia Wood's Hexie Block of the Month (BOM) over at The Hexie Blog. The design for January was a snowflake and February is a heart! This was my January block. The little circles of blue in the centre of the background spaces was my own addition. A little bit of embellishment can take a block from pretty to beautiful in only a few stitches.


I liked the open airy feel of the snowflake block. I also liked the blue and white combination so I've decided that the entire quilt will be blue and white.

The February pattern is a heart that is solid hexagons in shades of pink and red. I decided to leave the center of my heart open so that the background fabric would show and it would maintain the open and airy feel of the previous block. The fabric I selected for my hear is blue with a little red it it as a reference to Valentine's Day. To make the block sparkle I used my little start that I demonstrated yesterday. It measures 2 1/2" across.


And here is the finished February block! The hexagons are 1" and the block measures 15" finished. You will find the February pattern here.


My guess is that the theme next month might have something to do with St. Patrick's Day so I'll be looking through my stash of blues for fabrics with some bits of green! The blocks are fast and fun to make so if you are tempted head on over to Julia's blog. You can find the first block, January, here.

I'm linking up with Sarah over at Sarah Did It for her monthly Help with Hexie-Aholics! There's always something interesting to find there so do drop by for a visit!

Until I post again, happy sewing!

Karen H

Sunday, February 16, 2014

Tutorial: Twinkle, twinkle little star!

I thought today I would demonstrate how I made a little star using my technique for foundation pieced English paper pieced hexagons. I worked with 1/2" hexagons! You can find a master template for the hexagons here.

The first step is to draft the star points. I make marks at the top and bottom edge of a pair of hexagons. These marks will be the width of the base of the star point. You can make the base of the star points as wide or narrow as you want however I would not make it as wide as the hexagon itself because there is just too much seam allowance for a little piece. It is much easier to baste with a narrower base.


 I connect the marks on the diagonal.

I repeat on the other diagonal.

I make two more pairs and then cut them out.

If you are new here my foundation piecing method is explained in my January 19, 2014 post. It is really important to shorten your stitch length! The basting is explained in my January 20, 2014 post.

Here you see a foundation pieced star point on the hexagon. When trimming the excess be sure to leave at least 1/4" seam allowance but 3/8" is even better. I just trim with my scissors. If the seam allowance is too large when I come to baste it I can trim a little bit.

 Here you can see a basted hexagon from the front and the back. The paper is still in place. Notice how the fabric is folded and basted at the base of the star point. Normally the folds would all be in the same direction but in this instance the fold in the lower right corner has changed direction. It makes for a sharp corner.


The basted hexagons are arranged and ready to be stitched together.


Once basted they can be stitched together and a center is added. I'll do a little video in the near future to show you how I set in the center hexagon.

The little star is complete and it measures a dainty 2 1/2" square.


 I used one of these stars to make my miniature quilt Bony Fingers.


I plan to use the star I made in this tutorial as an embellishment on another quilt so it will be appliqued in place. I gave the star a good press with a hot iron and spray starch. I pressed the front and the back. The basting threads were removed and then the paper was removed. To remove the papers I gently opened the seam allowances that were basted under.


I remove the papers from the sides of the star point. My stitch length was shorted so the paper comes out effortlessly.


The last step is to remove  the paper that was the star point from the center. I neatly folded the seam allowances back into place.


And here you see the finished star ready to be appliqued to my quilt!


While this small star looks difficult it is actually quite easy. Just take your time and have fun! If it doesn't turn out it doesn't take much fabric so it isn't a huge loss! If you do make a little star I would love to hear how you made out!

And speaking of stars, Nellie of Nellie's Needles has finished Step 4 of her Soupcon QAL quilt. She wrote "It was a surprise to see how the set in squares border glowed when it was all constructed. I didn't see that effect until it was all sewn together. I'm in love with this piece". She took the words right out of my mouth! That is the very reason I love this border....it really does glow! Nellie's use of the striped fabric just adds a soupcon of excitement! Nellie is working on a second quilt using the basics of my Soupcon QAL pattern and she is creating something really wonderful. You can see it and read about it here.


That's it for today! Until I post again happy sewing!
Karen H