Showing posts with label figure 8. Show all posts

Sunday, December 21, 2014

REWIND: Filling the elongated hexagons in the Anna H quilt and what the Turtle Girls got up to


Welcome back to REWIND! Every now and then I "rewind" and republish some of my older posts that you may have missed! Today I'm going to share a post from July 2013. It included a bit of information about the quilting of my Mom's Anna quilt and turtle yoga! If you can doodle it or write it with a little practice you can quilt it! I love drawing continuous figure 8s so I tried quilting them and they worked like a charm in the Anna quilt. Don't believe me? Try quilting your name in cursive. Bet it turns out pretty good! And as for turtle yoga.....well you'll just have to read to find out what it is all about!
Filling the elongated hexagons in the Anna H quilt and what the Turtle Girls got up to

There are some things I just don't like doing and filling bobbins is one of them!


One of the reasons I dislike filling bobbins is that I don't like having to take off my thread, load my bobbin thread, rethread the machine and then fill the bobbins. I do a bunch at once but eventually they need filling again!


My friend Barbara asked me about what I thought about bobbin winders. These are little machines that are used exclusively to fill bobbins. I'm starting to think that maybe I might just invest in one. I've read some reviews and they seem to do a good job and it is something I could do in the evening while I watch TV. Does anyone out there have any experience with these devices and if so would you recommend them to others? I would love to know.


I have gone through LOTS of bobbins quilting Mom's Anna quilt but the end is in sight! I now have a plan for the elongated hexagon inner border. Figure 8 is a comfortable shape for me to draw and stitch as are feathers. If you can doodle it you can likely quilt it with ease!


All of the elongated hexagons were previously stitched in the ditch. To quilt the design above I first stitched just inside the top and bottom edges of the middle strip of hexagons and then quilted the figure 8. The 8s don't have to be perfect or exact - the eye sees the whole, not the parts.


Next I quilted just inside the top edge of the top row of elongated hexagons, then the feathers were quilted and the feathers were echoed.


I repeated the same step with the bottom elongated hexagons. I did the same on the other three borders around the centre panel. Finito!


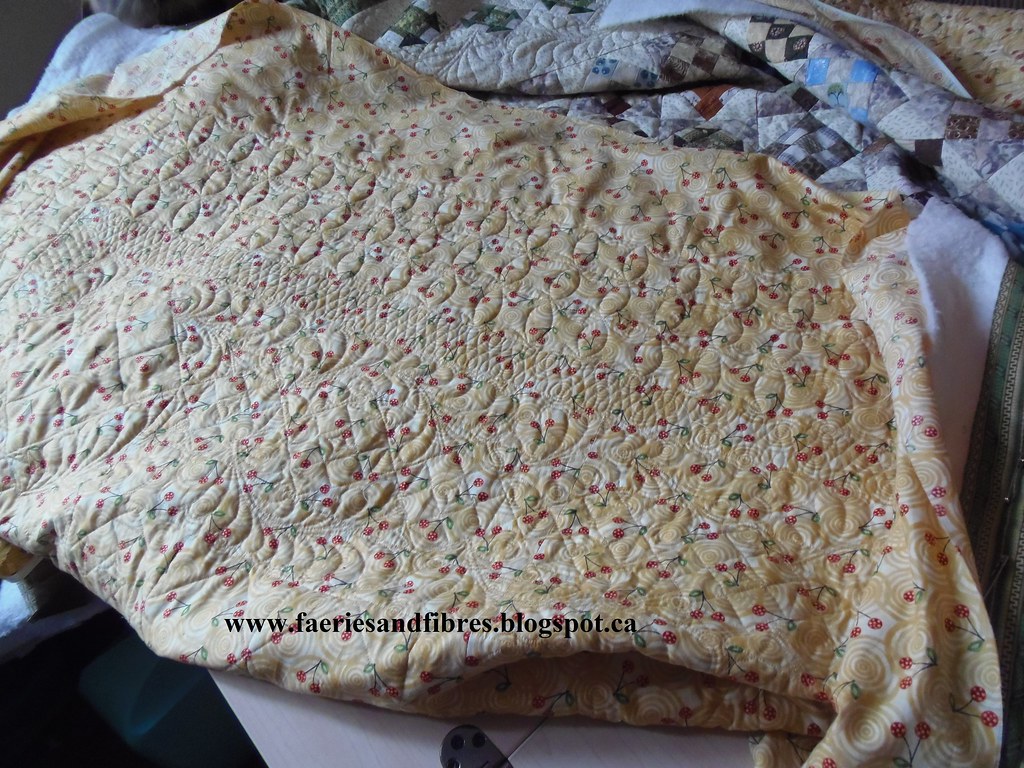
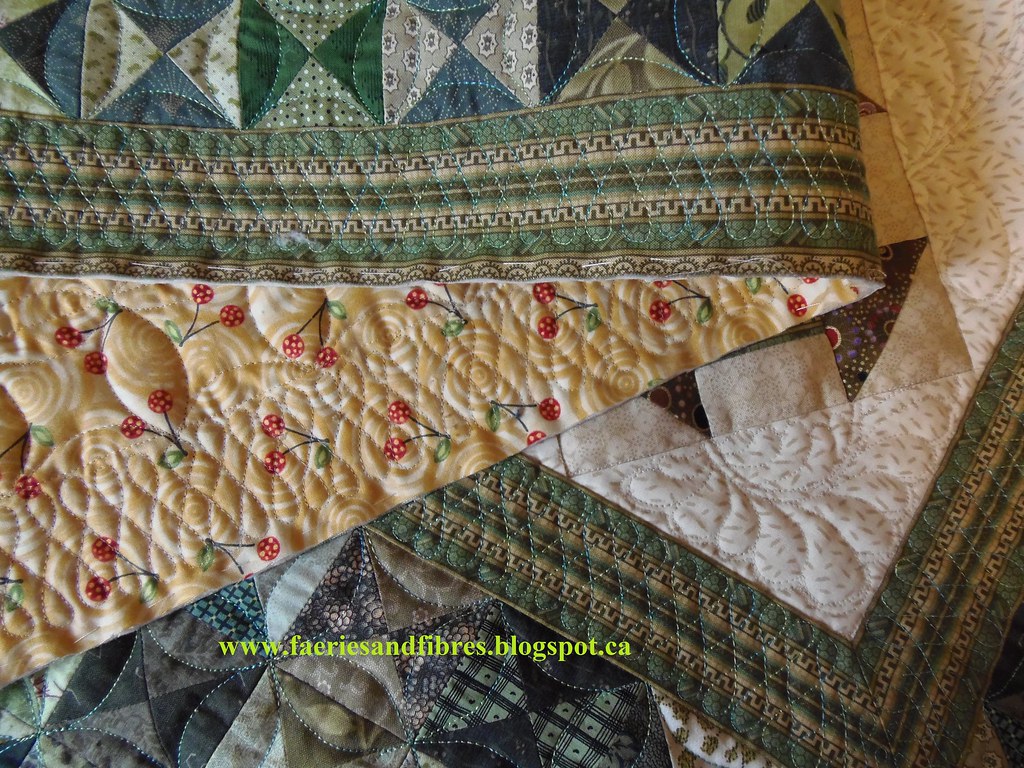
And this is the view from the back.


Tomorrow I move on to the outside edge of the swag! More thinking needed!
Yesterday I told you I caught those naughty Turtle Girls heading out to the garden with my little silk quilt. And what do you think they told me they were going to do? Yoga! 

Hurry up - run! I see a good spot for yoga!

They started with some gentle stretches


Downward turtle? Don't you mean downward dog?  And I can't do that!

Turtle Girl perseveres on her own and gives cobra a go. Stretch!!!! Inhale, exhale breathe. Ahhhh!

Happy baby, or happy turtle as she calls it,  is very good for the back - like a gentle massage! Oh - it feels very nice but I'm pooped! Best not overdo things first time!

Forget yoga! This is more like it - let's just hang out with the goldfish!

Until I post again, stretch, breathe and happy sewing!

I made the turtle girls myself and I had planned to add to the family this summer but somehow time just got away from me! They are on the "to do" list for sure! I hope that you've enjoyed this issue of Rewind. I reply to every comment by email so if you don't hear from me it means you are a no reply blogger and I have no way to contact you unless you provide me with your email address (or you email me)!

Happy sewing!
Karen H 

Thursday, July 17, 2014

Yellow Bird is quilted and progress on the new hexagon project

Yellow Bird is done and I hope my friend Babs likes what I did to her quilt! The last decision I had to make was what to quilt in the black inner border and I decided to go with a figure 8. It is a simple and quick motif to quilt and it can be very effective.


I used the figure 8 in my quilt Piccadilly to the Nines (which I plan on finishing this week)!

Close-up of Piccadilly to the Nines figure 9 quilting

Probably the trickiest part is figuring out how to deal with the mitered corners but if you know the trick it isn't difficult. It quilts very easily because for many of us a figure 8 is a familiar shape to doodle. You can read about how I quilt my figure 8's here.

Bab's used a black backing and I think it is fabulous. I used Superior The Bottom Line (silver colour) in the bobbin and I think the thread and quilting look great on the back. I just love the way the figure 8 quilting looks on the back.


I'll try to get outside to take a picture of the entire quilt but for now you will have to be happy with the corner. I am beyond thrilled with the feather border on the outside. I've never done anything like it and have simply amazed myself! Really! You don't know what you can do until you try! The plumes are not equal or identical but you don't see that...all you see is the lovely texture that they create!


Last week I shared a picture of a quilt that I fell in love with and it is next on my very long "to make" list! I saw this quilt on Lorraine's blog. It is such a cheerful quilt! If you love hexagon quilts be sure to click on that link because there are several lovely hexagon quilts in the post.


I went through my stash and pulled fabrics. I pulled these two for the turquoise snowflakes.


These fabrics are being turned into these rosettes! I've got a nice pile started!


I also pulled these two fabrics for the center medallion.


I added a subtle off-white, tone on tone print and now have the beginning of the medallion stitched together!


The next step is a border of the off-white fabric followed by a pink border. I've selected the fabric I will used so I'll prep some hexagons for basting when I'm out and about!

Until I post again, happy sewing!
Karen H

Monday, May 5, 2014

More figure 8 quilting

Hello everyone! Thought I would share a picture of the back of Piccadilly to the Nines so you can see the quilting. I've got one more border to quilt before I bind the quilt and it is a narrow border.


When I'm quilting up to the outermost edge of the quilt I sometimes have problems. The fabric gets pushed so ripples or pleats can happen. With a larger border it doesn't seem to be as much of a problem however the last border on my Piccadilly to the Nines is only 1 3/4" finished. The figure 8 quilting is dense and close together and I didn't want to have problems with the border not laying flat. So I had what I thought was a solution and it worked like a charm! I needed some tools: needle and basting thread, fabric safe glue stick and scissors.


I applied some of the glue stick to the wrong side of my border right down the middle of the border. I worked about 12" at  time. I smoothed the quilt top making sure the border was flat,smooth and tacked to the batting. I basted close to the raw edge (less than 1/4" from the edge) and I took shorter stitches. I worked all the way around the quilt. I normally baste the edge before I apply the binding because it makes the stitching of the binding much easier so this step really wasn't extra work for me. After the border was glued and the edge basted I quilted and it went so smoothly and the quilting was stress-free! I will definitely use this technique again! I made sure the bottom edges of the figure 8's were more than 1/4" from the edge so that they wouldn't be covered when the binding is applied. I still have to go back and put some more quilting in the center panel but that will happen after the quilt is bound. Here is the edge of the quilt quilted and trimmed. Who`s a happy quilter? Me, that's who!


My next project is to quilt another one of my Mom's African banner quilts. She loves this design and I think this is her third quilt! I've ditch quilted so now I'll have to go back and put in some details.


I am a relatively new blogger and I`m learning as I go. I read on another blog that there is a photo limit on Blogger and I think it is 1GB. I like sharing lots of pictures so now I`m trying to figure out how to determine how close I am to the limit (no luck on this front so far) and how to be able to continue to post loads of pictures moving forward. I think I`ll start using links to a photo sharing site. It won`t affect what you see but it does involve a little more work for me however I believe that if I using links that it won`t affect my available storage space for pictures. There`s always something new to learn so I`ll just think of this problem as gymnastics for the brain!

Time for me to get sewing so until I post again, happy sewing!
Karen H

Saturday, May 3, 2014

Quilting a figure 8 in a border

I continue to quilt my Piccadilly to the Nines. There is a striped border on either side of the hourglass blocks and today I quilted the inner border. I decided to go with a figure 8 motif and rather than the planned gold thread I again used my green variegated Fantastico thread from Superior.

I am particularly fond of the figure 8 design in borders. I like the way it flattens the fabric and the design that shows on the back is pleasing to the eye (well my eye at least)! In the picture below the figure 8 is quilted in the horizontal border and it is nice and flat. The vertical border is unquilted and it has a little "puff" to it.


Figure 8s are quite easy to quilt  and thought I would share with you how I do it in case you would like to try it out. The first thing I like to do is to mark a line along the center of the border strip with a fabric safe marker. The border in Piccadilly to the Nines is striped so I was able to use the gold stripe that was in the middle. My corners are mitered so I started at the outer corner of the miter.


I will start my quilting at the dot that is near the outer corner and I make the bottom half of the 8.


I stitch small 8's that grow in size until I get close to the top edge of the border.


From this point on I will stitch 8's that fill the space. I stitch the loop making sure to cross my stitching just above the middle line for the upper loop and just below the middle line for the lower loop.


HELPFUL TIP: I like to keep my hands relatively close to my work so I can control the loops and curves so this means I need to stop and reposition frequently. I always stop in the same spot so when I am ready to start quilting again I know direction to go! Pick the spot that works the best for you; for me it is just past the top loop of the 8 headed toward the middle point in the border.


Here you can see I've stopped with the needle down. I'll smooth my quilt and reposition my hands so that I can start quilting again.


I stitch in this way until I am almost at the opposite end of the border strip.


I make the 8's gradually smaller to fill the space and the last loop I stitch is always the bottom half of the 8 so that I can join it up with the other side.  You can see how the corner will look when it is stitched.


I used the figure 8's to fill in the center row of elongated hexagons in my Mom's Anna quilt.


The next step is to quilt the outer striped border and it is the final border. I find quilting that area can be challenging, especially when I get close to the raw edge of the border but I've got some ideas about how to manage it so it goes smoothly. I'll try them out tomorrow and let you know what I did and how it worked!

Until I post again, happy sewing!
Karen H

Wednesday, July 24, 2013

The Anna quilt finish, Cherry Blossom Pattern and more!

The quilting is done on Mom's Anna H quilt and I wanted to share some pictures with you because it will be another couple of days before the binding is finished. It will be the same fabric as the side triangle border so it will just blend in.

I very much admire the quilting of the likes of Cindy Needham, Diane Gaudynski and Harriet Hargrave and wanted to create a quilt that was more densely quilted like those made by these three talented quilters. So the Anna quilt is very heavily quilted. This is my first quilt that has been quilted to this extent and I LOVE the appearance. Unfortunately it is difficult to photograph in such a way that the quilting is shown to its best advantage. To compensate I've taken several pictures. So here we go!


The quilting is a little clearer here!


I am really pleased with the look of the quilting in the elongated hexagon border. It is a combination of feathers on the outside rows and figure 8s on the center row. The effect is very pretty, especially from the back!


This is the quilting plan for the elongated hexagons


The border quilting with dragonflies, meander quilting and straight(ish) lines!
 
So there you have it - Anne H's Anna H quilt! Now I'll make the binding for the quilt so Mom can finish it!
 
The reason that the binding isn't made just yet is that I decided to work on the Cherry Blossom Quilt Pattern and I am pleased to say it is almost done. A couple of last minutes checks and amendments and it will be posted tomorrow! I hope you like the pattern and if you make your own Cherry Blossom Quilt, l would love to see it!
 
I've been working on another quilt which I've not yet shared with you but it is coming soon. It is a scrap quilt that was inspired by an antique quilt. It is a fast, simple quilt but it has an interesting little border that I will remain a secret for the time being! For now, here is a sneak peak of my quilt that I call Brick Bungalow!
 
 
And the good news is that there will be another free pattern for this one so stay tuned!
 
For now I'll leave you will some pictures from the garden.
 
Turk's cap lily


Bottle brush
 

Bottle brush close-up
 
Until I post again, happy sewing!