
I promised to show you how I baste my hexagons for English paper piecing (EPP). I enjoy basting because it is a mindless activity but even so I want it to go quickly. At the end I want a neatly basted hexagons with smooth folds and sharp corners so that each will fit precisely (or close to it) with its neighbour!
To start I use a tiny dab of my glue stick to hold the paper to the wrong side of the fabric. If I'm cutting multiple hexagons I'll often glue the paper to the fabric and then cut the hexagon out with scissors. Unlike other piecing methods the seam allowance doesn't have to be an exact 1/4". Here you can see a hexagon that I cut out. It isn't perfect but there is enough seam allowance all around so that I can baste it!

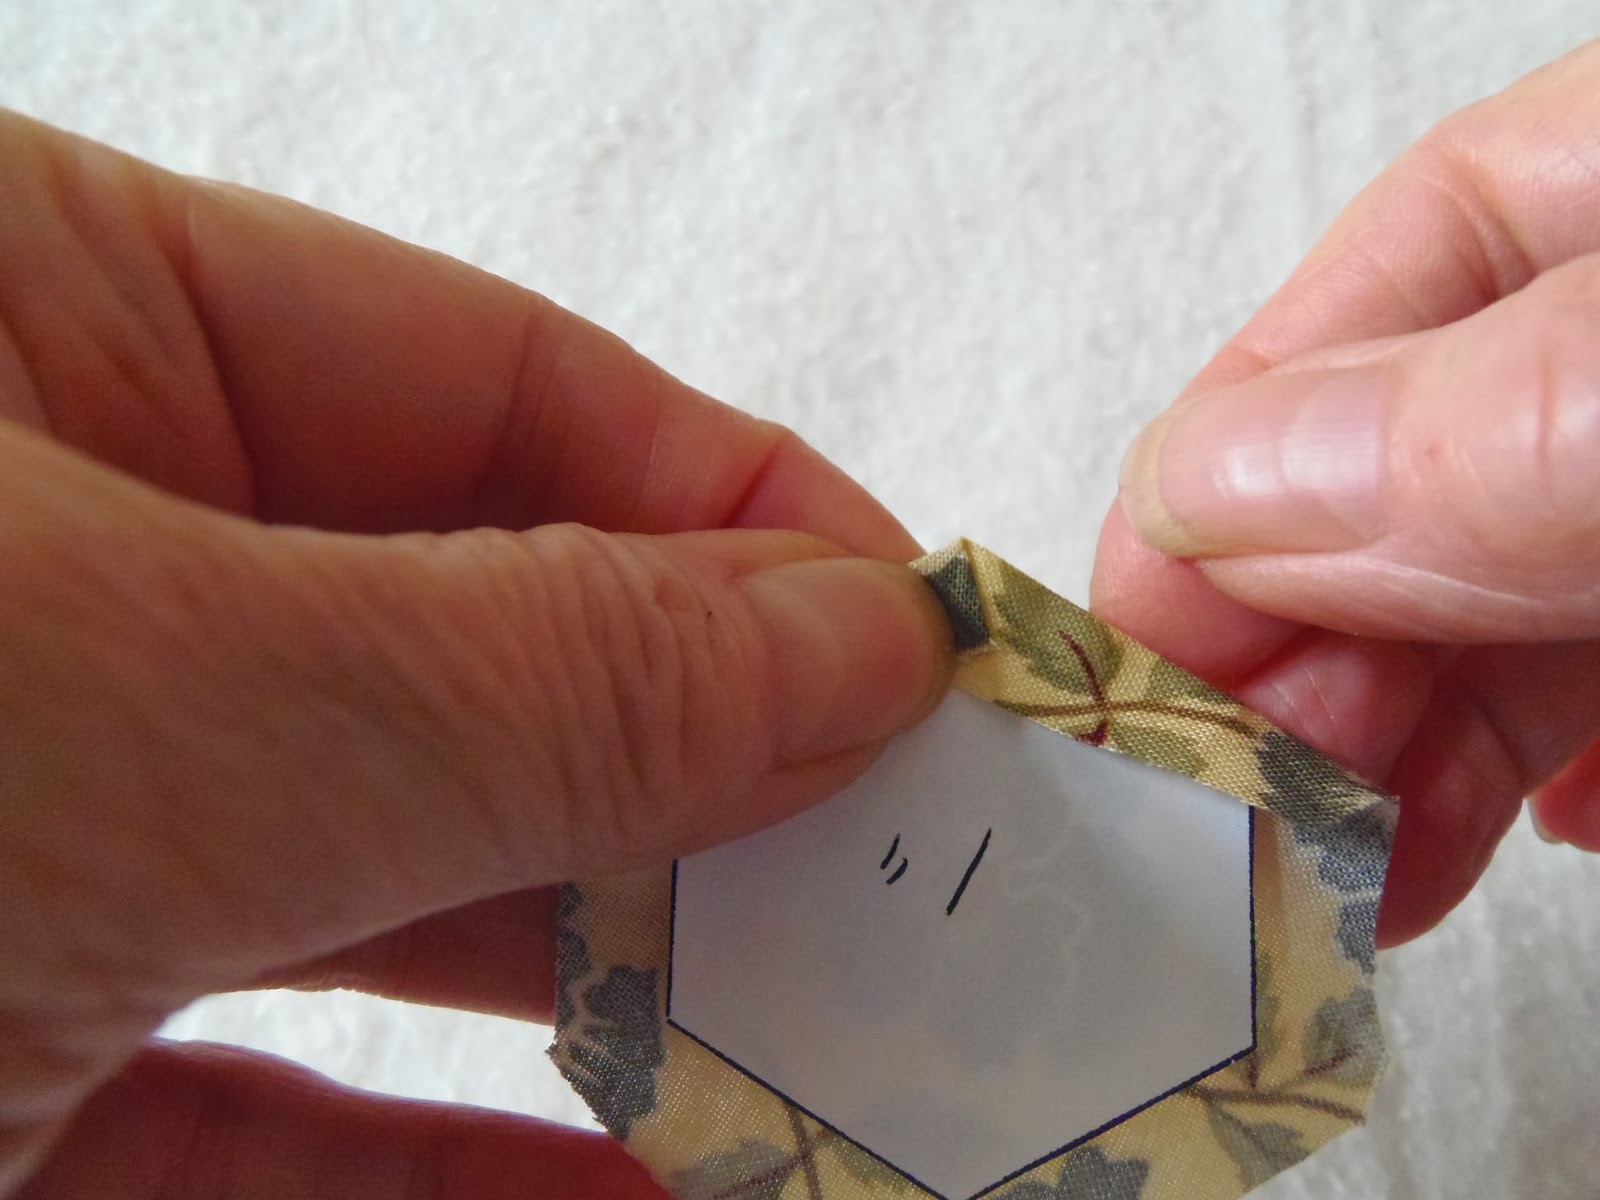
I thread my needle and make a knot at the end so it is ready to go. I like to use inexpensive thread like serger thread. To start I fold the fabric over the paper and I pinch it with my right thumb and index finger at the very edge of the corner.

I rest the edge to the left of the corner against the ball of my index finger (the pointer) and I use my index finger roll the fabric and as it starts to fold over the paper.

I catch the fold with my right thumb to hold it in place;

I then use my left thumb and index finger to hold the fold -it is all one smooth fluid movement! I am ready to start sewing
I bring my thread up from the right side of the fabric just below the fold and take my needle down through the fold and back up close to where the next fold will be made. My goal is to have a smallish stitch over the fold because it will hold it down nice and snug!

I turn the hexagon a little and repeat the process.

I continue in this manner until I get to the last corner. With my right thumb I fold the fabric and sweep it under the folded fabric for the last side. I make my stitch over the fold. I take one more stitch in the same way along the first edge that was basted and clip my thread. I don't knot my thread when I'm finished because it will just slow me down when it is time to remove the basting thread.

This is my hexagon from the back. You can see that the stitches are smaller at the corners.

This is my hexagon from the front. You can see that the stitches on the right side are larger. In addition to keeping the folds flat and snug, stitching in this way makes the removal of the basting thread much easier because the stitches on the right side are large. HELPFUL TIP: I use a darning needle (the end with the eye of the needle) to pull out my basting threads. These large stitches make it easy for me to slide the needle under the stitches and pull the thread out.

I find this method of basting quick and easy.
When I'm basting one of my foundation pieced hexagons if there is a fold in the center of a side as is the case with the point of a star I often take an extra stitch to hold if flat.


Pictures are great but sometimes it helps to see live action so I thought I would shoot a video to demonstrate how I baste hexies! It is action packed - snags, tangles and basting all in two minutes of amateurish video (my first one if truth be told) but it gives you the idea. I considered re-shooting the video but decided that it would be good for you to see that everything doesn't always go smoothly! That includes the shooting - please excuse the blurry shot! I hope the video will be helpful! Once you get the rhythm of the movement down pat the basting goes really fast and it is meditative once you get into the zone! Best of all you have nice sharp corners and smooth folds resulting in perfectly basted hexies!
I hope you've enjoyed this quick tutorial and that you'll give it a try. Until I post again, happy basting!
Karen H
Just excellent Karen-thanks very much-I can do this now with visual-hugs
ReplyDeletevery nicely presented
ReplyDeletelovely to hear your voice. Exactly how i do it, except for the dab of glue to hold the fabric in place... might try that. I imagine it would be especially helpful with fussy cuts.
ReplyDeleteOh I can't get any sound :-(
ReplyDeleteIt must be a problem at my end, as Sheila says she can hear you.
But anyway, watching without sound still made the process clear. I have sewing withdrawal symptoms as we have my Brother here doing some carpentry in my sewing room.
Hi Karen,
ReplyDeletethis is so funny. I am just working with the same floral fabric on a quilt at the moment, as you used for the Hexagon tutorial. Had this fabric for a long, long time.
Thank you for sharing with us.
Greetings,
Sylvia
Excellent tutoriel,karen....you are going to make me love basting!!!!
ReplyDeleteGreetings
Very good...thank you:)
ReplyDeleteLove the video. You are a STAR. I am not quite hooked on the EPP yet but I am sure I will be after I see a video of you doing the whip stitch construction!!!
ReplyDeleteGreat video. That was excellent!
ReplyDelete