Showing posts with label Lozagons. Show all posts

Tuesday, June 9, 2015

Birds in the Loft - the BIG reveal

I've been busy, very busy! I finished Birds in the Loft and added borders to two other quilt tops. Today I'll share all of them with you plus my next project!

My Birds in the Loft hexagon quilt is together and as promised it is BIG! Very big! It measures a whopping 97" by 128"! Even I was shocked at the measurements and I already knew it was big (I think I was afraid to measure it until it was done). Not only is it big but it is also very heavy. Honestly this means it is not a quilt that could be used because it is too long for even a king size bed!

Birds in the Loft by Karen H 2015

I ordered a Hobbs Polydown king size batt because it is lightweight (this quilt does not need more weight) and I'll have to look at getting extra wide backing rather than using a pieced backing. Given its size there is a good possibility that it will never get quilted. On the other hand I might just take a couple of rows off the top and two off the bottom to make it shorter. It would still be wide but it would be more of a square than a rectangle. Oh well, I had fun putting it together and for me that's what it is all about. I might have fun taking it apart and putting it back together again too! I am sure that I would eventually find a use for the leftover hexagons (there would be 50 of them if I take out the rows).

For now I have smaller quilts that can be basted for quilting. I added a lovely wide border to my Lozagons hexagon quilt. My plan is to fill that border with free-form feathers similar to those I quilted in Babs quilt Yellow Bird quilt. I'm not sure how I would machine quilt this one and may consider combining hand and machine quilting. I'll decide when it is pinned and ready for quilting!

Lozagons by Karen H 2015

Finally I added borders to my Value Proposition hexagon quilt. I appliqued the quilt top to side strips and then I added the top and bottom borders. I have a lovely wavy brown stripe fabric and I think I will applique it to the sides of the quilt.

Value Proposition by Karen H 2015

If you are new to my blog Value Proposition was a hexagon quilt along in 2014. You will find all of the instructions and patterns under the tab Quilt Alongs by Karen H at the top of this page.

One final note about Value Proposition; I found a mistake! I am always going on about the use of directional prints and as I started pinning the borders to the quilt I found a mistake. The striped hexagon in the red circle is going in the wrong direction. How the heck did I miss it?


I also tend to go on quite a bit about learning to live with mistakes but if you just can't live with them, then one should fix them. This is a mistake (albeit a tiny mistake) that would bother me so fix it I did. It isn't a big change but it would have bothered me knowing it was there!


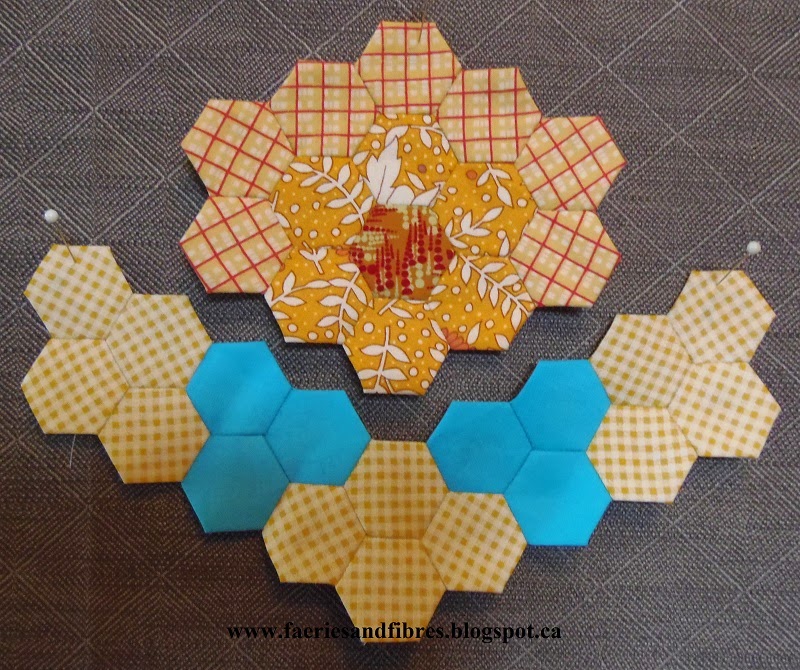
I've been casting about for a new project and have settled on a series quilt in QUILTmania (issue 107). The name of the quilt is Brinton Hall by Leigh Latimore. The first part is the blue section with all of the hexagons. I think it will be a great way to use scraps and also to feature some large prints in the seven panels in the centre. I've already started pulling fabrics!

That's it for today. Until I post again happy sewing!
Karen H

Saturday, January 17, 2015

Lozagons Quilt Top without border

I was finally able to get outside and take a picture of my Lozagons hexagon quilt. It was made with 3/4" hexagons. I ran out of the turquoise fabric and had to add a second fabric which is slightly different. You can see it in the middle of the top and bottom edges. This is such a cheery quilt top!


The next step is to add a wide turquoise border but I haven't ordered the fabric. Maybe I'll do that today!

The inspiration for Lozagons was an antique quilt on Lorraine's blog. You can see the original and several other hexagon quilts here.

Image courtesy of Lorraine at Granny Loz

I have another hexagon project it mind and one of my inspirations is this fabric from Moda. It is an old print and the collection is Dominique II and the colour is paprika! I just love these little birdies!


I also plan to use some of the ideas and techniques from my quilt Stars in the Loft.


Some of the design ideas for my new quilt are drawn from an antique quilt which I will share in another post. If my plan works out it will be a large quilt made of 1" hexagons and I plan to call it Birds in the Loft! The first step is to start sketching on a design sheet and then pull out my scraps to see what I can use! I'll keep you posted on my progress.
\
I will be posting a template for 1 1/4" hexagons but am having difficulty getting it to scan accurately. When I've got it figured out I'll let you know!

Until I post again, happy sewing!
Karen H

Monday, January 5, 2015

Playing with my hexagons

I've been playing with the filler bits of Lozagons am happy with the arrangement. I ran short of the turquoise so I had to substitute a slightly darker blue. I carefully placed them on either side of the middle unit and am satisfied with the effect. I'll order more of the blue so that I can add a wide border. I think it will finish the quilt nicely. Now I've got so stitch the turquoise hexagons into units for easy stitching to the rest of the quilt top.


I've done my fabric pull for the next round of The New Hexagon Millefiori Quilt Along by Katja Marek. The sun is shining on my fabrics so they are looking a little washed out. I think they will work but I won't know for sure until I cut them out and start sewing. Stay tuned and I'll have an update for you tomorrow!


Several people have asked about the paper pieces to make this block. I am making copies of the hexagons from Katja's book and then cutting them apart to make my hexagons. I'm using regular printer paper and it works just fine for me. For those who are less experienced with English paper piecing you may be more comfortable using a heavier weight paper stock because it is easier to feel the edge of the paper when folding over the seam allowance. You can buy it in the stationary store where you buy your printer paper. It is often used for professional reports (and hexagons)!

Until I post again, happy sewing!
Karen H

Sunday, January 4, 2015

Lozagon's filler bits

I've been working on the filler bits for the top and bottom edges of Lozagons. This is my working sketch that I shared with you.


The first step is fabric selection. I decided to make the top and bottom identical so to begin I selected an orange print for the rosette centers. Then I decided that the three full rosettes would be made from the same fabric and the four half rosettes along the top edge would be made from four different fabrics.

I made 3 full rosettes for the top and 3 for the bottom. Each will be partially surrounded with seven hexagons. I chose and yellow check fabric. It is a directional fabric so I paid particular attention to the placement of the hexagons. I never stitch hexagons one at a time; instead I look for the most efficient way to sew them and in this case I sewed the seven hexagons together into a semicircle and this will be stitched to the rosette.


And here you have the rosette with the yellow check hexagons. I made six units like this.


The next step was the construction of the section that will fit the bottom edge of the rosette and it will also connect to the quilt. There are three little yellow tentacles that come off the rosette so I chose another yellow check for all three and then there are small filler pieces made up of the turquoise background fabric. I sewed three units made up of of four yellow check hexagons (again notice I paid particular attention to the direction of the check) and I sewed two units of three turquoise hexagons. For the turquoise hexagons I used turquoise thread. The rest of the unit was stitched with pale yellow thread.


Here it is stitched together. Five more to go!


The eight half rosettes went together very quickly! Here is one of the eight!


The final step will be to construct the turquoise filler units that will fill the spaces between these yellow rosettes so that they can be connected to the body of the quilt.

Until I post again, happy sewing!
Karen H

Thursday, January 1, 2015

Happy New Year, Happy Lozagons and Happy QALs!

Happy New Year people and welcome to 2015! I had a lovely week off but still have more entertaining over the next few days and this is really cutting into my sewing time. There has been plenty of visiting and good food and I just had to squeeze in some time for hand sewing too!

I've been working away on Lozagons and it is staring to look like a quilt! When I last showed it to you I had stitched together the middle section with the rose medallion and I was working on stitching together the rest of the snowflake blocks into strips that could be attached to the centre.


Since then I've stitched all of the strips that will be sewn to the centre panel. In this picture everything is just pinned together on the design wall. I now have some long seams to sew.


I also shared the drawing of how I would assemble the quilt. It it you can see my first draft of the filler bits for the corners (H and I) and the top centre which isn't labelled.


I was struggling with colour and couldn't decide what to do. So I printed a copy of my drawing and coloured it in to get ideas. Yellow and orange always work well with blue so this is what I finally settled on.


The three large yellow motifs will be identical and then I think the four partial rosettes along the top will be made with four different fabrics. I'll use only one orange print for the centres of all seven. The bottom of the quilt will be identical. I do have one small problem - I'm almost out of the turquoise fabric. It was only $4/m so why I didn't buy more of it is beyond me. I've found something similar so I'll have to use it strategically to make sure it looks like it was part of the design rather that a solution to a fabric shortage!

So what have you got planned in the way of projects for 2015? It is always fun to start something new (at least that's what I think). If you are looking for an English paper piecing project for 2015 I've got a few suggestions for your consideration.

The New Hexagon Millefiori Quilt Along by Katja Marek
It's free and the first pattern was just released! You will find Rosette 1 here.  The designs are from Katja's book The New Hexagon. You will need the book in order to participate; it includes 52 interesting 3" block designs that will be used to make the quilt. Each of the hexagons shown on the cover is one 3" block. Fussy cutting your fabric will make these blocks really spectacular!


One very important point I would like to clarify is that Katja's QAL should not be confused with Willyne Hammerstein's gorgeous book Millefiori Quilts published by Quiltmania. This is a book that has been on my wishlist for some time. If you love English paper piecing and hexagons add this one to your wishlist ! It is difficult to find but I know you can order it from Quiltmania in France.


Elizabeth E's Circles English Paper Piecing Block of the Month
This is another free QAL and it comes from Elizabeth E of www.OccaisonalPiece-Quilt.com Elizabeth just published the pattern for Block 7 and you will find it here. Links the the previous 6 blocks are available on her blog. In the Block 7 post she provides great information about printing patterns from a pdf, cutting the patches and sewing them together.

2015 Hexie Block of the Month from The Hexie Blog by Julia Wood
I know that there are a few of you out there who love hexagons (really people, what's not to love?)!! This is a great QAL for beginners! Julia has just launch the first pattern and you will find it here. The pattern calls for 3/4" hexagons but really you can use any size you want. These will be geometric designs that are stitched together and then appliqued to a background.  Julia is using Kaffe fabrics but you can use whatever tickles your fancy! You can find the general information for this QAL here.


Also sometime this month Julia will be launching her new emagazine Hexie Love. It will be published six times a year and the first issue will come out in the second week of January. A single issue will be $5.99 and a one year subscription will be $26.99 so that's a pretty good savings!

That's it for me for today! Time to get dressed, get cooking and get entertaining. Maybe even get sewing a little! Until I post again, HAPPY NEW YEAR!
Karen H


Wednesday, December 17, 2014

Tutorial: Planning the construction of a hexagon quilt

Looks like there is some interest in learning about my plan for constructing Lozagons so that's what today's post will be all about! This is a picture of the original quilt that was published on Lorraine's blog, Granny Loz.

Picture courtesy of Lorraine at Granny Loz

I usually do a sketch of my quilt before I get started so that I have a road map. In so doing it helps understand the quilt and it allows me to identify the type and number of units that make up my quilt. It also gives me ideas about constructing the quilt in sections.

This is my sketch of Lozagons. I  sometimes colour in my sketch with felt tip markers. The top and bottom of the quilt will be the same but I didn't sketch the bottom portion.


There are three basic units in this quilt. The first is a medallion of roses surrounded by a white background and pink hexagons; it is the centre of the quilt. 

Rose medallion

The balance of the quilt is constructed from two units that I describe as passion flowers and  snowflakes (turquoise). This is my diagram for the construction of passion flowers. It doesn't look like much in the picture but it will when it is attached to the snowflakes. The centre of each passion flower is a solid fabric. The first round of hexagons is a print, the second a different solid, the third is made up of two prints, six of one and twelve of the other. The final round is made up of six turquoise (this will form the points of the snowflakes) and eighteen of a single print. 

Diagram of passion flower

This is a picture of a passion flower stitched together. All of my passion flowers are made like this except for six of them that will have only four turquoise hexagons. More on this in a bit!

Passion flower

To make the turquoise snowflakes I start out by making a pile of rosettes.

Rosettes

Each rosette will need three hexagons added to it to make a triangle. The remaining points of the snowflake are created by the turquoise hexagons in the passion flower blocks.

Snowflake triangles

Once I have my rose medallion, snowflake triangles and passion flowers  I am ready to construct the quilt.

To construct the centre of the quilt I will use the rose medallion and the six passion flowers with only four turquoise hexagons. I will also need to construct six "crown" shapes that are coloured royal blue in my diagram. They are made of eight hexagons. These crowns will fill the spaces between the passion flowers and the rose medallion.  I stitched it to the lower left edge of the passion flower (you can see the crown fits in one of the two spaces that did not have a turquoise hexagon. I've marked a red circle to identify those spots. A snowflake triangle coloured in turquoise was sewn to the right side of the passion flower. I constructed six units in this manner.


These are the six passion flower units arranged around the rose medallion. I will stitch the six units together to create an "open donut". It is the same technique that I use to construct the passion flowers and you can read about it here. This is then stitched to the centre medallion and the open donut is closed. I like to work in this manner because it provides long continuous seams and that minimizes the number of starts and stops.


The next step was to attach a passion flower with snowflake triangles to either side to create a large diamond shape. If you examine the passion flower with the deep pink solid on the far right side you can see I attached two snowflake triangles, one on the upper left and the other on the lower left. This unit was then sewn to the quilt. I made a second unit (the passion flower with gold solid on the left) and attached it to the quilt.


This is my plan for constructing the balance of the quilt. The unit shown above is labelled A on my diagram. I will construct section B and attach it to the quilt. Section C is next followed by D, E and so on.


To construction section B I will need two passion flowers. To the first flower I will attach a pair of snowflake triangles. This will create a large diamond.


To the second passion flower I will sew two snowflake triangles like this.


To construct section B I will place the two units like this.


This is what the two diamonds will look like when they are sewn together. You can see the passion flowers and the snowflakes starting to emerge.


I generally construct several units before attaching them to the quilt. The reason is that they are still relatively portable but once I start stitching them to the quilt it becomes less so. I'll share more pictures of the construction of Lozagons as it grows.

So there you have it! I hope that this was helpful and informative. If you have any questions please feel free to ask because I am always willing to share. I  reply to every comment so if you don't hear back from me it means you are a no reply blogger. No reply bloggers can always leave their email address in the comment; just replace the @ sign with (at) (for example faeriesandfibres(at)gmail.com) and I'll be able to reply to you!

I'm linking up with HeLP for Hexie-aholics over at Sarah Did It! Pop on over to see what others are doing with hexagons!

Until I post again, happy sewing!
Karen H

Monday, December 15, 2014

Moving along on Lozagons

Today I'll share three more blocks for my Lozagons hexagon quilt.


The other day I showed you the centre blocks arranged on the floor,


I've now stitched them together and I've added a block on either side. This represents the width of the quilt. The balance of the blocks will be sewn together into strips and then the strips will be added to this centerpiece. It makes for very efficient sewing! If you would like me to share a diagram to explain just let me know and I'll do it!


Today and tomorrow I've got to go out and run errands so there won't be much more sewing done! Oh well, needs must!

Until I post again, happy sewing!
Karen H

Wednesday, December 10, 2014

It is like magic!

I've been working on Lozagons, my hexagon quilt every time I have a few moments and those moments are adding up! There are 18 large blocks in my quilt and all 18 are now stitched!

The quilt is inspired by an auction find hexagon quilt that was featured on Granny Loz's blog. This is the original quilt.

Photograph courtesy of Lorraine at Granny Loz

There were a number of things that I found very appealing about this quilt. I thought the centre medallion of roses surrounded by pink was pretty. You've seem my version of the rose medallion but just in case you missed it, here it is again!


I also liked the small turquoise snowflakes. I've been made a pile of the rosettes that will eventually become the snowflakes. They are the connector pieces that join the larger hexagon blocks.


The next step with these turquoise rosettes is to add some filler pieces so that they will fit the larger blocks.


The 18 larger hexagon blocks were the third feature that I found very attractive.  If you look at the original quilt you can see them; they have a very floral look and remind me of passion flowers so that's what I'm calling them. This is a block that I showed the other day and although it doesn't have a floral look just wait - it will!


The turquoise hexagons in  this block will form the points of the  snowflakes. After showing this picture the other day I realized that I had to remove two of the turquoise hexagons so that the block would fit the rose medallion. In fact only one of them would have been removed but for the fact that I decided to use a different blue for the hexagons that touch the rose medallion.  So I removed the two offending turquoise hexagons, added the blue hexagon unit that will connect to the rose medallion and the turquoise unit that will create the small snowflake. You can almost see the passion flower starting to emerge.


To get a true feel for the floral blocks and snowflakes I arranged the blocks out and MAGIC!!!! You can see the small snowflakes (they are missing their sixth point) and the passion flowers!


Can't wait to see this one evolve as more blocks are added! I think this is one of the things I like most about hexagon quilts......little pieces don't look like much on their own but you stitch them into a rosette and add to them and like magic little jewels begin to develop right before your eyes! Magic!

Until I post again, happy sewing and I hope you find some magic in your sewing!
Karen